Welcome! In this enlightening post, “Expert Guide: Locating Your House’s Sewer Drain Like a Plumber,” we’ll be sharing our deep insights and professional tips on how to discover your house’s sewer drain. Whether you’re a homeowner dealing with a plumbing issue or just someone interested in understanding the basic structure of their household’s sewage system, this detailed guide is a treasure trove of information. This collection of expert advice, fact-based explanations and user-friendly methods will make the process of locating your house’s sewer drain an easy, manageable task. Equip yourself with the knowledge like a real plumber and turn a potentially messy situation into a stress-free one. We’re here to educate and inform, making your life that little bit easier. Let’s dive in!
Understanding the Importance of Locating Your House’s Sewer Drain
If you’re asking yourself why it’s necessary to locate your home’s sewer drain, here’s the answer. Your house’s sewer drain is connected to all the plumbing fixtures in your home, including the sink, toilet, and showers. If you ever happen to experience a blockage in your drainage system, knowing the exact location of your sewer drain will aid in solving the problem swiftly and efficiently. Aside from that, being aware of the drain’s location comes in handy in situations of home improvement projects, especially those digging related. Knowledge about your sewer drain’s location significantly reduces the risk of damaging your property’s essential sewage infrastructure. Locating your house’s sewer drain may seem complicated, but it doesn’t have to be. By learning easy techniques from experts, you can trace your sewer drain like a professional plumber. Firstly, you can search for a cleanout. This is typically located outside your house and has a circular lid marked with “Sewer Cleanout.” Another method is to check your home’s blueprint, as the sewer drain location is usually marked on them. Lastly, you could bring in a professional if you’re not comfortable handling this task or if the sewer drain location still remains elusive. Every home is unique, and these methods could vary depending on the age and design of your property.
Method
Description
Look for a cleanout
Usually located outside the house, marked with “Sewer Cleanout”
Check home’s blueprint
The sewer drain location is often marked on them
Consult a professional
Visit by a professional plumber to pinpoint sewer drain location
Remember, gaining a clear understanding of your house’s sewer drain location is a key tool in the homeowner’s handbook. A well-informed homeowner minimizes the risk of potential property damage and unnecessary repair costs.
The Basics of Your Home’s Plumbing and Sewer System
If you are looking to take plumbing matters into your hands, it’s crucial that you understand the basic structure of your home’s plumbing and sewer system. Your home’s plumbing consists of two fundamental parts: the water supply system and the drain-water vent system. The water supply system facilitates the delivery of fresh water to your home and is pressurized, enabling water to reach all corners of your home. On the other hand, the drain-waste vent system carries out wastewater through a series of pipes and vents.
Coupled with these are the various plumbing fixtures in your home, such as sinks, toilets, and bathtubs, which are directly connected to the plumbing and sewer system.
Locating The Sewer Drain Now, assuming you are facing a significant plumbing issue at home, one that possibly involves the sewer line, the first step is to locate the sewer drain. If your house has a basement, then you’ll likely find a large pipe running down to the floor, this is the main sewer line. In most houses without a basement, the sewer line is often found outside the house, more specifically in the yard.
If you can’t locate the sewer line even after a thorough examination around your house, then you may need to refer to the house’s blueprint or consult a professional plumber.
.table {
width: 100%;
margin: 20px 0;
border-collapse: collapse;
}
Step by Step Guide to Identifying the Sewer Drain Location
Getting familiar with your home’s infrastructure is critical, especially when it involves your sewage system. This knowledge will save you time, money, and potential disaster should you ever find yourself dealing with plumbing issues. So, how do you go about locating your house’s sewer drain? Let’s break it down.
First off, start by examining your home’s blueprint. It should highlight the layout of your drainage system and thus point you towards the general direction of your sewer line. If you don’t have access to the blueprint, don’t sweat it. You can always delve into inspecting areas prone to sewer line placements. These include the basement, utility rooms, or outside your house. They are usually identifiable by a noticeable round or square-shaped sewer cleanout cap.
Look for pipes running into the floor. Sewer cleanout cap usually present.
Utility Room
Pipes exiting through the wall towards the street.
Outside The House
Look for a noticeable round or square-shaped sewer cleanout cap. Pipes usually run in a straight line from your house to the city sewer mains.
Consider hiring a professional if you aren’t able to locate your sewer drain, as misidentification can cause severe damage to your other utilities. Some professionals use a sewer camera to locate and inspect the line with accuracy. It is always preferable to be safe than sorry.
Using Advanced Tools and Techniques for Precise Location
An essential skill for any homeowner looking to tackle DIY plumbing tasks is the ability to locate the sewer drain. This isn’t always the simplest task, but with the right tools and techniques, it is something that everyone can learn. Using a line tracer or a camera for example, are advanced methods that provide precision.
Line Tracer: This tool is a professional plumber’s best friend when it comes to locating a drain line. A line tracer uses a transmitter to send signals through non-electrical conduits like PVC pipes, dirt or cement, this signal is then followed by the receiver which tells exactly where the line is. It’s very effective but also a little costly. Camera Inspection: This technique involves sending a small camera down the pipe and visually inspecting the interior. It’s perfect for pinpointing blockages or leaks, as well as measuring the pipe’s depth.
These tools can give you a precise location of your sewer drain:
Locator Sonic Device: It’s essentially a two-part system: one part goes into the pipe and emits a signal, while the second part is a handheld receiver that picks up that signal above ground.
Sewer Jetter: It uses high pressured water to clean and clear out the pipe. It includes a hose that has a nozzle and a machine that pressurizes water from your garden hose end into a jetting flow.
Sewer-Navigation Robot: This tool can travel through the pipes, allowing you to monitor both the location and the conditions of the pipes in real time.
Tools
Uses
Locator Sonic Device
Locating sewer lines accurately
Sewer Jetter
Cleaning pipe blockages
Sewer-Navigation Robot
Locating and inspecting sewer lines
Mastering these tools and techniques can save you money on plumbing costs and also give you a better understanding of your home’s plumbing system. Remember, always keep safety at the forefront and if there’s a plumbing job you’re not confident about, don’t hesitate to call a professional.
Avoiding Common Mistakes When Locating Your Sewer Drain
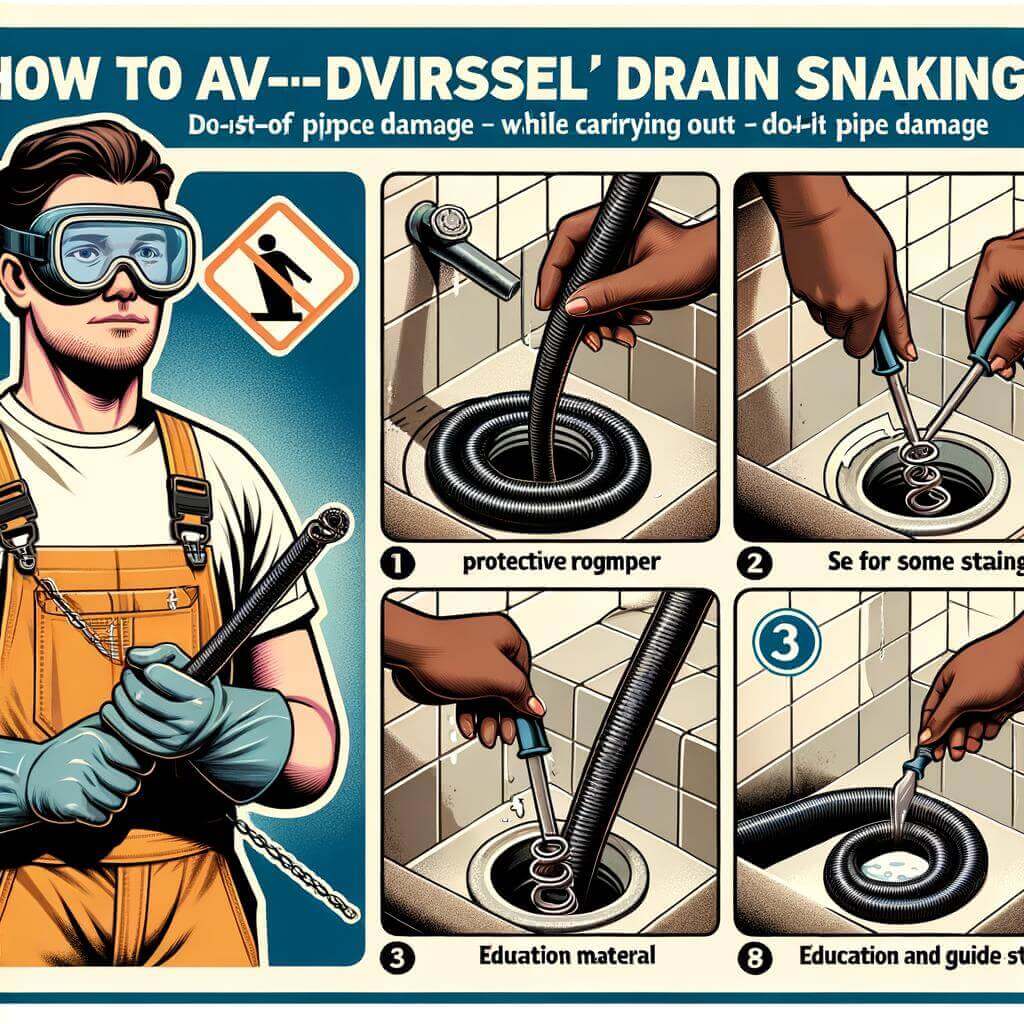
In the quest of locating your house’s sewer drain, it’s easy to overlook certain factors and make mistakes that could result in damage or unnecessary expenses. One of the most prevalent errors homeowners commit is the improper usage of drain snakes. This tool, while effective, can cause pipe damage if not used appropriately. When used without proper knowledge, it can even worsen the present issue. Apart from this, homeowners often fail to recognize the sign of a slow drain, attributing it to a minor issue and thus ignoring it. However, a slow drain may denote a much more significant problem that needs addressing.
Moreover, incorrect diagnosis of the location of blockage is another commonly seen issue. Sometimes, the blockage may not be localised but a issue down the line. Rather than attempting DIY solutions, it is advisable to call in professional help in these scenarios. Additionally, many forget to wear the right gear such as gloves and eye protection. Remember, drains are a hot spot for bacteria and germs, and you may risk getting a serious infection if you neglect safety measures.
Lastly, homeowners often dive right into the problem without having a clear understanding of their house’s drainage structure. Every house has a unique plumbing system and the sewer drain location might vary.
Get informed on how to use the tool or hire a professional
Ignoring a slow drain
Seek immediate help as this could be the symptom of a bigger problem
Incorrect diagnosis of the problem
Call a professional to ensure accurate identification and treatment
Not wearing the right gear
Always wear gloves and eye protectors to avoid infections
Unawareness about drainage structure
Understand the unique plumbing system of your house before acting
Stay informed about these common mistakes and arming yourself with the right knowledge will go a long way in ensuring you’re tackling your home’s plumbing in the best possible manner.
Turning to Professional Plumbers for Expert Assistance
There’s no denying the convenience and assurance of turning to professional plumbers when you’re navigating household repairs. Yet, understanding the basics of locating your house’s sewer drain can serve you well especially during emergency situations. The expertise of professional plumbers is unrivaled but arming yourself with some essential knowledge could potentially save you time and costs.
Here’s where a professional plumber’s expertise comes in handy:
Identifying the source of the problem: A seasoned plumber can use specialized tools, such as a video inspection camera, to locate the precise area of the problem. This results in accurate servicing and cost-effective solutions.
Implementing effective solutions: Armed with the proper training and years of experience, plumbers can address issues efficiently and appropriately, helping to prevent future problems.
Getting it right the first time: A DIY approach may lead to errors, additional expenses, or worsening the issue. In contrast, a professional can tackle and potentially resolve the problem in the initial attempt.
Given the above advantages, you may wonder why it’s essential to learn to locate your house’s sewer drain. The reasons are two-fold: you gain greater understanding and control over your property, and this knowledge can aid in preliminary damage control before the professional plumbers arrive on the scene.
The table below summarizes important aspects of professional and DIY approaches to plumbing:
Can be costly, depending on the complexity of the problem
DIY
Cuts down costs, increases knowledge about your property
Potential errors could escalate the problem, leading to additional costs
In conclusion, understanding the location and general layout of your home’s sewer line is an essential part of effective home maintenance. Armed with the details in this expert guide and some practical know-how, you’re now well-equipped to locate your house’s sewer drain, just like a plumber would. The task may seem daunting, but remember, each house is unique. The process will require a bit of effort, but it’s definitely something you can achieve yourself. It’s crucial to always undertake utmost caution when dealing with your home’s sanitary system, but knowing how it operates can save you a good amount of money down the road with potential repairs or replacements. However, whenever in doubt or should complications arise, don’t hesitate in reaching out to a professional plumber for assistance. Their expertise and professional tools will alleviate any guesswork and ensure efficient problem-solving. Regardless, with the knowledge you’ve gained today, you’re certainly more prepared than before to handle home plumbing inconveniences. Always remember, a well-maintained home is not just about cleanliness or aesthetics, but also about effective functioning and longevity of essential systems like the sewer drain. Happy plumbing!
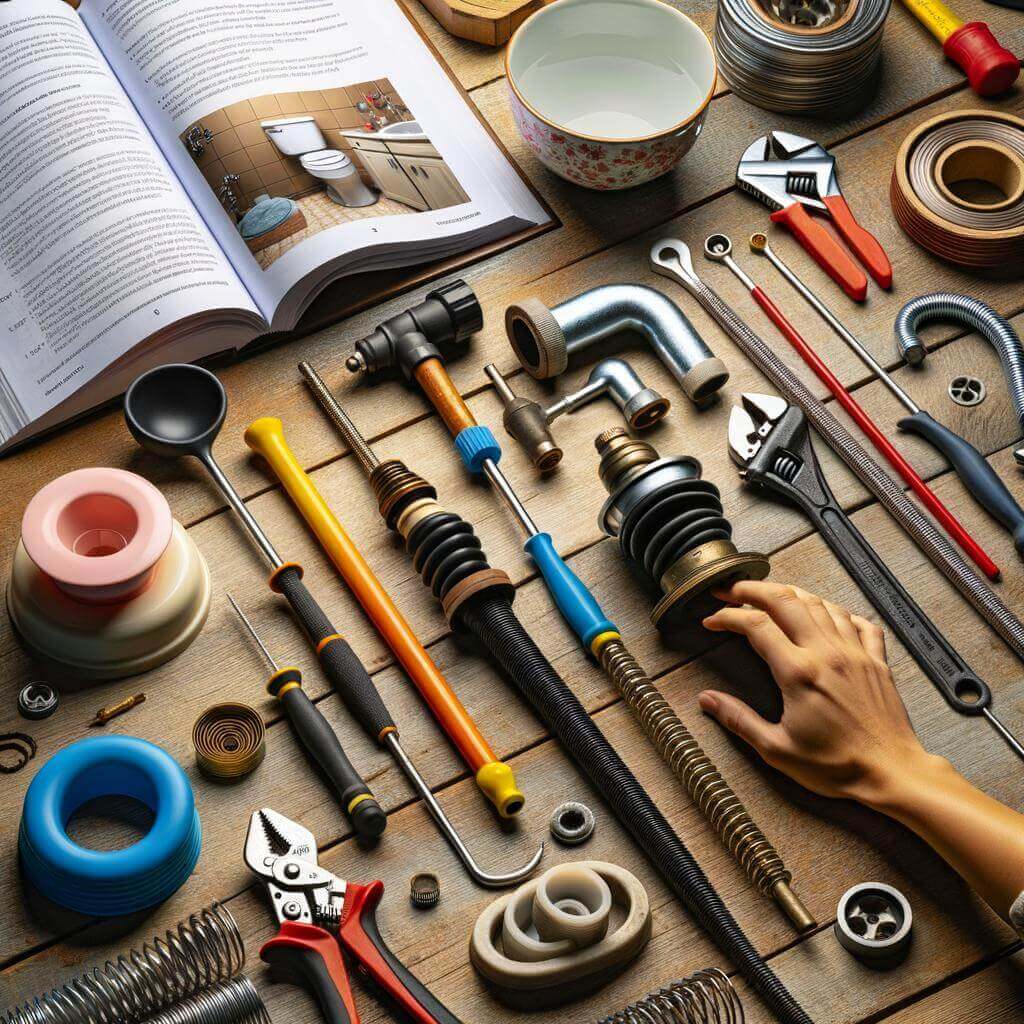
Welcome to our post on “DIY Drain Snaking: Avoiding Stuck Tools and Pipe Damage”. A clogged drain can be a real hassle, but reaching for the phone to call a plumber isn’t always your only option. In this easy-to-understand, fact-based guide, we’ll walk you through the process of snaking your own drain. Our expert tips can help you accomplish this task while avoiding common pitfalls such as damaged pipes and stuck tools. This practical guide gives you the confidence to clean your drains safely and effectively, potentially saving you time and money. Let’s dive into the world of DIY drain snaking and learn how to handle a clogged drain like a true professional.
Understanding the Basics of DIY Drain Snaking
Understanding how to properly snake a drain is an essential skill for any dedicated DIYer. Sure, this task might seem simple – insert the snake, wriggle it around a bit, and pull out the clog. In reality, though, there’s a little more to it than that. Done incorrectly, snaking a drain could result in the tool getting stuck or even damaging your pipes. The first thing you’ll need to understand is that there are various kinds of drain snakes. Top snakes, also called ‘flat tape’, are suitable for narrow pipes and shallow clogs. Mini rooters are the go-to tool for larger pipes and more stubborn obstructions. Finally, a toilet auger is specifically designed to navigate the sharp bends of a toilet pipe.
Top snake
Narrow pipes, shallow clogs
Mini rooter
Larger pipes, stubborn clogs
Toilet auger
Toilet pipes
Knowing which tool to use is only half the equation, however. You also have to use it correctly. Don’t force the snake if it seems to be stuck. Instead, retract it a bit and try a different approach. Remember, your goal is to break up or retrieve the obstruction – not to push it further down the pipe. Digging into the clog and retrieving it in pieces is often more effective than trying to pull the whole thing out at once.
Do not force the snake: If it appears stuck, pull it back and adjust your tactics.
Goal: Your aim is to break up or retrieve the clog, not to push it deeper down the pipe.
Breaking up the clog: Retrieving the clog in smaller pieces can be more effective than removing it in one go.
By equipping yourself with the right knowledge and tools, you can avoid stuck tools and pipe damage when snaking a drain. Happy DIYing!
Choosing the Right Tools for Drain Snaking
As a DIY enthusiast, resolving drainage issues in your home can be a fulfilling and cost-effective task. However, it’s important to understand that having the right tools for the job can be the difference between success and disaster. Failure to use the appropriate equipment may lead to pipe damage or even stuck tools. Choosing the right tool for drain snaking aids in avoiding such undesirable outcomes. Delving into the types of tools helps you to make an informed decision on your next purchase.
The primary categories of drain snakes include hand spinners, drum machines and rodders. Hand spinners are often used for small indoor drains due to their simple operation and modest size. For larger blockages, drum machines provide the necessary power to break up stubborn obstructions. Lastly, for reaching far into the drainage system, rodders are the preferred choice. Each tool serves a unique role and application.
Type of Tool
Common Use
Strengths
Weaknesses
Hand Spinners
Small indoor drains
Easy to use, compact size
Not effective for larger blockages
Drum Machines
Larger indoor and outdoor drains
More power for bigger blockages
Can be difficult for beginners to use
Rodders
Large drains, long-reach applications
Great reach, highly flexible
Requires good technique
With careful selection and proper use, drain snaking can be a manageable DIY task. However, remember that personal safety and pipe protections should be your main concern during the process. Always use safety goggles and gloves. Furthermore, frequent use of mechanical equipment may wear out the pipes, leading to leaks and other plumbing issues. Therefore, if your drain is consistently clogging, it may be in your best interest to call a professional plumber.
Detailed Step-By-Step Procedure for DIY Drain Snaking
Snaking a drain refers to the process of inserting a metal rod into your drainage system to remove blockages using a snake-like motion. While a simple concept, improper technique can lead to your tools getting stuck or, worse still, damage to your pipes. Follow this comprehensive guide to safely unclog your drain like a pro and save on potential costly plumbing bills.
The first stage involves preparing your tools. Depending on your situation, you may need a handheld snake, a medium drain machine, or a sewer jetter. Make sure you also have a bucket, gloves, and safety glasses on hand. Once you’re properly equipped, take a deep breath and remember to work slowly.
Pick Up Your Snake: Pick up your snake tool or drain machine ensuring your hands are adequately protected with heavy-duty gloves.
Insert Snake:Guide the snake into the drain carefully. When you feel resistance, it usually means you’ve reached the clog.
Twist and Push: Start to crank the handle of the snake, twisting it to allow the metal coil to break up the blockage. If you find that the snake’s cable is bunching, retract it slightly then push forward again.
Retrieve and Check: Once you break through the blockage, gradually retrieve the snake. Pour water down the drain to check if it is draining better.
The trick is the gentle twisting and pushing of the snake to break the clog without damaging the pipes. Skipping or rushing this process can cause your tool to become stuck or, in a worst-case scenario, break the pipe. Hence, a patient, steady hand is key to successful DIY drain snaking.
In the case of severe clogs, you may need to use a medium drain machine or a sewer jetter. These drain machines use a powered spinning motion and high-pressured water to break up tougher or deeper clogs. Always remember safety first; if the blockage doesn’t clear after a few attempts or you feel uncomfortable performing the task, consult a professional.
Tool
Use
Handheld Snake
For simple, small blockages
Medium Drain Machine
For tougher, deeper clogs
Sewer Jetter
For severe blockages and full sewer lines
Common Mistakes to Avoid When Snaking a Drain
Drain snaking can be a cost-effective way to unclog your pipes, but it comes with its share of pitfalls. The most common is the tool getting stuck in the drain. This usually happens when you push the snake forcefully or abruptly. Instead, you should proceed gently and steady, twisting the snake as you push it down the pipe to help it navigate bends and traps. Also, avoid retracting the snake abruptly once you’ve reached the clog; doing so can cause the tool to coil and trap itself.
Another mistake that the do-it-yourself plumber often makes is damaging the pipes. You can inadvertently puncture a pipe if you use too much force, which can lead to costly repairs. To avoid this, ensure that the force you apply is just enough to penetrate the clog but not enough to damage the pipe. It’s also crucial to understand your home’s plumbing layout. Using a drain snake on a pipe with too many bends or small diameters can cause the snake to twist back, potentially damaging the pipe.
Mistake
How to avoid it
Tool getting stuck
Proceed gently and steady, twisting the snake as you push it
Damage to the pipe
Apply enough force to penetrate the clog but not enough to damage the pipe
The key to successful DIY plumbing is knowledge and patience. Avoid rushing the process and ensure you have a fair understanding of how your drain system works to effectively deal with clogs without causing any damage.
Expert Recommendations for Preventing Stuck Tools
In the world of Do-It-Yourself plumbing, smoothly navigating your drain snake through your pipes is crucial. However, tools can get stuck, causing a fleet of challenges, and even lead to pipe damage. Experts weigh in on how best to prevent this common issue during your next DIY plumbing project.
All ground rules start with having the right tools. Using the wrong device for the task will not only impede your work but may also cause severe damage. Experts recommend using a drain snake designed for home use. Commercial snakes are larger and harder to handle, increasing the risk of tool jams and pipe damage.
Inspect Your Tools: Ensure your drain snake is clean and rust-free before use. Detritus and rust can cause your tool to jam.
Know Your Pipe: Understanding the layout of your pipes is crucial. Sharp turns and vertical drops in your plumbing can be tricky to navigate and increase tool jam probability.
Go Slow: Patience is vital when snaking a drain. Feed your snake slowly into the drain, avoiding brute force which can cause both tool jams and pipe damage.
Effectively clearing a drain pipe requires more than just the right tool and technique; it’s also crucial to maintain your drain snake and know the limits of the task.
Maintenance
Description
Cleaning
After each use, clean the snake to remove any debris or grease. This not only prevents future jams but also helps extend the life of your tool.
Storage
Store your drain snake in a dry, controlled environment to avoid rusting and jamming hazards.
If you’ve tried snaking your drain several times with no luck, or if your tool keeps getting stuck, it might be time to call a professional. Do-It-Yourself methods come with limitations, and for overly complex plumbing issues, expert intervention might be the best course of action.
Avoiding Pipe Damage While Undertaking DIY Drain Snaking
Drain snaking is a popular DIY method for resolving stubborn clogs in your home plumbing. However, if done incorrectly, it can lead to stuck tools and worse – pipe damage. Ensuring that your drain-snaking mission is successful without causing any collateral damage requires a careful strategy and precise action. Below are a few expert tips to prevent pipe damage and stuck tools when undertaking DIY drain snaking: • Always Start With a Plunger: A simple plunger can often loosen the clog and make the snaking process much easier. Starting with a plunger will also help you avoid unnecessary force while snaking, thereby reducing the risk of pipe damage. • Use the Right Snake Tool: Different clogs require different tools. For instance, sinks and bathtubs require small drain snakes, toilets need closet augers, and main lines require larger sewer rodents. Choosing the right tool is essential for effective clog removal and avoiding damage. • Don’t Force the Snake: If you feel resistance, do not try to force the snake down the pipe. Remember, the goal is to gently break up the clog, not to push it deeper or damage the pipe.
Tool
Use
Small Drain Snake
Sinks and Bathtubs
Closet Auger
Toilets
Sewer Rodent
Main Lines
At times, however, despite taking all precautions, you might face some challenges. When a tool gets stuck or you suspect pipe damage, it’s essential to know how to respond. If your snake tool becomes stuck, try rotating it; either the rotation will help to break up the clog, or it will free the tool. If, however, the tool remains stuck or you start seeing signs of damage such as leaking pipes or wet spots on the wall, it’s time to call a professional. Forcing the issue can lead to serious pipe damage, leading to an even costlier repair work in the long run. Professional plumbers have the required experience and tools to tackle these situations without causing further damage to your plumbing. Remember, the DIY route isn’t always the best approach. Drain snaking should be undertaken only if you feel confident in your abilities and understand the potential risks. Otherwise, it’s always safer to leave it to the professionals.
Maintaining Your Drains Post the Snaking Process
Following a successful drain snaking process, caring for your drains is crucial in preventing future issues. Through regular upkeep, you can maximize the efficiency of your drains and minimize the risk of pipe damage or stuck tools.
First and foremost, avoid disposing of inappropriate materials down your drains. This includes items such as coffee grounds, grease, oil, and fibrous vegetables in kitchen sinks; hair and soap scum in bathroom sinks and showers; and diapers or wipes in toilets. Limiting the waste that goes down your pipes can significantly reduce the chances of blockages.
Use mesh screens or filters on all drains to catch debris.
Furthermore, be mindful of the signs of a clogged drain, such as slow drainage, foul smells, or unusual noises. By addressing these issues promptly, you can avoid costly repairs in the future.
Remember, a little maintenance goes a long way. By taking the time to look after your drains post-snaking, you can enhance their performance and lifespan, and ensure a smooth shopping process free from frustrations.
As we wrap up this comprehensive guide on DIY drain snaking, let’s keep in mind that, while a do-it-yourself approach can be gratifying and cost-efficient, you must adopt the right techniques to avoid a stuck snake or pipe damage. Remember to wear protective gear, use the correct snake tool for your specific drain type, and apply the right amount of force. With patience and proper know-how, you can successfully snake your drain without professional help. Nevertheless, should you encounter a complex situation or feel out of your depth, don’t hesitate to call in a professional plumber to reduce the risk of damage or escalation of the problem. Keep this information at your fingertips the next time a slow or clogged drain emerges and remember to take a step-by-step, careful approach to the task ahead.
Welcome to this exciting journey through plumbing history where we explore the intriguing world of P-Traps! You might wonder, why all the fuss about an unseen, often overlooked component of our plumbing system? Well, this post is designed to provide an in-depth understanding of P-Traps, their evolution throughout history, their pivotal role in our everyday lives, and the major problems we can avoid with their proper use and maintenance. This knowledge will empower you, the homeowner, to troubleshoot common issues, avoid unnecessary plumbing costs, maintain a healthier home environment, and even leverage this understanding in innovative home design and architecture. The fact-based content is distilled from expert sources to provide you with accurate information. This post promises to be as educational as it is practical; a dive into the past to ensure smoother plumbing in our present and future. Dive in and take this fascinating journey through plumbing history with us!
Introduction to the Enigmatic P-Traps
In the intriguing world of plumbing, undeniably, the role of the P-Trap can never be undermined or overlooked. A P-Trap, as simple as it may seem, plays a critical role in maintaining cleanliness and hygiene in homes and businesses alike. Shaped like the letter ‘P’, this curved section of drainpipe prevents foul odors and harmful gases from seeping into your homes. A P-Trap ensures that after use, the water drains away leaving a sufficient amount to form a barrier, thus preventing any untowardly ‘backflow’ occurrence.
Design: The standard configuration has evolved over centuries and has primarily remained unchanged. The reason being, it works efficiently in trapping debris and forming a liquid gate against the invasion of sewer gases.
Installation: Even though it’s a vital component, the P-Trap is relatively simple to install and requires minimum maintenance.
Materials: P-Traps are traditionally made using brass or PVC, depending upon the application and location of installation.
Regarding its historical significance, one of the earliest recorded uses of a P-Trap-like device dates back to ancient Rome. However, the modern-day P-Trap as we know it, was developed and patented in the mid-18th century, offering significant improvements in design and function.
Year
Development
3000 BC
Primitive P-trap-like devices used in ancient Roman plumbing systems
1740 AD
Modern P-Trap design developed and patented
Present
Continued use in domestic and industrial applications worldwide
So, if you ever wondered about the mechanics behind the simple act of washing your hands, relishing a hot shower, or using your kitchen sink, now you know it involves something as fascinating yet functional as the P-Trap.
The Critical Role of P-Traps in Modern Plumbing Systems
When considering the fundamental aspects of modern plumbing, one can’t overlook the undeniable significance of a P-Trap. Named for its distinctive shape, the P-Trap serves as a necessary majority player in the provision of functional, hygienic household plumbing. This humble pipe configuration ingeniously prevents sewage gas from permeating our homes and buildings, which could potentially cause substantial health problems or serve as a fire risk.
Developed from S-Traps and patented by an Englishman named Alexander Cummings in 1775, the P-Trap has revolutionized plumbing systems around the world. This innovation has not only increased the effectiveness of sewage disposal, but it has also dramatically improved the comfort and health of millions of homes.
Alexander Cummings’ P-Trap: The innovative design of this P-Trap used a small amount of water to create a barrier against the backflow of sewage gas into homes and buildings.
Functionality: P-traps operate on the simple principle of holding a small amount of water in a ‘U’ or ‘P’ shaped dip to prevent sewer gas from flowing back up the pipe and into the home.
Material: P-Traps were initially constructed from lead, however given the toxic nature of this metal; they are now typically made from PVC, ABS, or chrome-plated brass.
Year
Innovation
Significance
1775
Alexander Cummings Patents P-Trap
Launch of the modern plumbing era
20th Century
Introduction of PVC and ABS materials
Moved away from potentially toxic lead materials
Present Day
Continued usage of P-Trap design
Represents a centuries-old, yet effective, solution to maintain hygienic conditions
Delving Deep Into the Historical Evolution of P-Traps
The P-Trap, an integral part of our plumbing systems, has a rich historical evolution that spans several centuries. In its most basic form, this u-shaped pipe section under your sink is designed to trap a small amount of water each time the sink drains, creating a barrier between the open sewer system and your home. While the design appears simple, the P-trap’s journey through history is anything but ordinary, encompassing a multitude of iterations, transformations, and technological advancements that ultimately shaped this humble but monumental invention.
In the 18th century, the predecessor of the modern P-trap was the S-trap. Made from lead or cast iron, the S-trap’s job was to prevent sewer gases from entering buildings. But it had a significant flaw – it was susceptible to self-siphonage, meaning the water could be siphoned out of the trap, breaking the seal and allowing sewer gases to enter the building. Realizing this, Londoner Alexander Cummings invented a modification in 1775, shaping the trap into a U instead of an S. This small adjustment, creating the first version of the P-trap, was significant as it greatly reduced the chance of self-siphonage.
What followed was an era of P-trap advancement, refining both the design and the materials used to produce P-traps. In the 1880’s, Thomas Crapper, the famous London sanitary engineer, improved upon the P-trap design by adding a vent system. This system, known as the “Crapper’s Valveless Waste Preventer”, released trapped gases back into the sewer line, thus minimizing any chance of siphonage. By the 20th century, the use of PVC plastic in P-trap production increased, making them resistant to corrosion and reducing environmental impact. A table below provides a quick glimpse into the P-trap’s evolution:
Century
Key Development
18th
Invention of the S-Trap, later modified to P-Trap by Alexander Cummings
19th
Thomas Crapper’s vented P-trap design
20th
Introduction of PVC as preferred material
This historical evolution of the P-trap shows how even the seemingly simplest components of our daily lives can have a storied past. Moreover, it provides a key lesson in the importance of innovation and continuous refinement in technology, regardless of how mundane it may appear at the surface.
How P-Traps Became an Integral Part of our Everyday Lives
While many wouldn’t spare a second thought, the ingenuity of the P-trap which is hidden beneath our sinks, deserves an iota of appreciation. Many of us use sinks and plumbing every day, yet probably have no idea how the contraption actually works. Little do we know, the water we see disappearing down drains is actually an impressive feat of engineering, thanks to the clever development of the P-trap.
The P-trap got its name due to its distinctive shape, which mirrors the uppercase “P” when viewed from the side. Invented in the 18th century, the P-trap serves a crucial purpose in maintaining cleanliness and addressing health concerns. It essentially captures water and creates a barrier between your home and the potential dangers that lurk in the sewer system, such as harmful gases, insects, and creatures. The water retained in the P-trap effectively forms a seal that barricades from the aforementioned threats.
A Vital Component ensuring our homes’ sanitation and safety.
P-Trap’s simple, yet contrastingly intricate design is a Testament to Ingenious Engineering.
Invention Era
Role
Importance
18th Century
Barrier Protector
High
Next time you use your sink, pause for a moment to appreciate the humble P-trap. This vital plumbing innovation is silently working around the clock, protecting us from potentially harmful or even disastrous consequences. The story of the P-trap is a fascinating one, demonstrating how seemingly simple design can significantly enhance our everyday lives.
In Depth Analysis of the Design and Function of P-Traps
In your journey through the fascinating world of plumbing, you’ll find that P-traps have a surprising amount of sophistication encompassed in their simple design. First established in the late 18th century, the apparatus’ purpose remains fundamental to the functionality of our modern plumbing systems. The U-shaped pipe, located beneath your sink, plays a critical role in preventing sewer gases from entering your home. The water that remains in the bend of the pipe creates a seal that stops these gases, contributing to a safer and fresher environment. The design of P-traps has evolved over time, with each refinement better suited to the needs of the modern home. In early iterations, P-traps were constructed from heavy cast iron, which made installation laborious. Over time, the design material changed to lighter and more manageable metals, like brass, before eventually settling on PVC, or polyvinyl chloride. The PVC P-trap has proven to be durable, cost-effective, and relatively easy to install, making it a staple in modern plumbing.
Material
Description
Cast Iron
A robust, heavy material. Used in the earliest P-traps but difficult to work with due to its weight.
Brass
A lighter alternative to cast iron. Easier to work with but more expensive.
PVC
Currently the most popular material for P-traps. It’s lightweight, durable, and cost-effective.
From an engineering perspective, P-Traps offer an eloquent solution to a critical problem. They are a testament to the incredible ingenuity behind our everyday conveniences, showing that even the simplest components play vital roles. They serve as a powerful reminder that thoughtful design, even in areas unseen, makes a world of difference to our daily living experience.
Expert Recommendations for Proper Maintenance and Installation of P-Traps
In every journey of knowledge, an expert’s piece of advice is invaluable. With this instruction, we are going to provide you with expert recommendations on how to properly maintain and set up P-Traps. This expertise is crucial, as ignoring the care for your P-Traps can lead to severe plumbing issues. Firstly, when it comes to P-Trap installation, it is crucial that you ensure the P-trap is positioned directly beneath the drain outlet. This placement will allow water to flow from the sink and through the P-Trap smoothly. To further enhance this process, you need to use the correct size of a P-Trap. Professional plumbers generally recommend a 1 1/4 inch P-Trap for bathroom sinks and a 1 1/2 inch trap for kitchen sinks.
Type of Sink
Recommended P-Trap Size
Bathroom Sink
1 1/4 inches
Kitchen Sink
1 1/2 inches
Moving over to maintenance, understanding that P-Traps are designed to hold a small amount of water at all times is vital. This water acts as a seal preventing sewer gases from entering your home. When unused for long periods, the water seal can evaporate, thus causing the unpleasant smell. To prevent this, experts recommend periodically running water through seldom-used sinks to ensure the water seal maintains its purpose. In addition, regular checks for leaks or cracks are essential, replacing any faulty or old P-Traps when necessary. Regular cleaning is also advised to avoid any build-up of debris that can cause blockages and affect the performance of your P-Trap. By following these expert tips, your plumbing systems will remain stable and function correctly, ensuring a smoother journey through the fascinating world of plumbing.
Conclusion: The Enduring Impact and Fascination with P-Traps
In concluding this journey through history, it is of great significance to assert the enduring impact of P-Traps in our lives. P-Traps, despite being a behind-the-scenes element of our homes, continue to play an integral role in maintaining sanitary conditions, preventing drainage issues, and eliminating foul sewer odors. The innovative design of these plumbing essentials has not only stood the test of time but has evolved to meet contemporary requirements, a testament to their importance and continuous relevance in today’s society.
The curve in a P-Trap acts as a seal against sewer gases, keeping the environment pleasant and disease-free.
They resolve common drainage issues, preventing backflow of dirty water.
P-Trap designs have evolved over time, with some even being adjustable to fit different pipe sizes, thereby incorporating flexibility in deployment.
Beyond their practical functionality, P-Traps also encapsulate a rich history, offering a fascinating insight into the evolution of plumbing engineering. As we look forward to future advances, the enduring fascination with the P-Trap reminds us of the genius of early inventors and their lasting impact on our world today.
Century
Major Evolution in P-Trap Design
18th
Invention of the basic P-Trap
19th
Improvement in seal design to prevent evaporation
20th
Popularity of adjustable P-Traps for varying pipe sizes
21st
Emergence of eco-friendly P-Traps with water-saving features
In conclusion, the fruitful journey through the history of P-traps unveils layers of brilliant engineering and resourceful innovation. The P-trap may appear to be a hidden and insignificant part of our plumbing system, yet it’s a vital component that ensures a hygienic and odor-free environment in every home and public space. Remember, understanding the function and design of P-traps can help prevent unnecessary headaches due to plumbing problems and also improves our appreciation of creative human inventions. Hopefully, this article has not only piqued your interest, but also enriched your knowledge about this remarkable device. It’s a testament to the thoughtful engineering that silently and persistently works to improve our lives. Isn’t the world of plumbing intriguing and fascinating once you dive deeper into its depths?
Hi my name is Angel Muro I established Comfort Time Heating & Cooling driven by my deep passion for HVAC and a sincere commitment to improving our customers' comfort. My initial fascination with plumbing, heating, and air conditioning systems has evolved into a dedicated profession, emphasizing the significance of both technical expertise and a warm, customer-centric approach. This blog aims to provide valuable insights and information. While some pages provide details about our services, my primary goal is to share real-life experiences that can assist you in various HVAC matters.
Have A Plumbing, Heating Or Air Conditioning Project & You Can Us Our Help?
Comfort Time Plumbing Heating & Cooling Servicing Southern California
At Comfort Time Plumbing Heating and Cooling, we are your trusted HVAC & Plumbing experts serving Southern California. With years of experience in the industry, we take pride in delivering top-notch heating and cooling solutions tailored to the unique climate and needs of the region. Whether you're in the coastal areas, inland valleys, or urban centers, our team of dedicated professionals is here to ensure your year-round comfort. We stay up-to-date with the latest technologies to offer energy-efficient solutions, and our commitment to customer satisfaction means you can rely on us for prompt and reliable service. When it comes to your HVAC needs in Southern California, Comfort Time is the name you can trust.