As explorers on the trail of energy efficiency and conservation, we daily navigate a route laden with ever-evolving building codes and standards. One of the most recent landmarks on our journey is a shift from R-6 to R-8 insulation in the world of ductwork, under the umbrella of California’s robust Title 24 building standards. The majestic R-8, a pinnacle of insulation values in duct design, is now the new marker for thermal efficiency. But what does this milestone mean for contractors, builders, and homeowners? Prepare to embark on a trek through the wild lands of building regulations, as we explore the terrain of “Rising to R-8: A Shift in CA Ductwork Standards & Title 24”. Ensuring your compass is set to true north, let’s look at how these shifting sands of standards are promoting the journey towards optimum energy performance. Welcome to a new landscape, where every insulation upgrade becomes a step forward in creating an environmentally friendly future. Let’s delve into this change together and decode its implications. Ready? Let’s hit the trail.
Transitioning from R-6 to R-8: Embracing the New CA Ductwork Standards
The world of ductwork standards is not static, it is continuously evolving and adapting to ensure the best energy efficiency and cost savings possible. One notable shift currently in progress is the transition from R-6 to R-8 insulation standards in California. The Golden State is known for its forward-thinking energy policies, and this upgrade is par for the course. In 2016, the California Energy Commission (CEC) updated the Title 24 Building Energy Efficiency Standards to require R-8 insulation for all newly installed ductwork in nonresidential buildings. This was a major step up from the previous R-6 standard, and represented a significant improvement in terms of energy efficiency. The reason for this is simple: the higher the R-value, the better the material is at insulating. In other words, R-8 insulation provides a higher level of thermal resistance than R-6 insulation. The transition to R-8 insulation also came with a few other changes. Here are some of the major shifts:
Increased insulation thickness: R-8 insulation is thicker than R-6 insulation. This means that it provides better insulation, but it also takes up more space
Changed duct design: Due to its increased thickness, R-8 insulation can require changes to the duct design in order to fit into the same space as R-6 insulation. This can mean additional costs and labor for the installation process
Greater energy savings: Because R-8 insulation provides better insulation than R-6, it can provide greater energy savings. This can result in lower energy costs over time
Parameter
R-6 Standard
R-8 Standard
Insulation Thickness
Less
More
Duct Design
Simpler
Requires Adjustments
Energy Savings
Lower
Higher
It’s important to note that the transition from R-6 to R-8 is not just a matter of swapping out one style of insulation for another. It requires careful planning and an understanding of the unique challenges and benefits that this change brings. Despite the challenges, the energy savings and improved performance these new standards deliver make the transition well worth the effort. Embrace the change and strive for a greener tomorrow.
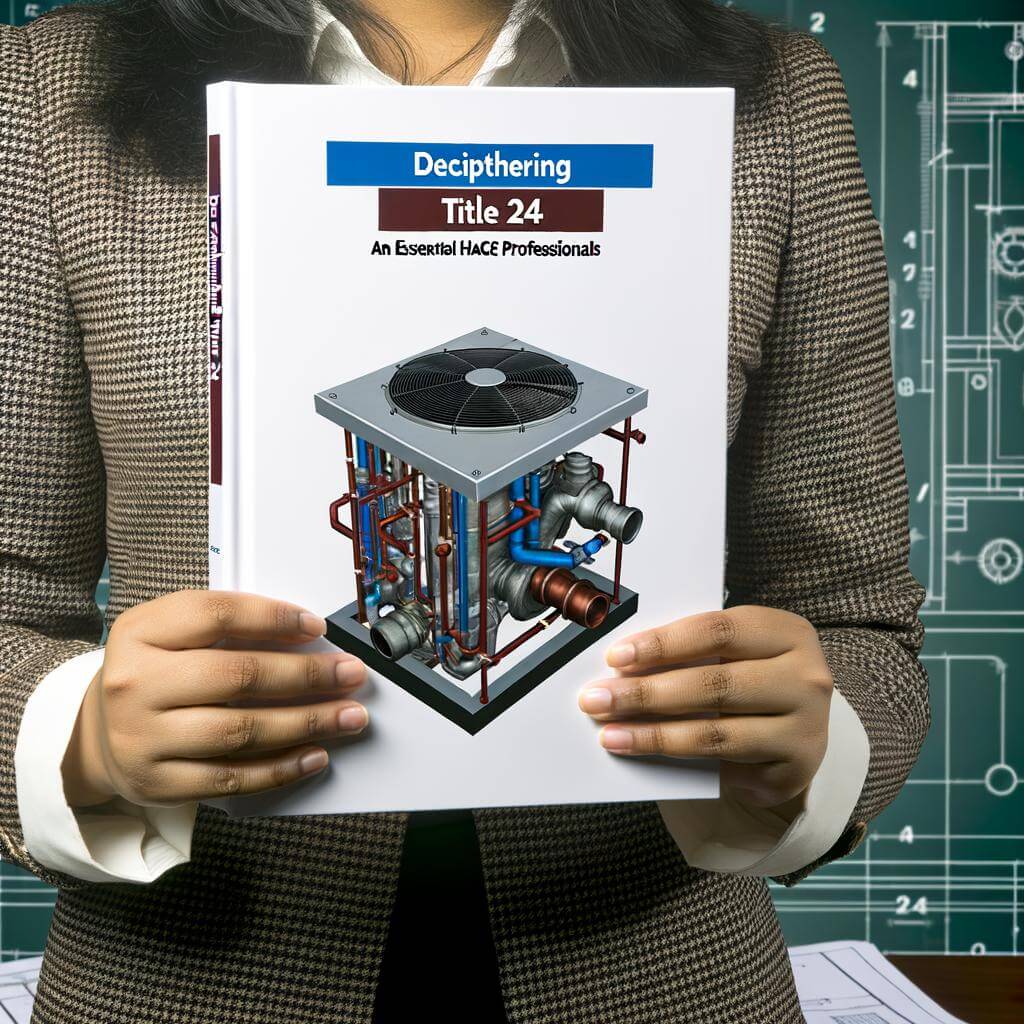
Deciphering Title 24: An Essential Guide for HVAC Professionals
Rising up to an R-value of 8 presents new challenges for HVAC professionals in California. The California Energy Commission’s Title 24 Building Energy Efficiency Standards have recently updated their guidelines, and there are several critical changes HVAC professionals need to be aware of. Primarily, the recommended R-value, a measure of thermal resistance used in the building and construction industry, for ductwork insulation has been increased from R-6 to R-8. This makes California’s mandated performance standards for ductwork among the strictest in the country.
This shift places increased emphasis on energy efficiency and the role of ductwork in maintaining building performance. For HVAC professionals, this means that meeting the new standards will likely require implementing some changes in terms of how ductwork installation and insulation projects are conducted. Here’s an overview of the key changes:
New duct insulation requirements: Ductwork in California now requires an R-value of 8. This involves the addition of more insulation material to meet the new standards and ensure energy-efficient operation.
Increased energy efficiency: The change from R-6 to R-8 is expected to result in significant energy savings for residential and commercial buildings, contributing to California’s overall target of reducing greenhouse gas emissions.
Impact on HVAC installation: This change may influence the design, materials, and techniques used for installing and sealing the HVAC ductwork, requiring more advanced planning and execution.
Given the complexity of these changes, HVAC professionals need to be aware of Title 24‘s comprehensive guidelines and how these impact their work. Let’s examine the fundamental aspects of this through an illustrative table:
Key Aspects of Title 24’s New Ductwork Requirements
Aspect
Pre-Change
Post-Change
Recommended R-Value
R-6
R-8
Focus on Energy Efficiency
Medium
High
Impact on HVAC Installation
Low
Considerable
The Implications of Higher R-Value Standards on Energy Efficiency
The evolution in insulation technology and environmental consciousness has lead to the recent developments in insulation standards – notably, the ductwork standards in California. The ushering in of the R-8 standard, increased from the previous R-6, represents a remarkable shift in how we view energy efficiency and insulation. The greater the R-value – the measurement of thermal resistance – the better the material insulates. This new standard presents certain implications that homeowners, constructors and HVAC professionals need to take into account. Superior in Home Insulation Increasing the R-value results in more efficient insulation, reducing heat loss in winter and heat gain in summer. An R-8 insulation can significantly reduce energy costs:
It diminishes the demand for HVAC by reducing the load on the system
It cuts back the escaping heat by 10%, compared to the R-6,
Though R-8 installation might be more expensive at the start, benefits come in the form of long-term savings on heating and cooling bills. However, it is important to consider certain factors:
Factor
Description
Ductwork size
R-8 insulation requires bigger ductwork. Make sure to take this into account, especially when considering its application within existing structures.
Climate
Higher R-value is more beneficial in climates with harsh winters or hot summers.
With a clear understanding of these implications, one can fully appreciate and adapt to the new R-8 standard and subsequently reap the benefits. This shift is a step closer to energy-efficient living and sustainable development.
Embracing the Transition: Steps to Upgrade Existing Ductwork Systems
The transitioning from the old-style to the upgraded R-8 ductwork systems should not be seen as an obstacle but an opportunity to improve energy efficiency and build a more sustainable future. California’s new standards require the installation of R-8 insulation on ducts located in unconditioned spaces, under the Title 24, Part 6 regulations. This marks a significant shift in the industry, but one that promises long-term benefits. The new mandates may seem daunting, but the transition can be made smoother by following a few simple steps:
Conduct a thorough inspection of the current ductwork system. Identify weak spots, leaks or inefficiencies that need immediate attention.
Plan the upgrades based on the results of the inspection. Be ready to replace parts that are old, degraded, or inappropriate for the R-8 standard.
Employ a qualified contractor to carry out the upgrades. Their skill and expertise will ensure correct and proper installation.
Finally, make sure to validate the upgrades, whether through an energy audit or compliance software. It’s important to have an objective assessment to ensure the new ductwork meets the necessary standards.
Old Standards
New Standards
Up to R-6
R-8
Less insulated, loss of energy
Higher insulation, energy-efficient
Outdated, can degrade rapidly
Modern, longer-lasting
Embracing the shift in CA’s ductwork standards from R-6 to R-8 demands a little time investment and forward planning. But it ultimately leads to more efficient, sustainable homes that significantly lower household energy usage and costs. So, let’s gear up to invest in a greener future.
Expert Tips on Navigating Compliance with the New R-8 Ductwork Standards
In a substantial shift towards fostering extensive energy efficiency, the California Energy Commission’s Title 24 standards have necessitated R-8 insulation for flex ducts in all parts of the state. This move amplifies the already considerable responsibility of HVAC professionals, who are now tasked with navigating the implications of these elevated standards. Conforming to this updated code requires a sound understanding, particularly when translating these requirements into practice.
Here are a few expert tips to aid the process:
Adequate Training: Given the complexities and nuances intertwined with the R-8 standards, it is crucial to have your team trained by credible institutions. This would ensure adherence to updated codes and promote the installation of effective, efficient, and compliant duct systems.
Focus on Insulation: Achieving R-8 insulation entails substantial thickness, which might necessitate spatial adjustments. Professionals must consciously consider this aspect right from the design phase, to prevent potential complications during the installation.
Reliable Suppliers: Choose to work with suppliers providing compliant and high-quality insulation materials. This ensures your installations align with the required R-8 ratings and also influences the life span and efficiency of installed systems.
Through these, one can ensure compliance with the R-8 standards, capitalizing on its benefits for consumers and the environment.
Material
R-Value
Fiberglass (loose)
2.2 – 2.9
Fiberglass (batt)
2.9 – 3.8
Cotton (recycled denim)
3.0 – 3.7
Mineral Wool (batt)
3.3 – 3.5
Cellulose (blown)
3.1 – 3.8
Spray Foam (closed-cell)
5.5 – 6.5
The table above provides a summary of R-values for various insulation materials. It showcases the superiority of certain insulation options over others in the quest for R-8 insulation. Remember, abiding by Title 24 and R-8 ductwork standards not only secures regulatory compliance, but it also enables HVAC professionals to deliver durable, efficient, and more environmentally friendly solutions to clients.
Future-proofing Your HVAC System: Long-Term Benefits of R-8 Compliance
As California transitions towards R-8 insulation standards under Title 24, builders and homeowners alike are encouraged to switch to R-8 compliant HVAC systems. This shift is not only a nod to the progression in California’s energy efficiency policies, but also an opportunity to future-proof HVAC systems for long-term benefits.
R-8 compliant HVAC systems carry considerable benefits. Firstly, they considerably reduce energy bills. The enhanced insulation means HVAC systems don’t work as hard to warm or cool the house, thus lowering utility costs each month. Secondly, your home becomes environmentally friendlier. As we exhaust less energy, we reduce carbon footprints, contributing to a more sustainable future. Lastly, R-8 compliant HVAC systems increase your property’s value. As energy efficiency becomes an increasing selling point, homes equipped with a future-proof HVAC system are more likely to attract buyers.
Benefits of R-8 Compliant HVAC Systems
Reduced Energy Bills
Environmentally Friendly
Increased Property Value
Recognizing these long-term benefits, it becomes evident that adherence to the new R-8 insulation standards is not merely a matter of compliance, but a strategic move that ensures your investment in an HVAC system is resilient to future market changes and positioning your property as a preferred choice for energy-conscious buyers.
As we sweep back the curtains on the stage of California’s ductwork standards, it’s an evocative panorama of evolution that unveils itself. From the R-4 we walked away from, through the transition to R-6, and now, perched on the threshold of the R-8; it is an odyssey of regulation and a testament to a fledgling industry’s relentless quest for excellence. Crucial, moreover, is the pivotal role of Title 24, a keystone in the grand archway of HVAC standards, setting the rhythm and fortifying innovation. The dance to R-8 is a dance of adaptation, a rhythm of resilience. As we exit the stage, leaving you amidst the dimming echoes of our discussion, remember that every turn of the journey—every fresh challenge—brings a new cadence. The tune may change, the steps may evolve, but the dance goes on. In this labyrinth of policy and practice, innovation and adaptation, lies the future of efficiency, the blueprint for sustainability. As the industry continues to pirouette to the tempo of progress, we are reminded of the role we all play – a dance of diligence and dedication, choreographed by the standards we create. Therefore, let’s rise to R-8, embracing the uptempo shift towards remarkable efficiency and higher performance.
The winter frost gently taps on your window as you nestle into the comfort of your warm home, trusting silently in the furnace that wards off the biting cold. You have entrusted it with your comfort, your warmth and the safety of those you hold dear. But within the guts of your home’s warmth champion, lurks a villain – the cracked heat exchanger. This little-known part, hidden deep within your furnace, can be a silent threat to the efficient heating of your home. Have no fear, though. This article will lead you on a journey of discovery, shedding light on the mysterious world of heat exchangers, teaching you how to navigate the possible damage, and cracking the code to keep your furnace – and your home – safe and snug.
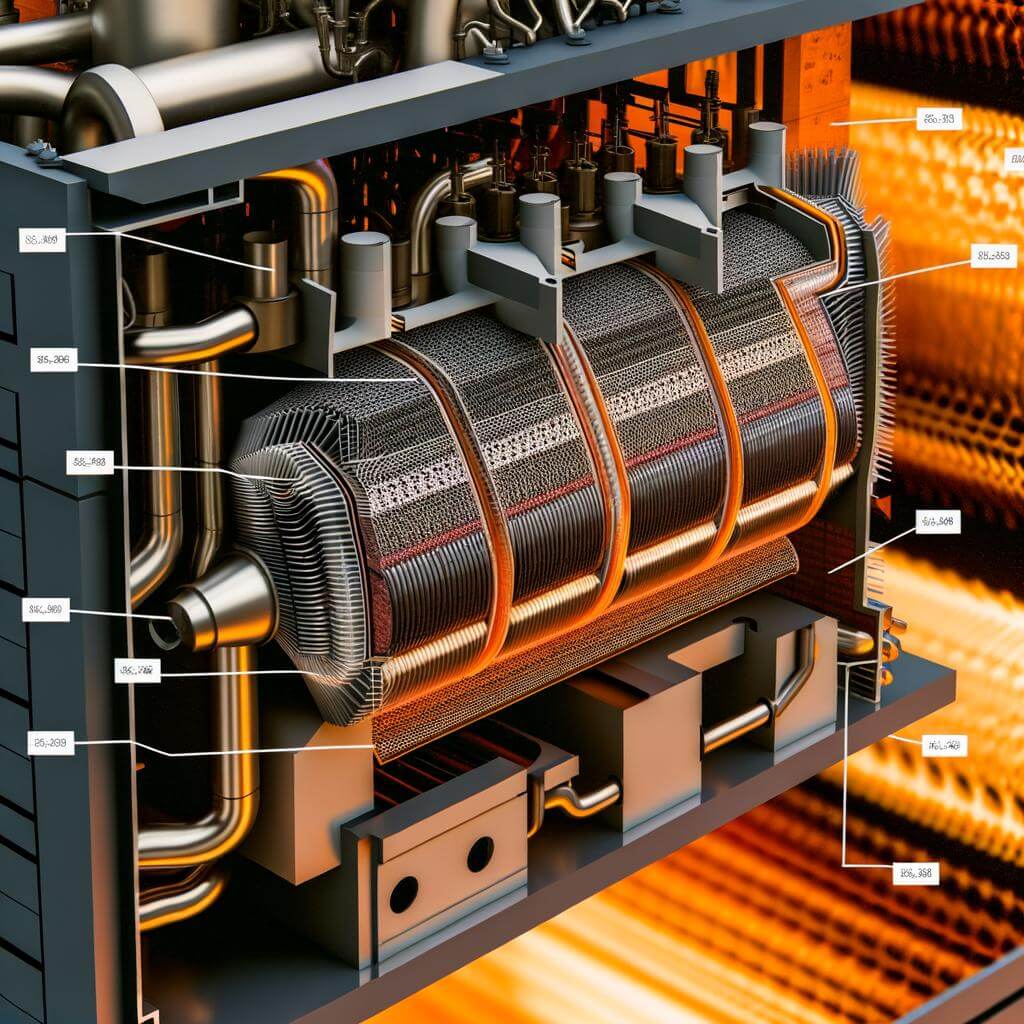
Cracking the Code: Understanding the Crucial Role of Heat Exchangers in Your Furnace
Understanding the importance of heat exchangers in your furnace is essential for efficient function and maintenance. These central components act almost like the heart of your furnace, pumping heated air throughout your home. Ensuring their optimum performance is vital. However, one common issue that many homeowners face is dealing with cracked heat exchangers. This seemingly small issue can drastically hamper your furnace’s performance and potentially lead to more serious, costly problems if left untreated. When it comes to identifying a cracked heat exchanger, some key signs are unusual smells, inefficient heating, and higher energy bills. If you spot these signs, it is advisable to contact a professional immediately.
Type of Sign
Description
Recommended Action
Unusual Smells
You may notice a distinct, metallic smell. This can often indicate a crack in the heat exchanger.
Switch off your furnace and reach out to an HVAC professional to diagnose the issue.
Inefficient Heating
If rooms in your house seem to be heating unevenly or your furnace isn’t achieving the desired temperature, this could be another symptom.
A problematic heat exchanger can result in higher energy consumption, hence a rise in your bills.
Upon noticing a significant increase in energy costs, arrange a furnace check-up for any potential issues.
In understanding the warning signs and acting quickly, you can help avoid costly repairs and replacement bills. Knowledge truly is power when it comes to cracking the code of navigating cracked heat exchangers in your furnace.
The Common Culprits: Identifying Factors that Lead to Cracked Heat Exchangers
Incremental Wear and Tear To chalk it down to the basics, a heat exchanger in your furnace experiences a great deal of stress during its operational lifetime. The constant cycle of heating and cooling gradually causes wear and tear to the metal materials of the heat exchanger. This is especially true for machines that are regularly used to their full potential. Over time, the continuous expansion and contraction of the metal can lead to damage.
Metal Fatigue: This is the most common reason for cracks to occur in a heat exchanger. As the metal continues to heat up and cool down, it expands and contracts, gradually weakening its structural integrity.
Overheating: If you’re consistently pushing your furnace to its limits, it can lead to overheating. This can cause the metal to expand too much, creating cracks.
Age: As with many things, age can also factor into the health of your heat exchanger. Older systems have gone through more heating cycles and are more likely to crack just due to their age alone.
Inadequate Maintenance A well-maintained heat exchanger will be less prone to developing cracks. However, neglecting regular maintenance can lead to small issues magnifying into large, system-threatening problems. Regular maintenance can help point out indications of possible wear and tear that could result in cracks. Ensure to clean and inspect your system regularly, and don’t forget to replace its filters.
Type of Maintenance
Impact on Heat Exchanger
Regular Cleaning
Improves airflow, reduces strain on the system, preventing overheating and cracks.
Regular Inspection
Helps detect cracks or signs of wear and tear early, before they become a bigger problem.
Filter Replacement
Ensures unrestricted airflow and helps prevent dust buildup, which can lead to overheating and cracks.
By understanding the regular enemies your heat exchanger faces, you can hopefully prevent them from causing any serious damage to your system. Regular maintenance and a watchful eye can ensure your system’s longevity.
Seeing the Signs: Early Indicators of a Cracked Heat Exchanger
If you’re like most homeowners, odds are you haven’t given your furnace’s heat exchanger much thought, at least, not until something goes wrong. However, early detection of a cracked heat exchanger can prevent unwanted problems and unexpected expenses. It’s vital to understand the telltale signs of a damaged exchanger before it morphs from a small issue into a significant problem.
One concerning sign is strange smells. A properly functioning heat exchanger should not produce any odors, but a damaged one may release a metallic smell throughout your home. Another common indicator is the presence of soot. While a tiny amount of soot isn’t alarming, excessive build-up is a clear sign that your heat exchanger is not effectively burning fuel. Lastly, pay attention to discoloration. A clean heat exchanger should be shiny; however, a cracked one may appear black or darker than usual due to carbon residue.
Knowing this valuable information, can help in early detection and even prevention of a major catastrophe. But how should homeowners ensure their furnace runs smoothly? Here are some handy tips:
Frequent furnace inspections: A professional can detect small cracks and other issues before they escalate.
Regular filter change: This simple maintenance task will help keep your furnace running efficiently.
Your heat exchanger appears black or darker than usual.
Remember, every furnace is different, and these signs might not always ring true. Always consult with an HVAC professional if you suspect a problem with your heat exchanger. With careful monitoring and early detection of issues, anyone can successfully navigate the landscape of cracked heat exchangers.
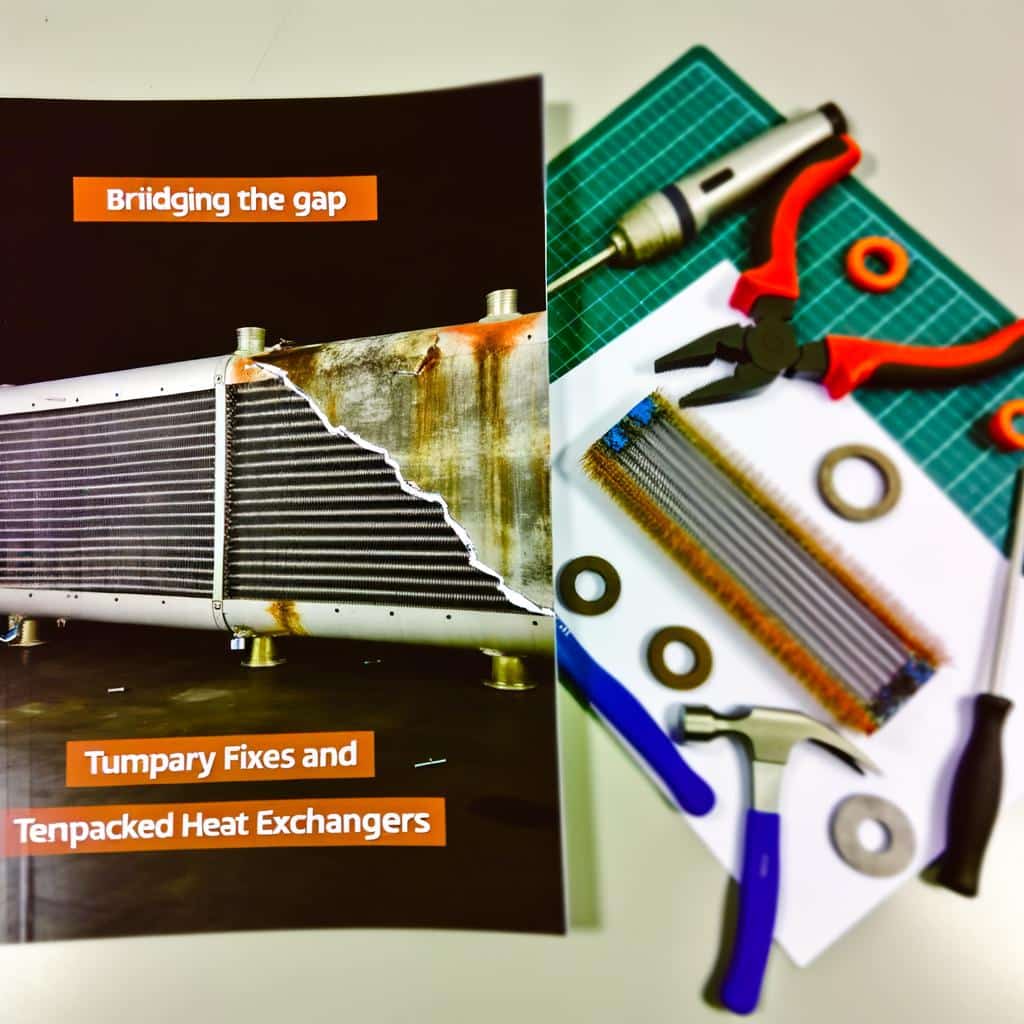
Bridging the Gap: Quick Fixes and Temporary Solutions for Cracked Heat Exchangers
Let’s face it: cracks in heat exchangers are a common, yet daunting problem. They compromise the furnace’s safety and efficiency. But don’t be panic, there’re several quick fixes and makeshift solutions to overcome this hurdle. Now, let’s demystify how to deal with these troublesome fractures.
Sealants and Patch Kits: Sealants such as high-temperature silicone and patch kits can be a quick yet temporary fix for smaller cracks. However, remember, these materials deteriorate over time under the effects of continuous heating and cooling cycles. So, this solution mainly buys you time until a professional repair or replacement can be done.
Silicone Sealants: These are able to withstand high temperatures, and can provide a quick fix that lasts for a few weeks or even months.
Metal Patch Kits: These kits typically contain a patch that adheres to the metal surface of the heat exchanger, effectively sealing the crack. Remember, this is also a temporary remedy.
Professional Repair or Replacement: For larger cracks or when sealants no longer work, professional repair or replacement becomes mandatory. Note: Replacing the heat exchanger or the entire furnace requires significant investment. But, it’s a more reliable, long-term solution.
Quick Fix
Estimated Lifespan
Best For
Silicone Sealants
1-6 months
Small cracks
Metal Patch Kits
Up to 1 year
Small to Medium cracks
Professional Repair/Replacement
Long term
Large cracks
In conclusion, while quick fixes can momentarily cure the issue, nothing can substitute professional repair or replacement for safety and efficiency.
Knowing When to Call: The Right Time to Involve Professionals for a Cracked Heat Exchanger
It’s not always easy to know the exact moment when a minor issue in your furnace warrants professional help. However, one sure indication is a cracked heat exchanger. If you notice flame discolouration, soot production, or unusual smell, you may be dealing with this issue. It’s also a critical matter if your carbon monoxide detector goes off. Irrespective of the reason, potential risk of harmful gas leak or a system failure makes it imperative to call a professional. Your health, as well as that of your furnace, hangs in the balance.
Graphical Inspection Camera or a Combustion Gas Analyzer are essential tools that professionals employ to spot cracks in a heat exchanger. But what does it look like when a heat exchanger is failing? Here’s a brief overview of what to expect:
Remember, it’s never a good idea to ignore any signs of a failing furnace. It’s always better to resolve potential issues before they become full-fledged problems. Stay warm, and stay safe.Making it Last: Proactive Measures for Preventing Heat Exchanger Issues in Your FurnaceRegular maintenance of your furnace plays a pivotal role in avoiding costly and potentially dangerous heat exchanger issues. One crucial aspect of this task is regular inspection of the heat exchanger for any signs of damage or stress. A cracked heat exchanger is one of the most common furnace problems homeowners face. Cracks may develop due to several reasons – metal fatigue caused by heating and cooling cycles, overheating due to restricted airflow, or just the natural aging process of the furnace. Regardless of the cause, immediate attention is required to prevent carbon monoxide leakage or complete furnace failure. During annual furnace maintenance, a certified HVAC technician can carefully inspect your exchanger for early-stage cracks using advanced visual and camera tools. To prevent the occurrence of cracks in the first place, consider these proactive measures: – Adjust Thermostat: Lowering your thermostat a few degrees will reduce the strain on your furnace, hence reducing the chances of metal fatigue. – Regular Filter Replacement: Regular replacement of furnace filters will ensure proper air flow, preventing potential overheating of the exchanger. – Periodic Duct Cleaning: This helps to alleviate pressure accumulation inside the furnace, subsequently reducing the likelihood of fatigue cracks.By staying proactive and ensuring regular maintenance, you can help reduce the risks of a cracked heat exchanger, thereby ensuring a safer, more efficient heating system for your home.Practicing Smart Spending: Cost Effective Ways to Manage Cracked Heat Exchangers
With winter settling in, it is inevitable that your furnace’s heat exchangers may fall to the common risk of cracking. However, dealing with cracked heat exchangers does not necessarily have to burn a hole in your pocket. The secret lies in smart spending and effective heat exchanger management. You can start with simple routines such as regular inspection, investing in an energy-efficient furnace, and scheduling routine maintenance.
Cracked heat exchangers may jeopardize your home’s warmth unless they’re addressed timely. Let’s first understand the potential costs of managing cracked heat exchangers. However, it’s essential to note that these figures can vary based on local pricing and the specific furnace model.
Signs
Meaning
Inconsistent Heating.
Cracked heat exchangers can result in parts of your home not heating up as they should.
Yellow or Flickering Flame
Good furnaces burn with consistent, blue flames. Any other colour or inconsistency is a warning sign.
Weird Smells
Unusual odours, particularly a formaldehyde-like smell, could indicate a malfunctioning heat exchanger.
Proactive Measure
Benefits
Adjust Thermostat
Reduced strain on furnace
Regular Filter Replacement
Avoids potential overheating
Periodic Duct Cleaning
Prevents pressure accumulation
Description
Estimated Cost Range
Inspection
$50 – $100
Heat Exchanger Replacement
$1,000 – $2,500
New Energy-Efficient Furnace
$2,500 – $7,500
Now that we have a basic understanding of costs, we can introduce some cost-effective ways to manage cracked heat exchangers. Instead of an immediate replacement of the full heating system, invest in routine inspections to help catch small issues before they turn into significant problems. Moreover, an energy-efficient furnace may appear to be high-priced upfront, but they drastically cut your energy usage—saving you money in the long run. Lastly, remember to sign up for annual maintenance contracts with reliable service providers to ensure optimal performance and longevity of your furnace.
Playing detective with your furnace is not everyone’s idea of fun, but understanding the ins and outs of cracked heat exchangers can transform your seasonal ordeal into an interesting diversion. Like testy codices in ancient scripts, these cracks can be hard to decipher, but we have decrypted some of that opaque furnace language for you. Hopefully, the journey through the labyrinth of heat exchangers, the signs of trouble, their effects, and solutions has provided you with the torchlight needed to navigate this often misunderstood furnace component. So next time your home’s warmth seems amiss, you can put on your Sherlock Holmes hat — with this newly acquired knowledge, you are no longer an observer, but an informed participant in the narrative of your home’s heating system. Your furnace isn’t a foreign entity, but an ally in warmth, a riddle begging to be solved. And after cracking the code of the heat exchangers, who knows what other furnishing mysteries you might uncover next?
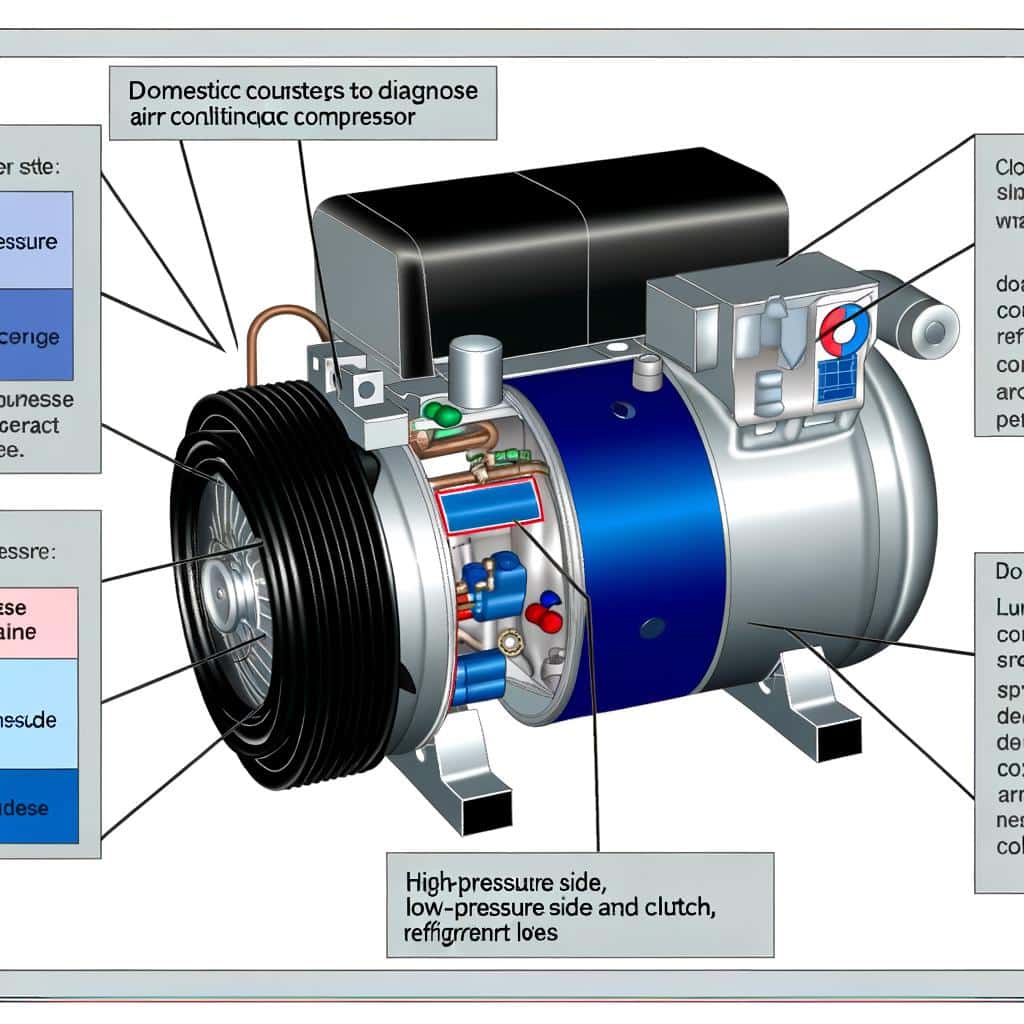
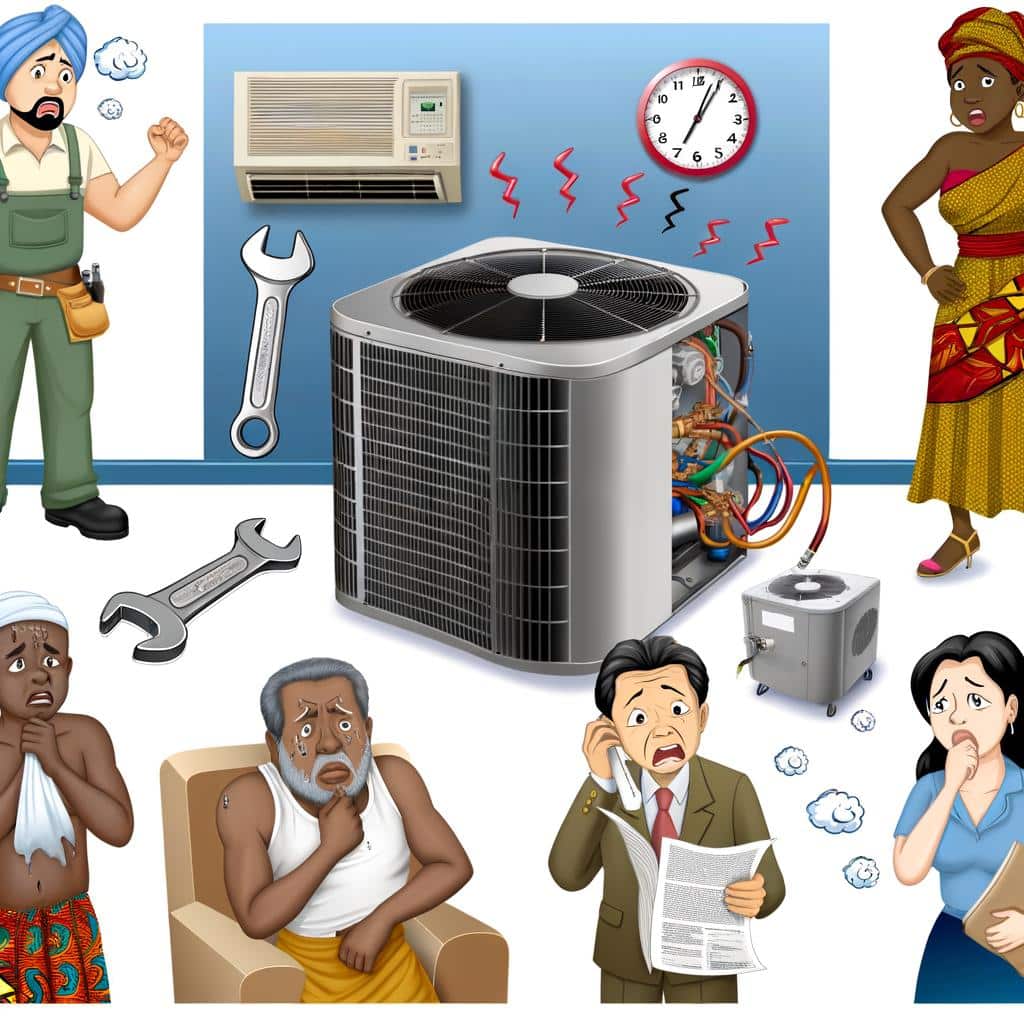
As the unsung hero of summer, your air conditioning unit is a lifeline, a comfort bubble, a cool breath of sanity in the brutal, fiery grasp of July. But what happens when that breath of fresh air feels less like a refreshing breeze and more like a weak sigh of defeat? Chances are, the culprit might be lurking in an essential component that you may not even have heard about – the compressor. Plunge into the intricate world of AC mechanics with us as we dissect the issue of bad compressors and explore the signs, symptoms, and solutions. This is your crash course on AC compressors; a comprehensive lowdown that promises to turn you into a better-informed consumer, an amateur expert, a warrior armed for the ultimate showdown – surviving the heat. Welcome to your initiation. We’re about to lift off!
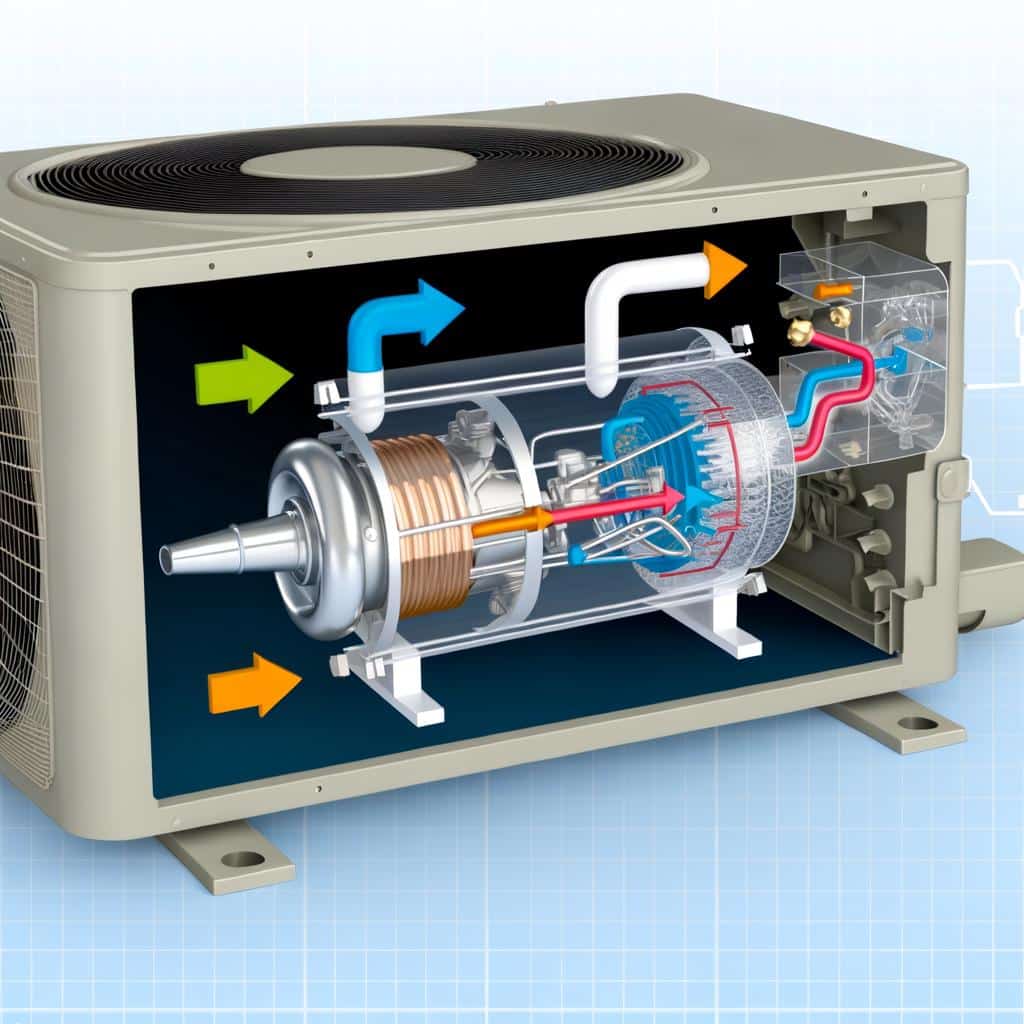
Unraveling the Mystery of an AC Unit
If you’ve ever found yourself scratching your head in confusion over your AC unit’s shenanigans, fear not, for you are not alone. One of the most frequent culprits behind a malfunctioning AC unit is a bad compressor. But what exactly is a compressor and what makes it go bad? Let’s take a quick dive into the topic. The compressor is essentially the heart of your air conditioning system. It’s the component responsible for circulating the refrigerant necessary for heat exchange within the coils of the AC unit. A bad compressor, therefore, can cause your system to lose its cool—quite literally! Common signs of a failing compressor often include:
Diminished cooling capacities: If your AC isn’t cooling your space effectively despite being at the right setting, a failing compressor might be the problem.
Noise: Loud or unusual noises from your unit can indicate a malfunctioning compressor.
High energy bills: A faulty compressor can make the whole unit work harder, thereby consuming more power and ultimately driving up your bills.
Unfortunately, there can be numerous reasons why a compressor goes bad:
Causes
Consequences
Electrical problems
Surges and breakdowns
Incorrect suction lines
Reduced system efficiency and increased wear and tear
Lack of lubricant
Overheating and eventual failure
Understanding your AC unit better can empower you to spot signs of trouble early and potentially save you from costly repairs or replacement. However, self-diagnosis should never replace professional inspection and maintenance. Regular maintenance check-ups are essential to ensure a long and chill life for your AC!
Decoding the Role of the Compressor in Your AC
Many people rely on their AC systems to get them through the hot and sweltering months. But often, we fail to appreciate the complexity of these devices and how intrinsic components like the compressor contribute to their overall functionality. In simple terms, the compressor is the core of your air conditioning system, the “heart” if you will, responsible for circulating the refrigerant necessary for heat exchange. Understanding the operation of the compressor isn’t a challenge if you think of it in terms of a human circulatory system. The way your heart circulates blood throughout your body, the AC compressor circulates refrigerant through your air conditioning system. Over time, like any other mechanical part, the compressor may fail or start malfunctioning.
Motor Failure: If the motor of your compressor fails, your AC unit will not cool the air efficiently. This is one of the most costly air conditioning repair issues, but unfortunately, it’s also one of the most common.
Capacitor Failure: Your compressor has start and run capacitors which also can fail. Consequently, your AC may not run or may not function efficiently.
Refrigerant Leaks: Sometimes, you may find that your compressor is working harder than it needs to as a result of a refrigerant leak. This makes your system inefficient and increases your power bills.
Familiarizing yourself with these typical issues will help you identify signs of potential compressor failure early, allowing you to seek professional help before the problem escalates. Here’s a useful table for highlighting some key signs:
Signature
Potential Issue
Loud or Unusual Noises
Possible Motor Failure
AC not blowing cold air
Possible Capacitor/Refrigerant Issue
Elevated Electricity Bills
Possible Refrigerant Leaks
Remember, the AC compressor plays a vital role in cooling your home or office. It’s crucial to keep it functioning correctly to ensure optimal cooling and avoid hefty repair costs.
Diving Deep: How to Tell if Your AC Compressor is Bad
If your air conditioning system starts misbehaving, it might often be due to a failing AC compressor. However, as one of the most vital components of your AC, an ill-performing compressor can’t simply be neglected. In fact, if you wish to beat the heat, it is absolutely mandatory to understand how to diagnose a bad AC compressor. Learning to catch the warning signs early can save you from potential discomfort and unnecessary expenses. Your AC compressor can show various symptoms when something’s up. For instance, you might notice the coldest of your air isn’t as chilly as it used to be or the AC is noticeably noisier. In more severe cases, your circuit breaker could trip when the AC turns on. Another red flag could be the AC unit vibrating excessively when the compressor kicks in.
Symptom
What it means
Poor cooling performance
Compressor may not be pumping refrigerant properly
Noise
Internal damage to the compressor or mechanical failure
Tripped breaker
Compressor overloads the circuit
Excessive vibration
Mechanical failure or worn-out compressor mounts
Remember that regular maintenance of your AC system can help prevent compressor issues. As a homeowner, you should aim to have an HVAC professional inspect and service your AC unit annually. By catching any potential issues early, you can save yourself from a hot, uncomfortable home and a costly repair or replacement.
Understanding the Consequences of a Bad AC Compressor
Renowned as the heart of your AC system, the compressor’s role is both critical and dynamic. Essentially, it’s there to convert refrigerant gas into a high-pressure, high-temperature state before it gets sent off to the condenser. But what happens when things go awry? Well, a faulty or bad AC compressor triggers a cascade of frustrating issues that not only compromise the comfort level in your house but could also lead to potentially exorbitant repair expenses. Reduced Cooling Performance: It should be no surprise that the primary symptom of a bad AC compressor is its significant drop in cooling effectiveness. The unit may still blow air, but you may start noticing it’s not as cold as it used to be. In this scenario, it feels like your system is continually battling to maintain the desired temperature in your home, thus resulting in increased energy usage. This can be seen vividly in your skyrocketing energy bills.
Unusual Noises
: When the component of your AC system suffers wear and tear, it’s likely to produce odd sounds. When a compressor is going bad, you may hear buzzing, rattling, or humming noises whenever the AC is running. This signifies trouble and shouldn’t be ignored.
Symptoms
Possibly Indicates
Reduced Cooling
Damaged or Failing Compressor
Increased Energy Bills
Overworked AC unit due to Compressor Issue
Odd Noises
Worn Out AC Compressor
Then there are other sinister fallouts of a failing compressor, such as liquid and refrigerant leaks, overheating issues, and even a complete shutdown of your AC system. Thus, it’s crucial to be aware of these symptoms to respond promptly by calling in a professional for diagnosis and repair.
Offering Solace: How To Deal With A Faulty AC Compressor
Slipping into a home that’s perfectly cooled during a hot summer’s day is one of life’s little pleasures. But what happens when your AC unit begins to falter and the culprit is a faulty compressor? This is a problem faced by many, and if you’ve found yourself in this predicament, you’re not alone.
Understanding what an AC compressor does and the signs of a bad one can prevent a complete system failure. The AC compressor circulates refrigerant throughout the system, absorbs heat and moisture from the air in your home, and ultimately brings cool air in. Common indications of malfunctioning may include loud noises during operation, warmer air than usual, and unresponsive thermostat.
Loud noises: When compressors go bad, they’ll often make loud clunking, rattling, or banging noises during operation.
Warmer air: If you’ve noticed that the air blowing out of your vents isn’t as cool as it should be, it might be a sign of a faulty compressor.
Unresponsive thermostat: If no matter how much you fiddle with the thermostat, the temperature doesn’t seem to respond, your compressor might be to blame.
Symptom
Possible Cause
Loud Noises
Bad Compressor
Warmer Air
Insufficient Refrigerant or Faulty Compressor
Unresponsive Thermostat
Compressor Issues, Bad Thermostat Wiring
Examining these red flags early on can save you from the expense and inconvenience of a full system breakdown. However, addressing compressor issues should be left to the professionals to avoid creating more serious problems. Remember that while a faulty compressor is inconvenient, it’s not insurmountable with the right help.
Empowering Yourself: Finding Reliable AC Compressor Repair Services
Dealing with a faulty AC compressor can be quite a bummer, especially during the hot summer months. But empower yourself with the knowledge about what’s happening, why, and more importantly, how to find the best repair services and you can avoid getting stuck in the heat. To ensure you’re getting a reliable repair service, consider these keys:
Experience: How many years has the company been in the AC compressor repair service? Check their background and ask for client testimonials. The more experienced, the better.
Trained Technicians: It’s essential that the technicians in the company are well trained and hold certifications. This is a sign of credibility and skill.
Prices: Be wary of companies providing services at cost that seem to be too good to be true. High-quality repair work comes with a price. However, it doesn’t mean you have to break your bank.
Availability: A good repair service will be able to attend to your needs whenever required and will not leave you stranded.
Understanding the causes and symptoms of a bad compressor might also steer you towards the right repair solution. Quite often, a failing compressor manifests signs like:
Signs
Description
AC blowing hot air
Your AC was meant to deliver a chill, not a heatwave. If it’s doing the opposite, your compressor could be failing.
AC frequent cycles
It’s natural for your AC to cycle on and off. But if it’s happening too frequently, then it may be time to check the compressor.
Leaking moisture
Small amounts of condensation are normal. But if you see large pools of water or refregerant leaks around your AC, the compressor may be the problem.
Strange noises
If you’re hearing grinding, squealing, or chattering noises from your AC, the compressor may be developing a fault.
Don’t let yourself be left sweating and uncomfortable in a sweltering room. Empower yourself with the right knowledge and make the best decision for your cool comfort. In the rhythm of daily routines, amidst the hum and hustle of life, stands a silent sentinel—your Air Conditioner. It goes on unblinking and unsleeping, steadfast in its duty to keep you cool. The heart of this guardian? Your AC compressor. Nevertheless, like all hearts, it too can falter and fade. Knowing and understanding this crucial component, can often be the difference between a quick fix and a looming AC catastrophe. Now that we’ve let you in on the secrets of ailing compressors hopefully, you’ll have a cooler perspective on your summer chill. Stay cool, stay informed, and when in doubt, always consult a trusted HVAC specialist. Remember, a healthy compressor implies a happy home.
Hi my name is Angel Muro I established Comfort Time Heating & Cooling driven by my deep passion for HVAC and a sincere commitment to improving our customers' comfort. My initial fascination with plumbing, heating, and air conditioning systems has evolved into a dedicated profession, emphasizing the significance of both technical expertise and a warm, customer-centric approach. This blog aims to provide valuable insights and information. While some pages provide details about our services, my primary goal is to share real-life experiences that can assist you in various HVAC matters.
Have A Plumbing, Heating Or Air Conditioning Project & You Can Us Our Help?
Comfort Time Plumbing Heating & Cooling Servicing Southern California
At Comfort Time Plumbing Heating and Cooling, we are your trusted HVAC & Plumbing experts serving Southern California. With years of experience in the industry, we take pride in delivering top-notch heating and cooling solutions tailored to the unique climate and needs of the region. Whether you're in the coastal areas, inland valleys, or urban centers, our team of dedicated professionals is here to ensure your year-round comfort. We stay up-to-date with the latest technologies to offer energy-efficient solutions, and our commitment to customer satisfaction means you can rely on us for prompt and reliable service. When it comes to your HVAC needs in Southern California, Comfort Time is the name you can trust.