Welcome to this comprehensive guide where we’re going to delve into the benefits and basics of DIY Sewer Rooter Cleaning. Around the house, cleaning and maintenance are essential tasks, but sewer cleaning is a topic that many shy away from, often due to a lack of understanding or simply, not knowing where to start. However, with the right information at your fingertips, it becomes a much simpler task than one might think.
This post aims to streamline your understanding of sewer rooter cleaning, teaching you how to perform proper and efficient cleaning all by yourself. By following this guide, you can avoid high professional service costs, gain essential DIY skills, and increase your home’s overall cleanliness and hygiene. With this expert and fact-based guide, you can become your own sewer rooter specialist. Read on to equip yourself with valuable knowledge that will empower you to keep your sewer lines clean, unclogged, and flowing smoothly. Let’s dive in.
Understanding the Importance of DIY Sewer Rooter Cleaning
Many homeowners overlook the important task of maintaining their sewer lines through DIY sewer rooter cleaning. Just like any other part of your home, your sewer lines need regular maintenance to prevent problems that could lead to costly repairs. Taking on this task yourself not only saves you a significant amount of money spent on professional services but also enhances your understanding of your home’s plumbing system. This greater understanding empowers you to deal with minor issues before they turn into major ones.
Getting your hands dirty with DIY sewer rooter cleaning comes with several benefits. Firstly, periodic cleaning ensures smooth operation of your sewer system, eliminating the risk of potential clogs or backups. Secondly, it brings to light any damage that may have gone unnoticed, such as tree roots breaching into the sewer lines. Thirdly, this gives you the opportunity to preserve the structural integrity of your home by preventing water damage potentially caused by leaks or breakages.
DIY Sewer Rooter Cleaning: Key Steps
Carefully remove the sewer line cap. Always remember to put on protective gear first, like gloves and eye protection.
Insert the sewer rooter – a specialized drain snake that can reach deep into your sewer lines and break apart blockages.
Keep turning the sewer rooter handle and navigate it through the line. You’ll feel a certain resistance when it comes into contact with a clog.
Once the clog is reached, whip the rooter around to break up the blockage.
After breaking up the clog, remove the rooter and flush the sewer line using a hose. This clears out any residual debris.
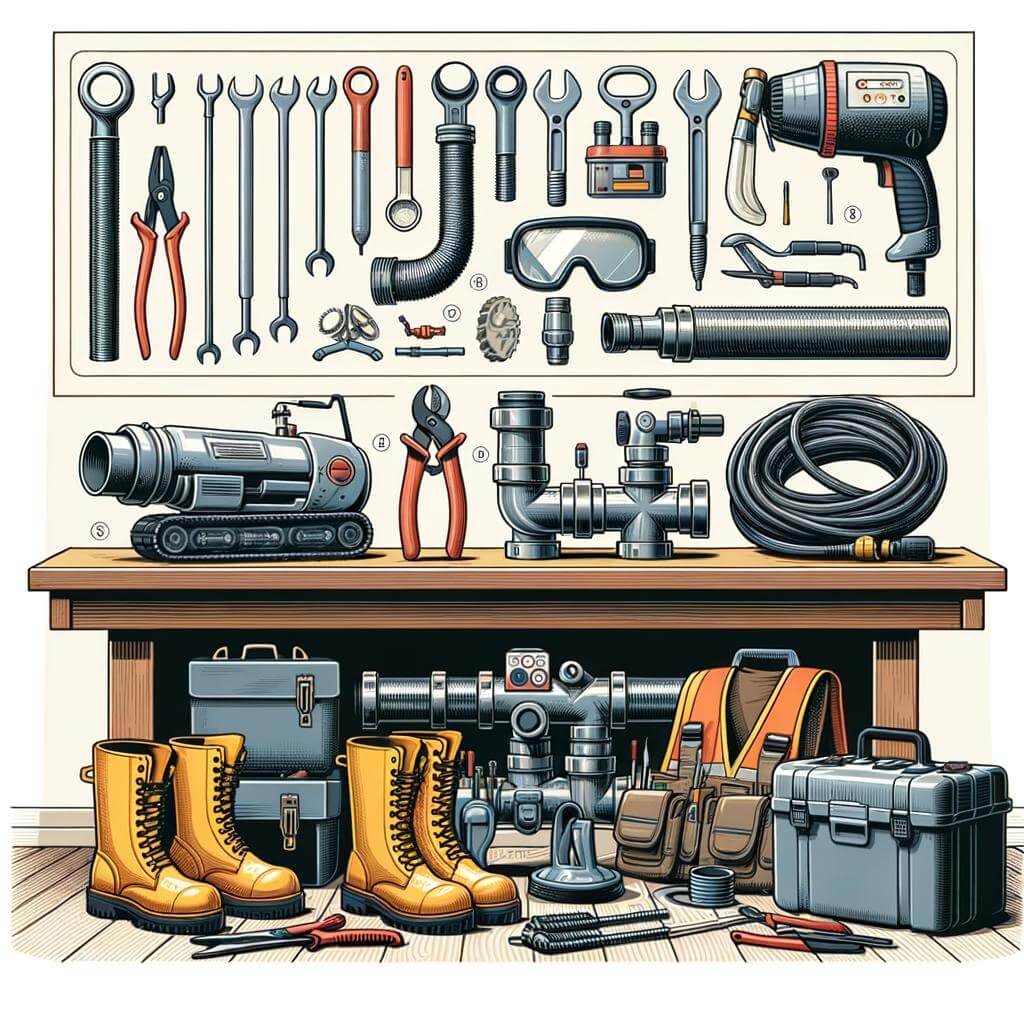
Tools Required
Uses
Sewer Rooter
For breaking apart blockages deep within the sewer lines.
Gloves and Eye Protection
Protects against potential harm from sewer debris and bacteria.
Hose
For flushing out the debris broken up by the rooter.
In sum, DIY sewer rooter cleaning isn’t just a cost-saving measure; it’s an essential preventative maintenance step that ensures a smooth operating sewer system. So before you find yourself facing an expensive and messy sewer issue, consider adopting a regular DIY sewer rooter cleaning regimen.
Getting to Know the Materials and Tools Needed for Sewer Rooter Cleaning
It might seem daunting at first, but with the right set of tools and materials, DIY sewer rooter cleaning can be a manageable task. To begin with, you will primarily need a sewer auger or rooter machine; a distinct tool specifically created for unblocking sewer lines. Besides, don’t forget the safety gear, including heavy-duty gloves, safety googles, and sturdy work boots. These are important to protect you from unwanted exposure to waste and harmful materials.
Another significant item to have is a quality plumber’s snake, which is especially effective for small to medium blockages. When it comes to substances for breaking down the blockages, an enzyme-based drain cleaner is a must-have. It is eco-friendly and less corrosive compared to other chemical-variety cleaners. Lastly, a hydro jetter is ideal to clear stubborn blockages and clean the inside of the pipe thoroughly
Tool/Material
Purpose
Sewer Auger
For unblocking sewer lines
Safety Gear
To protect from exposure to waste and harmful materials
Plumber’s Snake
To tackle small to medium blockages
Enzyme-based Drain Cleaner
For breaking down blockages, eco-friendly
Hydro Jetter
To clear stubborn blockages, cleans the inside of the pipe
Remember, it’s advisable to understand the functionality of each tool thoroughly before starting the cleaning process. Sewer rooter cleaning is an essential maintenance task, and with the right tools, you can achieve professional-like results at a fraction of the cost.
Step by Step Guide on the DIY Sewer Rooter Cleaning Process
A regular sewer rooter cleaning is essential to keep your home’s plumbing in top condition. However, hiring a professional to do this job can often be expensive. Thankfully, you can take matters into your own hands by performing a do-it-yourself (DIY) sewer rooter cleaning. Here’s a step-by-step guide on how to do it.
Firstly, you’ll need the right equipment. Essential tools include a sewer rooter- which can be rented from any home improvement store, gloves for sanitation and safety, and an inspection camera to identify clogs and blockages. Once these are in place, you can proceed to the cleaning process.
Step 1
Use the inspection camera to locate clogs or blockages. You’ll need to feed this through from the sewer clean-out, which is a pipeline outside your home that provides direct access to your sewer line.
Step 2
Once the clog or blockage has been identified, bring in the sewer rooter. This machine uses a rotating coil to break up roots and other debris in your sewer pipe, clearing the way for smoother flow.
Step 3
After the clog has been broken up, flush the pipe with a hose to make sure all the debris has been removed.
Step 4
Use the camera to inspect the drain once more, ensuring that the clog has been successfully removed. If debris remains, repeat the process.
By following these steps, you can efficiently handle your own sewer rooter cleaning. This DIY approach is not only cost-effective, but it also allows you to understand and take care of your home’s plumbing more effectively.
Remember, however, that while this guide provides a thorough overview, every home’s plumbing system is different. You should still follow all safety guidelines and manufacturer instructions when using the sewer rooter. You should also know when to call in a professional. If the clog is too major, or if there’s potential for damage to your pipes, it may be best to bring in an expert rather than risk further damage.
Best Practices for DIY Sewer Rooter Cleaning Safety
Sewer rooter cleaning may seem daunting and dangerous, but by adhering to a set of best-practice safety measures, you can keep your sewer lines flowing freely without any misadventures. A reminder to always prioritize your well-being, the first recommendation is to equip yourself with the necessary personal protective equipment (PPE). Depending on the task at hand, this might include a pair of sturdy gloves, safety glasses, and a respirator mask. In addition, when using any chemical or electrical tools for sewer rooter cleaning, make sure you have read and understood the user manual to keep safe.
Sturdy gloves
Safety glasses
Respirator mask
Tool
Safety Precaution
Chemical drain cleaners
Avoid direct skin contact and inhalation
Electric drain cleaners
Use GFCI protected outlet
Being cautious of your surroundings is another crucial component in maintaining safety when cleaning your sewer. Ensure your work area is well ventilated to prevent the build-up of harmful fumes. When working outside, be mindful of potential slip, trip or fall hazards and take steps to mitigate them. For instance, put away any loose tools and keep your hoses and wires neatly coiled when not in use. Furthermore, as you will potentially be dealing with bacteria and other pathogens, it’s crucial to thoroughly clean and disinfect your tools and work area when you’ve finished the job to minimize the risk of cross-contamination.
Ensure a well-ventilated workspace
Be mindful of slip, trip, and fall hazards
Thoroughly clean and disinfect tools and workspace
Activity
Safety Measure
Working outside
Be vigilant of potential hazards in your work area
Post cleaning
Disinfect tools and workspace
Dealing with Common Challenges in Sewer Rooter Cleaning
DIY sewer rooter cleaning is a beneficial approach that saves both time and money. However, it presents a set of challenges that need to be addressed to execute it properly. A common problem homeowners face is having to deal with tough blockages. This can occur when the roots of large trees, irrelevant debris or masses of hair accumulate in your sewage system. It’s crucial to use a reliable, high-quality sewer rooter that can power through tough clogs. But even the best tools can get stuck if not used properly. Learn to operate your tool and gain some practical experience before diving into complex clogs.
On top of handling stubborn blockages, another notable challenge in DIY sewer rooter cleaning is maintaining the health and integrity of your pipes. Homeowners need to strike a balance between removing the blockages and preserving the condition of the pipes. An overzealous clean could potentially cause more harm than good, leading to long-term damage. It’s important to avoid using overly aggressive methods or chemicals that could potentially weaken your pipework and cause leaks. Here’s a quick rundown on how to tackle these common challenges:
Equip yourself with a resilient yet flexible sewer rooter capable of navigating your pipes without causing damage.
Avoid harsh chemicals that can deteriorate your pipes. Opt for eco-friendly alternatives like vinegar and baking soda.
Consider using CCTV technology to locate blockages without excessive digging or intrusion into your pipes.
Exercise patience. Working too quickly or forcefully could lead to bigger problems down the line.
Adhering to these guidelines ensures a smoother cleaning experience. However, if you’re unsure or the problem persists, don’t hesitate to call a professional plumber!
Benefits of Regular DIY Sewer Rooter Maintenance
Keeping your sewer system in good shape is paramount to maintaining a clean, well-functioning home. One of the most crucial preventative measures is performing regular do-it-yourself (DIY) sewer rooter maintenance.
The first and most obvious benefit of timely DIY sewer rooter maintenance is saving money. Ignoring any potential problems can lead to costly repairs down the line. Second, you are extending the lifespan of your sewer system. Regular maintenance ensures your pipes remain in operational condition for many years. Last but not least, such self-care helps in preventing unpleasant odors that can pollute your home environment if the sewer system fails.
Saves you money: Avoid more expensive professional repairs.
Extends the lifespan: Keep your sewer system functioning for longer.
Prevents bad odors: Maintain a clean and pleasant home environment.
Performing regular maintenance not only helps you have a healthier home but also gives you an understanding of how your sewer system works, making you better prepared to handle any issues. Furthermore, this practice fosters a sense of independence and confidence in managing your household needs. Lastly, regular DIY sewer rooter maintenance contributes to environmental sustainability by preventing sewage leaks that can contaminate the local ecosystem.
Benefits
Description
Knowledge gain
Understand how your sewer system works, be prepared for issues
Independence
Feel confident managing your household needs
Sustainability
Prevent sewage leaks and contribute to a better environment
How to Evaluate When Professional Help is Needed for Sewer Rooter Cleaning
While sewer rooter cleaning may appear to be a simple DIY project, there are indications to watch for that suggest it might be time to enlist the help of professionals. Some of these symptoms include recurring clogs, foul odors originating from your drains, and slow drainage across multiple fixtures. It’s also crucial to consider the age and overall health of your sewer system. While occasional clogs are normal, frequent issues can signify more serious problems that require expert attention.
To make deciding when professional assistance is needed a little easier, here’s a simple assessment guide:
Overall Drain Health: Are your drains frequently prompting a sewer rooter cleaning? Regular clogs or slow drainage across multiple fixtures could suggest underlying problems.
Foul Odor: Persistent foul odors coming from your drain should not be overlooked. It might indicate a severe problem in the sewer system.
Sewer Age: Old sewer systems are more prone to problems and may require regular maintenance or replacement by professionals.
Moreover, despite all DIY efforts, certain issues are better tackled by professionals. This is largely due to the complexity of these issues or the risk of further damage. Problems such as tree root intrusion, collapsed or broken lines, and severe blockages usually necessitate professional help. Attempting these repairs without the proper skill set and tools can result in more costly issues.
To provide clarity, the following table lists some common issues and whether they can be addressed DIY or require professional help:
\\\\\\\\\\\\
Issue
DIY or Professional Help
Minor Clogs
DIY
Recurring Clogs
Professional Help
Tree Root Intrusion
Professional Help
Broken Sewer Lines
Professional Help
The Conclusion
In closing, DIY sewer rooter cleaning might seem overwhelming at first glance, but with safety, knowledge, and some elbow grease, you too can keep your sewer system running smoothly. Understanding the benefits, the process, and the precautions beforehand can alleviate the stress associated with this task. Throughout this task, you’ll enhance your skill set, save money, and gain a decent understanding of the inner-workings of your plumbing system. Nonetheless, if the task seems too daunting or if complications occur, seeking professional help is always an advisable option. Remember, apart from saving costs, the value of DIY projects lies in the understanding, responsibility, and care you invest in maintaining your home. Adopt these methods wisely, stay vigilant of any signs that suggest trouble, ensure timely intervention to maintain your sewer systems in good health. Welcome to the world of do-it-yourself home maintenance!
Welcome to this enlightening post, “Mistakes to Avoid When DIY-ing Your Mini Split System”. This important guide is created to help you avoid common pitfalls during your DIY mini-split system installation. It’s designed to empower homeowners like yourself with expert insight, factual data and hands-on advice so you can confidently tackle this project and prevent any unnecessary costs or damages. With the wealth of information provided, you’ll navigate your DIY project with ease, effectiveness, and a newfound expert understanding. Whether you’re a seasoned DIY-er or a beginner, this post will prove to be valuable, informative, and incredibly useful. Learn from others’ mistakes rather than making them yourself, saving both time and resources along your DIY journey. Let’s get started!
Understanding the Importance of Properly Installing Your Mini Split System
Installing your mini split system correctly is crucial for its efficiency and longevity. By committing common installation mistakes, you can unknowingly damage your system or cause it to work ineffectively, which can result in higher electricity bills or costly repairs. Moreover, a poorly installed mini-split system could potentially create a hazardous situation. Essentially, proper installation ensures that the mini-split system operates at its best and provides comfort for many years.
The following are some mistakes to avoid when DIY-ing your mini-split system:
Incorrectly choosing the location: The indoor and outdoor units of the mini-split system should be installed in suitable places for optimal performance. A good location is accessible, ensures adequate airflow, and minimizes noise. Moreover, the distance between the indoor and outdoor units should comply with the manufacturer’s recommendations.
Poor electrical connection: The electrical wiring should conform to the local codes and manufacturer’s instructions. A poor electrical connection could lead to system failure or a fire hazard.
Improper refrigerant charging: The refrigerant should be charged accurately as per the manufacturer’s instructions. Overcharging or undercharging could impair the system’s cooling efficiency.
Mistake
Implication
Incorrect Location
Impairs performance and increases noise
Poor Electrical Connection
Causes system failure or potential fire hazard
Improper Refrigerant Charging
Reduces cooling efficiency
Surely, you want your mini-split system to keep your home comfortable effectively and efficiently. So, make sure you don’t overlook these important considerations when setting up your unit. Moreover, if you feel unsure or overwhelmed by the installation process, don’t hesitate to call in a certified HVAC professional. Your mini split system is a significant investment, and it’s worth ensuring it’s installed right.
Delving into Common Mistakes in DIY Mini Split Installation
Among the myriad of home projects, installing a mini split system has piqued the interest of many DIY enthusiasts. However, there are certain pitfalls in this undertaking that might turn your investment into a waste. Improper placement and poor electrical connection are critical blunders often committed by DIYers during the installation process.
The split system is highly efficient only when each of its units is optimally positioned. An indoor unit, for example, should not be installed near heat sources or obstructed by furniture. Similarly, the outdoor unit should have ample space around it to ensure unimpeded airflow. Complementing the placement, a seamless electrical connection forms the backbone of the system. Any discrepancies in this can not only hamper the system’s performance but also pose a serious safety risk.
Improper placement: Misplacement of indoor or outdoor units can lead to ineffective heating or cooling and damage the system in the long run.
Poor electrical connection: Inadequate or faulty wiring can lead to short circuits, potentially damaging the system and posing a fire risk.
Common Mistake
Potential Consequence
Improper Placement of Indoor Unit
Reduced Energy Efficiency
Obstruction Around Outdoor Unit
Decreased System Lifespan
Poor Electrical Connection
Potential Fire Hazard
Keys to Correctly Selecting and Sizing Your Mini Split System
Selecting the correct size for your mini split system is arguably the most crucial step. It is integral to the overall efficiency and performance of your system. One common mistake to avoid is oversizing. It’s easy to fall into the belief that a larger system means better cooling, but this could result in higher energy consumption and less comfortable indoor environment. Similarly, undersizing will prevent the system from effectively cooling or heating your space. A system that’s too small will constantly run, leading to decreased energy efficiency.
To avoid these mistakes, you need to determine your heating and cooling needs accurately. A Manual J load calculation is the industry standard for this. This calculation factors in various aspects like size of the space, insulation levels, number of windows and doors, occupant load, and so on. Be sure to consider the climate of your location, as more extreme climates will require stronger systems. Remember, you can also choose to use multiple smaller systems to effectively condition larger or multiple rooms. It’s beneficial to consult with a HVAC professional to help with these calculations and prevent costly errors.
Common Errors
Solutions
Oversizing the system
Perform a Manual J load calculation
Undersizing the system
Consider multiple smaller systems
Not considering the local climate
Opt for a system suitable for extreme climates
Neglecting professional advice
Consult with a HVAC professional
A wrong selection could lead to inefficient operation, increased energy consumption, and reduced comfort and lifespan of the system. Being aware of these mistakes and following the mentioned tips will ensure you strike the right balance while choosing and sizing your mini split system.
Specific Guidelines on Proper Indoor and Outdoor Unit Placement
Indoor Unit Placement
Outdoor Unit Placement
High on the wall
In a well-ventilated area
Away from direct sun and heat sources
Away from areas prone to debris
Ensuring unobstructed airflow
Elevated off the ground
Correct placement of your mini split system’s units is crucial to ensure its efficiency and longevity. For the indoor unit, it should ideally be placed high on the wall where there is minimal obstruction. The unit should be kept away from direct sunlight as well as heat sources like stoves or radiators; these can affect the thermostat and cause the unit to overcool your room. It’s also vital to ensure the unit’s airflow isn’t blocked by furniture or curtains, to promote better circulation and cooling efficiency.
When it comes to your outdoor unit, choose a spot that is clean, well-ventilated, and free from potential debris like leaves or grass cuttings that might clog the system. The unit should also be elevated off the ground to protect it from water or snow accumulation that can cause malfunctions or damage. Remember, proper placement will not only boost your system’s cooling performance but also minimize the risk of breakdown, saving you future repair costs.
Expert Advice on Avoiding Faulty Wiring during Mini Split Installation
When it comes to wiring your mini split systems, these complex electrical interfaces require expertise, precision, and a thorough understanding of electrical safety precautions. Learning the basics can help you prevent common errors that could compromise your system’s functionality and safety. Here are some expert tips to guide you through the process:
Never bypass safety protocols: Interfering with built-in safety protocols, such as overload protections, can shorten the lifespan of your system and can even lead to electrical hazards.
Use guide manuals: Always adhere to the manufacturer’s guidelines and specifications to ensure proper installation and performance.
Proper wire selection: Ensure you use the correct wire size as using the wrong size could lead to overheating and potential fire hazards.
Correct outlet and breaker selection: The selected outlet and breaker should match the electrical demands of your mini split system.
Aside from those tips, a basic understanding of the mini split’s electrical interface is crucial. There are two wires involved in the operation of a mini split system, namely Communication Wire and Power Wire. The communication wire conveys the signal controlling operation, while the power wire supplies the energy needed.
Wire Type
Function
Communication Wire
Transmits signal controlling operation
Power Wire
Supplies necessary energy
Any error during installation can impact the system’s efficiency and safety. Therefore, it might be worth considering hiring a professional if you feel uncertain about your DIY abilities. However, with careful attention to instructions and regular practice, it is indeed possible to master the art of mini split system installation.
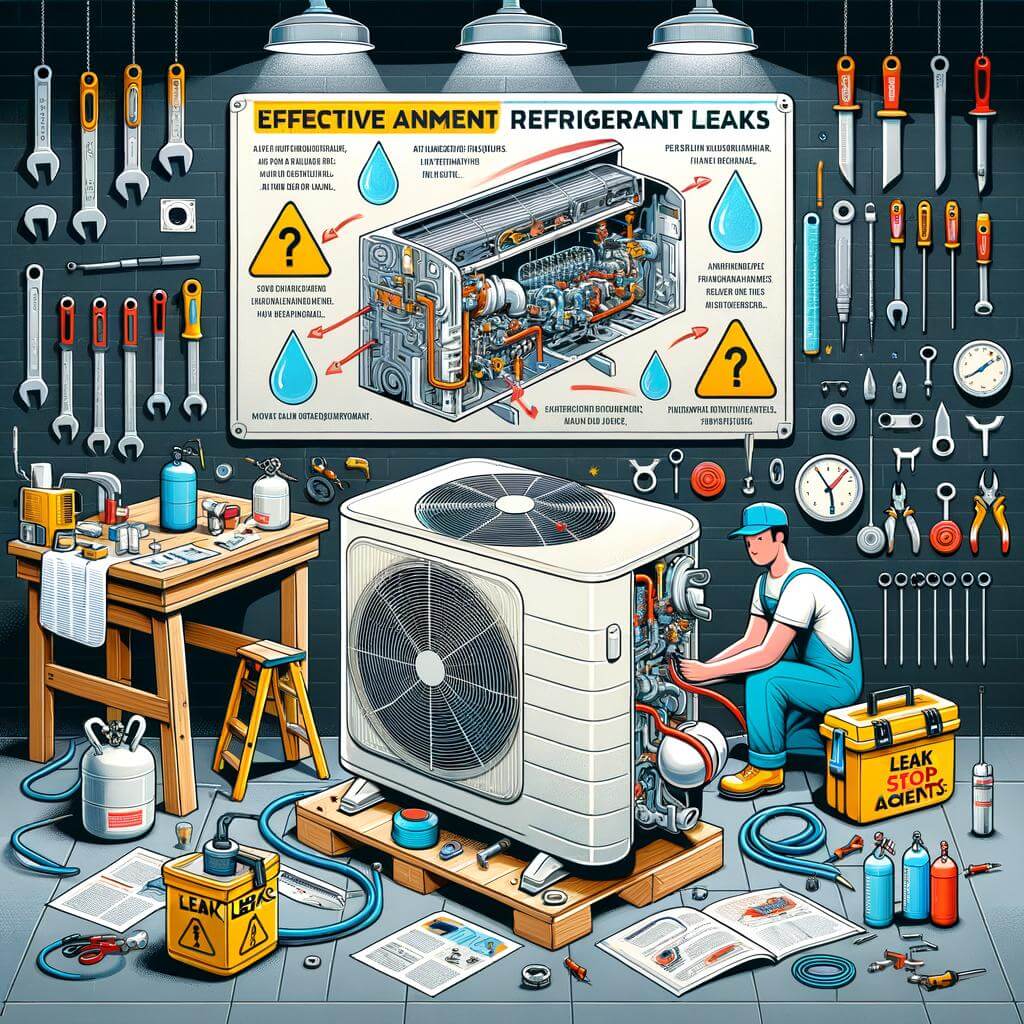
Effective Measures to Prevent Refrigerant Leaks
In DIY projects, the risk of refrigerant leaks in your mini split system can be a concern. By adopting certain best practices, these leaks can be effectively avoided, saving you from unnecessary expenses and headaches. The first things to remember are the basics like using the correct tools and following the manufacturer’s installation guide to the letter. Avoid rushing your installation and double-check connections and joints for seepage, even at the risk of seeming overly cautious. This extra measure can really pay off in the long run.
To further enhance your DIY installation experience, here are a few useful tips:
Invest in a high-quality tubing cutter to ensure clean cuts, as rough edges can lead to leaks.
Always create a flare connection using a flaring tool.
Use leak detection solutions or electronic leak detectors to inspecting connections thoroughly.
Never over tighten the connection to avoid damaging the flare.
Moreover, always consider pressure testing your equipment. This measure will help you identify leaks, as well as test the overall durability of the system. Remember, preventing refrigerant leaks is not just about precision, but also about knowledge, good practices, and patient execution.
Item
Description
Tubing Cutter
For clean, precise cuts
Flaring Tool
Needed to form airtight seal
Leak Detector
Helps identify leaks instantly
Pressure Testing Equipment
Checks the durability of the system and possible leaks
Critical Things to Remember About Drainage and Condensation Management
It’s easy to underestimate the crucial roles of both drainage and condensation management when installing a mini split system. One important DIY mistake to avoid is neglecting to properly angle the drain line. A downward slope of approximately 1/4 inch per foot will ensure condensate flows safely away from your system. Equally significant is keeping a clear, obstruction-free path for your drainage line, to prevent back-ups and potential water damage.
HTML code:
It’s easy to underestimate the crucial roles of both drainage and condensation management when installing a mini split system. One important DIY mistake to avoid is neglecting to properly angle the drain line. A downward slope of approximately 1/4 inch per foot will ensure condensate flows safely away from your system. Equally significant is keeping a clear, obstruction-free path for your drainage line, to prevent back-ups and potential water damage.
When it comes to managing condensation, neglecting insulation is another common DIY mistake. The line set, or refrigerant plumbing, should be insulated to prevent unwanted heat transfer and condensation build-up, which could lead to a multitude of problems including system inefficiency and even mould growth. It’s recommended to use insulating foam for these purposes, as it’s easy to install and provides optimal weather protection.
HTML code:
When it comes to managing condensation, neglecting insulation is another common DIY mistake. The line set, or refrigerant plumbing, should be insulated to prevent unwanted heat transfer and condensation build-up, which could lead to a multitude of problems including system inefficiency and even mould growth. It’s recommended to use insulating foam for these purposes, as it’s easy to install and provides optimal weather protection.
Best Practices for Maintaining Your DIY Mini Split System Post-Installation
The first thing to remember after setting up your DIY split system is to conduct regular check-ups. Monthly inspections can keep your machine running efficiently and extend its lifespan. Ensure to observe the system’s indoor and outdoor units regularly; pay attention to any strange noises, unusual odours, or leaking fluids. Replace filters regularly, ideally every 30 to 90 days depending on the manufacturer’s instructions. Maintaining wide-ranging cleanliness for your system, including the remote and indoor units, is essential too.
Proper usage of your DIY mini split system is another key to its maintenance. Avoid overworking the unit by constantly adjusting settings — determine a comfortable temperature and leave it. Remember to set the temperature higher during cooling mode or lower during heating mode when you’re not home to conserve energy. Also, it becomes very important to dust and clean the outdoor condenser unit regularly. Lastly, avoid trying to fix major problems yourself unless you have the technical know-how; call a professional instead.
Check-UP
Frequency
Noise and leaks inspection
Monthly
Filter replacement
Every 30 to 90 days
Overall cleanliness
Regularly
Conserve energy
When not at home
Outdoor condenser cleaning
Regularly
Professional attention
If major issues arise
This checklist is a simple guideline to consider while maintaining and operating your DIY mini split system. Remember, good upkeep ensures the longevity and efficiency of your device.
Insights and Conclusions
In conclusion, successfully installing your mini split system doesn’t have to be a daunting task with the right preparations and knowledge. If the task seems too complex, remember there’s no shame in calling a professional—it’s better to be safe than sorry. However, if you decide to take up the challenge, avoiding the aforementioned errors can save a lot of time, money, and unwanted stress in the future. Paying close attention to your unit’s specifications, dedicating ample time for planning and prep, and ensuring accurate installation can help you achieve a properly functioning mini split system. Always keep user manuals and professional assistance at your disposal, because when it comes to DIY projects, knowledge is power. Here’s to successful DIY-ing and enjoying the comfort of your well-installed mini split system!
Welcome! If you’re considering changing your shower fixture, you’ve landed on the right post. In “Insider Tips: What to Know Before Changing Your Shower Fixture”, we compile invaluable tips and guidelines, grounded in expert opinion and fact, to assist you in your DIY endeavour. This post serves as a beacon to navigate the process smoothly and make informed decisions. It can help you understand what to look for, how to make the perfect choice for your bathroom style and usage, and even how to care for your new shower fixture. It’s the ultimate guide for homeowners seeking an empowered change. So why wait? Let’s dive right in and make your bathroom renovation project a seamless and rewarding experience.
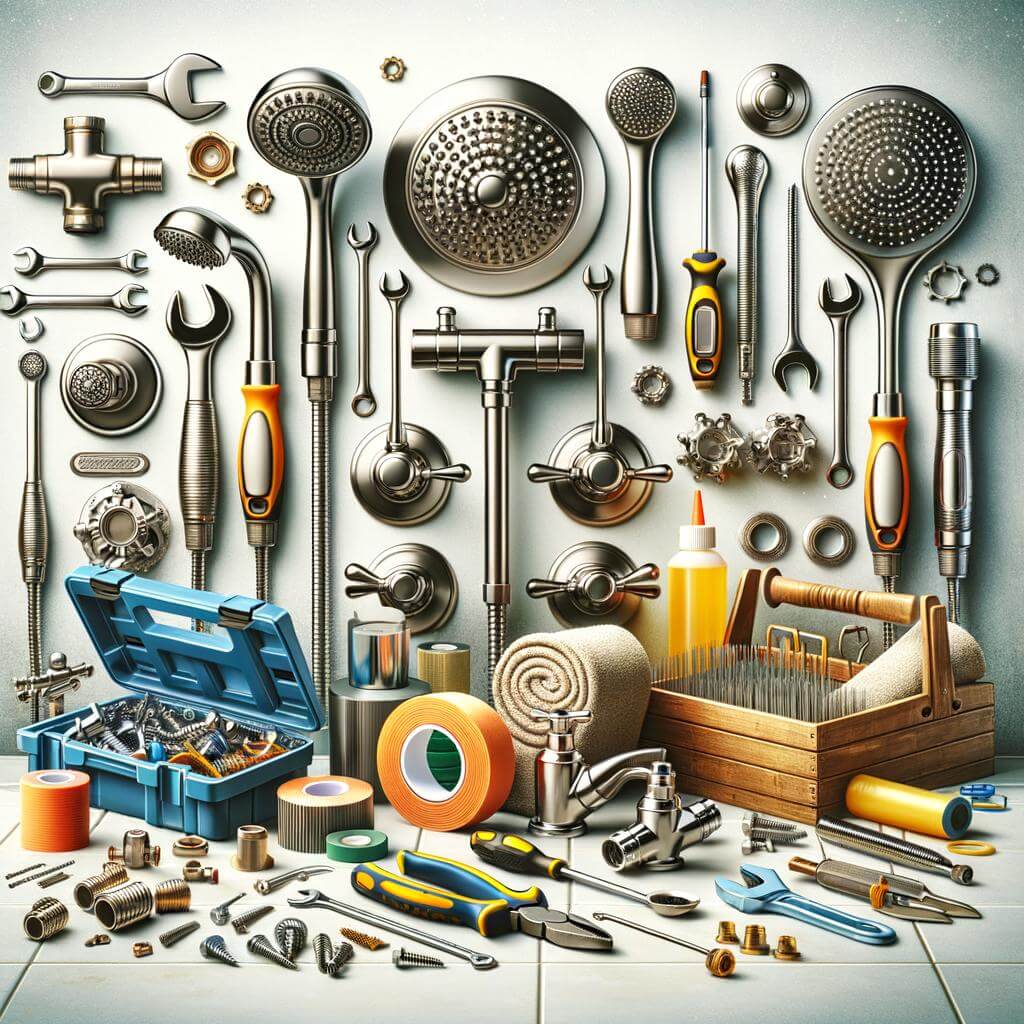
Understanding the Basics of Shower Fixtures
Entering into the world of shower fixtures can feel overwhelming, with an array of options that may leave you confused. Yet, knowing the basics can help to simplify the decision process. Shower fixtures essentially govern the spray of the water. The fixture can be as basic as a single showerhead, or as extravagant as a custom installation, featuring multiple sprayers aimed at different parts of the body.
One of the primary considerations in choosing a shower fixture is the type of shower experience you desire. For a basic, straightforward shower, a standard wall-mount showerhead would suffice. This option is easy to install and maintain, proving to be a cost-effective solution. For those seeking a luxurious, spa-like experience, a rain showerhead may be the right fit. Mounted on the ceiling or a wall, rain showerheads deliver a soothing, drenching downpour. There are also the innovative handheld showerheads, which offer the flexibility to use as a stationary or handheld shower.
Options Available:
Standard wall-mount showerhead – Usual, cost-effective, easy to install and maintain
Handheld showerheads – Stationary or handheld, offering flexibility in use.
It’s also essential to consider the water pressure and energy efficiency. Depending on your current shower’s water pressure, you might need to seek a showerhead that can increase the pressure. Similarly, if conserving water and reducing your utility bill is a priority, an energy-efficient showerhead would be beneficial.
Showerhead Type
Water Pressure
Energy Efficiency
Standard wall-mount
Medium
Low
Rain
Low
High
Handheld
High
Medium
Remember, not all showerheads are created equal. Each offers its unique experience, water pressure, and efficiency levels. Take into account the desired shower experience, and make a decision that brings both comfort and efficiency.
Starting Point: Is Your Shower Fixture Ready for a Change
Whether it’s a leaking showerhead, outdated fittings, or just a desire for a fresh look, there are plenty of reasons to change your shower fixture. But before you jump headlong into the process, it’s essential to take stock and evaluate the current setup. Start by testing the water pressure and inspecting the condition of your existing hardware. This inspection will help identify any hidden issues like worn-out pipes or faulty valves that might complicate the fixture replacement.
Your fixture’s compatibility with your existing plumbing system is crucial. Not all showers are created equal! Choosing a fixture that’s incompatible with your current setup can lead to unnecessary headaches and additional costs. When selecting a new shower fixture, keep the following factors in mind:
Type of shower: Is it a walk-in, over-bath, or wet room shower?
Water system: Which type do you have – combi boiler, gravity-fed, or unvented? This information will guide you in choosing a suitable fixture.
Water pressure: Your shower’s performance depends largely on your home’s water pressure.
Fixture Type
Suitable for
Mixer shower
High-pressure systems
Electric shower
Lower-pressure systems
Thermostatic showers
Households with varying water temperatures
By addressing these initial considerations and doing your homework, you can help ensure a smooth transition to your new shower fixture. Remember, investing time in the planning phase can save you from potential pitfalls down the road. So, use these pointers as a guide to start your fixture replacement journey on the right note.
Important Factors to Consider When Changing Shower Fixtures
Type of Shower Fixture
Pros
Cons
Handheld Showerheads
Flexibility, great for kids & pets
May require more cleaning
Overhead Rain Showerheads
Stylish, full body coverage
Higher water flow rate
Shower Towers
Multiple water outlets, luxury feel
More expensive, requires larger space
When remodeling your bathroom, or just updating the look, selecting the right shower fixture can have a considerable impact. Start by considering the type of shower fixture you prefer. There’s a wide range of options, from basic one-setting models to high-end, multi-setting versions with a variety of spray options. The shower fixture should also match the overall style of your bathroom. Modern brushed steel fixtures might not fit into a vintage or country-style bathroom. Another major factor is the water pressure in your home. Some showerheads can increase water pressure, offering you a more refreshing shower, but this could also lead to higher water usage.
Next is the installation process. Some shower fixtures can be easily swapped out, requiring only a few basic tools and no plumbing skills. Others might necessitate the assistance of a professional plumber. The cost of installation should figure into your overall budget. Consider the quality and durability of the materials as well. A cheap plastic model might save you money in the short term, but it could crack, leak, or break sooner than a metal one. Also, do not forget to consider the water usage. Showerheads with a high flow rate can use more water, which can potentially increase your utility bills. Therefore, looking for showerheads with a WaterSense label, implying they meet EPA criteria for water efficiency, can be beneficial.
Tips on Choosing the Right Shower Fixture
Changing your shower fixture can do wonders for your bathroom’s look and function. But with an array of options to choose from, deciding on the perfect one can be an overwhelming task. Here are a few tips to help you choose the right shower fixture.
Understand Your Needs: Before you start shopping around, it’s essential to know what you want. Is a handheld shower more suitable, or do you prefer a wall mount? Do you need a waterfall shower, or a rain shower head is enough for you? Decide upon these factors before moving ahead.
In addition, you should also consider your budget and lifestyle. If you prefer long, relaxing showers, it may be worth investing in energy-efficient fixtures. Saving on the water bill can contribute to the ROI of the remodel. Are there any specific features you need like thermostatic controls, different flow patterns, or a certain aesthetic?
Do a Thorough Research: Before you opt for any shower fixture, do detailed research about the brand, its reviews, and durability. Remember, reliability and quality should never be compromised for cost. In the same vein, do not overlook the warranty period of the fixture. It’s always better to choose a product with a longer warranty period.
Factor
Considerations
Material
Choose from metal, brass, or plastic. Metal and brass are long-lasting but pricey. Plastic is affordable but may not last as long.
Finish
Decide if you want polished (shiny), brushed (subtle shine), or matte (no shine). Your choice should complement other bathroom fixtures.
Installation
Some fixtures are easy to install yourself, while others may require a professional plumber.
Remember, the right shower fixture for you primarily depends on your preferences, budget, and existing bathroom design. So, weigh all these factors before making the final decision. Happy shopping!
Step by Step Guide to Changing Shower Fixtures
In order to upgrade your shower fixtures, having a game plan is essential. Knowledge of the process can save you time, effort and costly mistakes. So, let’s kickstart the process with a careful evaluation of your existing fixtures. Take into account measure of shower head’s arm pipe, to ensure you purchase the correct size replacements. Be aware of the water pressure in your home. If it’s low, a fixture designed to operate under high pressure won’t function as well. Also, determine if your shower valve needs to be replaced, which can be trickier and require more advanced plumbing skills.
Having completed your preparatory work, you can now proceed to the actual process of changing your shower fixtures. Here is a simple step by step guide:
Switch off the Water Supply: This is absolutely crucial to avoid any mishaps. You can typically find the shut off valve in the basement or on an outdoor wall in a utility area of the house.
Remove Old Fixtures: Use an adjustable wrench to detach the old fixtures. Be careful not to cause any damage to the pipes in the process.
Install New Fixtures: Apply Teflon tape to the threads of the new fixtures before screwing them in. Make sure to follow the manufacturer’s instructions.
Test your New Shower: Turn the water back on and test out your new fixtures. Check for leaks and make sure each setting on your new shower head functions properly.
Item
Description
Tape Measure
For measuring the size of shower head’s arm pipe
Adjustable Wrench
To detach the old and attach the new fixtures
Teflon Tape
Used to prevent leaks in plumbing joints
Strongly recommended to have these items at hand before starting the project. Getting your hands on appropriately sized fixtures and the right tools will make the process much easier and ultimately, successful.
Expert Recommendations for Maintaining a New Shower Fixture
Maintaining a new shower fixture doesn’t have to be a daunting task. With proper guidance and helpful tips from experts, you can extend the lifespan of your fixture and keep it running efficiently. Here are a few expert recommendations that can help you get the most out of your new shower fixture.
Regular Cleaning: One of the most important tips to maintaining your fixture is regular cleaning. This can prevent the build-up of soap scum, grime, and mineral deposits, which can cause the fixture to lose its shine and even affect the water flow. Use a mild detergent and a non-abrasive tool such as a soft cloth or sponge to clean the fixture. Close attention should also be given to cleaning the shower head, as mineral build-up can significantly deter its performance.
Prevent Leaks: Leaky shower fixtures can be a nuisance, not to mention the wastage of water and the potential for water damage. Ideally, all connections should be checked regularly to prevent any leaks or drips. It is also recommended to invest in good quality seals to keep your fixtures leak-free.
Expert Recommendations
Why it’s Important
Regular Cleaning
Prevents build-up of grime and can improve water flow
Prevent Leaks
Saves water, prevents potential water damage
Maintaining a shower fixture isn’t just about cleaning and preventing leaks. The water pressure is another aspect that should be checked regularly. Check Water Pressure: If the water pressure is too high, it could lead to premature failure of your fixture. A water pressure regulator can be installed to manage water pressure levels. Additionally, a yearly check-up of internals like the valve system, the waterway, and the spray face should be a part of your maintenance routine.
Last, but not least, investing in quality fixtures will ultimately pay off in the long run. Higher quality fixtures generally have better build quality, lasting finishes, and typically come with a longer warranty. While they might have a higher upfront cost, they could save you money in the long run by lasting longer and requiring fewer repairs.
The Conclusion
In conclusion, changing your shower fixture can be an exciting home improvement task, providing not only a visual facelift for your bathroom but also potentially improving the quality of your daily shower experience. With the insider tips, expert insights, and practical advice shared in this article, you are now well-equipped to make an informed decision before proceeding with your shower fixture upgrade. Consider factors such as the type, quality, style, water efficiency and installation process of the shower fixture to meet your specific needs and preferences. Always remember, the value comes not only from the aesthetics of your new fixture but also from its functionality and longevity. Happy renovations!
Hi my name is Angel Muro I established Comfort Time Heating & Cooling driven by my deep passion for HVAC and a sincere commitment to improving our customers' comfort. My initial fascination with plumbing, heating, and air conditioning systems has evolved into a dedicated profession, emphasizing the significance of both technical expertise and a warm, customer-centric approach. This blog aims to provide valuable insights and information. While some pages provide details about our services, my primary goal is to share real-life experiences that can assist you in various HVAC matters.
Have A Plumbing, Heating Or Air Conditioning Project & You Can Us Our Help?
Comfort Time Plumbing Heating & Cooling Servicing Southern California
At Comfort Time Plumbing Heating and Cooling, we are your trusted HVAC & Plumbing experts serving Southern California. With years of experience in the industry, we take pride in delivering top-notch heating and cooling solutions tailored to the unique climate and needs of the region. Whether you're in the coastal areas, inland valleys, or urban centers, our team of dedicated professionals is here to ensure your year-round comfort. We stay up-to-date with the latest technologies to offer energy-efficient solutions, and our commitment to customer satisfaction means you can rely on us for prompt and reliable service. When it comes to your HVAC needs in Southern California, Comfort Time is the name you can trust.