Welcome fellow explorers and history enthusiasts to our enlightening post, ”Exploring the History of Southern California’s 605 Freeway”. This descriptive narrative not only delves into the intriguing background of this iconic roadway but also reflects the evolutionary trajectory of Southern California itself. As we unravel the colorful chronicles and the extensive journey of this freeway, you will gain valuable insights into California’s progressive ethos, connections between various cities, and insights into how transportation has shaped our societies and neighborhoods. Whether you’re a student, a history enthusiast, or a curious local, this post serves as an enriching source of information that will support academic projects, enhance your knowledge pool, or simply feed your curiosity about your local surroundings. Step into an exciting journey back in time, uncovering facts and figures that make the 605 Freeway more than just a stretch of asphalt and concrete. This is not just a story of a freeway; it’s the tale of Southern California!
Unveiling the Origins of the Iconic 605 Freeway
The 605 Freeway, officially christened as the San Gabriel River Freeway, winds its way through the heart of Southern California. Named after the San Gabriel River, this vital artery of transportation spans over 27 miles, connecting the powerhouse counties of Los Angeles and Orange. Tracing its early beginnings back to 1964, the Freeway has had an active part in shaping the transport dynamics of the region.
The Freeway was conceived as a part of California’s expansive highway system under the jurisdiction of the California Department of Transportation (Caltrans). Its origin can be attributed to the local leaders’ vision of creating a seamless transportation network, signaling a new era of growth and connectivity for Southern California. Although several sections of the Freeway were open by 1964, its completion did not occur until 1971, marking seven years of meticulous planning, designing, and construction.
Year of Conception: 1964
Completion Year: 1971
Length: Over 27 Miles
Served Counties: Los Angeles and Orange
Influenced by a mid-century mindset that cherished speed and modernity, the design of the Freeway embodies the optimism of the Space Age. The engineering marvel was celebrated for its innovative use of grade separations, direct access ramps, and state-of-the-art traffic control devices. With broad lanes and modern safety features, it was hailed as a model of freeway design.
Design Highlights:
Grade separations, Direct access ramps, Advanced traffic control devices
Safety Features:
Broad lanes, Modern safety amenities
Significance:
Model of Freeway design, Embodiment of mid-century optimism
Significant Milestones and Challenges during Construction of the 605 Freeway
The construction of Southern California’s 605 Freeway, also known as the San Gabriel River Freeway, was a process studded with significant milestones and complex challenges. One of the significant achievements during its construction was that the freeway connected five separate counties, providing a much-needed transportation link between them. These counties include Los Angeles, Orange, Riverside, San Bernardino, and Ventura. Along the freeway, significant infrastructures like the Pico Rivera Sports Arena and the Whittier Narrows Recreation Area were developed, strengthening the local economy and providing recreational facilities for the citizens.
However, the construction was not without its hurdles. One primary challenge was related to the displacement and resettlement of residents. These relocations were necessary to make way for the freeway, which led to various social, emotional, and financial implications for the affected families. Moreover, the sheer scale of the project, spanning over 27 miles and requiring intricate technical skills and understanding, posed other significant challenges.
Significant Milestones
Challenges
Connected five counties
Displacement and resettlement
Development of major infrastructures
Scale of the project
To solidify this understanding, it’s also important to note the unforeseen environmental impacts. The construction resulted in loss of wildlife habitats and inevitable changes to the ecosystem surrounding the freeway. This sparked conversations about the importance of sustainable development and responsible construction practices, forcing the industry to reconsider their methods and impacts.
Unique Architecture and Design Aspects of the 605 Freeway
The 605 freeway, also known as San Gabriel River Freeway, boasts a variety of fascinating architectural and design aspects that sets it apart from other highways in Southern California. The 605 freeway was constructed during the 1960s, a period influential in shaping modern design and architectural innovations. The freeway’s alignment deliberately parallels the San Gabriel River, with several of its interchanges and bridges architected to cater for the region’s frequent flooding.
With its length extending to 27 miles, the 605 Freeway has several unique structural designs at the interchanges. One notable example is the ‘flyover-style’ connector ramps, for instance, the ramps connecting I-605 with I-10. These ramps exhibit modern engineering techniques of the ’60s, favoring vertical stack designs over older cloverleaf connections. Other unique design aspects include:
High Occupancy Vehicle lanes: These lanes are designed to encourage carpooling, reducing the number of vehicles on the highway and thus the overall carbon footprint. The design of these lanes allows for easy and swift transition between mainlines and HOV lanes.
Landscaping: To complement the surrounding natural beauty, the freeway features an aesthetic landscaping design inspired by the nearby San Gabriel River.
Freeway Segment
Construction Year
I-605 and I-10
1964
I-605 and I-210
1971
I-605 and SR 22
1969
Each segment of this freeway tells a different story of the region’s growth and progress. All together, they form a vital part of the extensive network of highways that make up the Southern California landscape, a testament to the power of innovation and clever design.
Environmental Impact and Sustainability Measures Associated with the 605 Freeway
From its inception in the early 1960s, the 605 Freeway has raised substantial environmental concerns. Despite providing invaluable convenience and connectivity in Southern California, it has been tied to significant air, land, and noise pollution, disrupting the local ecosystem and impacting the quality of life for nearby residents. Roadway runoff, containing harmful pollutants from vehicles, directly seeps into adjacent lands and infiltrates the groundwater. Besides, the freeway’s noise pollution has also been a burdensome issue, affecting local wildlife and creating potential health risks for inhabitants living within the vicinity.
In response to these adverse effects, several measures have been undertaken over the years to reduce the environmental impact and promote freeway sustainability. For instance, stormwater management systems have been implemented to treat roadway runoff before it enters local water bodies or seeps into the ground. Improvements in vehicle emission standards and the growing popularity of electric vehicles have also played a crucial role in mitigating air pollution.
Velocity Increase
Noise Barrier Introduction
Wildlife Crossings
N/A
First implemented in the 1980s, these barriers help to deflect highway noise away from residential areas. They continue to be updated and expanded as part of the freeway’s ongoing development.
This includes the construction and maintenance of specialised structures that allow local wildlife to safely cross the freeway without risking collision with passing vehicles.
N/A
These crossings, developed as part of an effort to sustain local biodiversity, form an integral part of the freeway’s commitment to lessening its environmental footprint.
Efforts are continually undertaken to scrutinise and enhance these environmental safeguards, ensuring the freeway evolves with technological advances and remains a sustainable part of Southern California’s transport system.
Navigating through the Current Landscape of the 605 Freeway
Delving into the current landscape of Southern California’s famed 605 Freeway is akin to taking a journey through time. This 27-mile stretch of highway, named the San Gabriel River Freeway, has been a significant part of the region’s history. Since its inception in 1964, it has seen countless changes – some subtle, others far more dramatic.
When traversing the 605 today, one can quickly notice a dynamic quilt of neighborhoods and communities it threads together. Starting from its southern junction with the I-405 in Seal Beach, it seamlessly connects you to cities and boroughs including, but not limited to, Long Beach, Cerritos, and Whittier, till the northern tip touching the Foothill Freeway (I-210) in Duarte.
605 Freeway Intersections
City Names
I-405 junction
Seal Beach
I-10 intersection
Baldwin Park
I-210 junction
Duarte
Not just this, the 605 Freeway also plays a critical role in connecting the region to a host of educational, cultural, and economic hubs. From serving busy professionals commuting to bustling downtown Los Angeles, to students heading to institutions like the Cerritos Community College and Whittier College, it exemplifies Southern California’s characteristic blend of energy and opportunity. It’s also a commercial lifeline, linking the ports of San Pedro Bay with the sprawling LA Basin, strongly contributing to the local economies.
While it’s undeniable that the 605 Freeway has changed in tandem with the region’s landscape over the years, its role as a vital artery within Southern California’s transportation network remains consistent. It is a testament to the area’s evolution and a vital link that shapes the daily life of many Angelinos.
Future Perspectives and Recommendations for the Southern California’s 605 Freeway
Looking forward to the future of 605 Freeway, there are several significant opportunities for improvement that can greatly enhance commuting experience. With the increasing population in Southern California, it has become more vital than ever to develop strategic methods to manage the rising demand for effective transport channels.Thus, it is recommended that government and related organizations prioritize implementing highway expansions, promote public transport, encourage carpooling, and adopt smart technologies.
Highway Expansion: The expansion of additional lanes would alleviate traffic congestion by improving the freeway’s capacity.
Promote Public Transport: By encouraging more people to use public transport, we can reduce the number of cars on the road.
Encourage Carpooling: Carpooling is an eco-friendly and practical way to lessen the volume of traffic.
Adopt Smart Technologies: Technologies such as Intelligent Traffic System (ITS) and other intelligent transport systems can help manage traffic in a more efficient way.
Not only will these recommendations improve road efficiency, but they also offer various socio-economic benefits. They promote sustainability, contribute towards a cleaner environment, and make commuting more cost-effective. The suggestions will also play a vital part in the larger battle against global warming and air pollution. The next table presents a summary of the necessary steps to take our freeway system to a better future:
Action
Benefit
Highway Expansion
Alleviate Traffic Congestion
Promote Public Transport
Reduce Vehicle Numbers on the Road
Encourage Carpooling
Lowers Traffic Volume
Adopt Smart Technologies
Efficient Traffic Management
Wrapping Up
In closing, the 605 Freeway has played a key role in the development and connectivity of Southern California. Its rich history paints a picture of progress, challenge, community input, and continual change. Understanding the past indeed lends greater appreciation for the present, providing a fascinating glimpse into the region’s evolution and growth. We hope you’ve enjoyed this journey down memory lane, and next time you travel down the 605 Freeway, remember its history and appreciate its role in shaping today’s Southern California. Whatever your destination, we trust this knowledge will enrich the journey. Safe travels, and take a moment to appreciate the road that brings us all together.
Welcome all! This post presents an enlightening discussion on the ever-persistent issue of Low Home Water Pressure and focuses on the potential fault of your home’s piping system. Expert opinions and accurate facts are once again combined here, providing you with a comprehensive understanding of why this problem occurs and how it can be remedied. If you’re experiencing a decline in water pressure and are unsure why, this insightful guide could be the help you need. Dive in to learn more about how to decode the issue and the steps you can take to ensure the consistent and efficient function of your home water system.
Understanding the Basics of Home Water Pressure
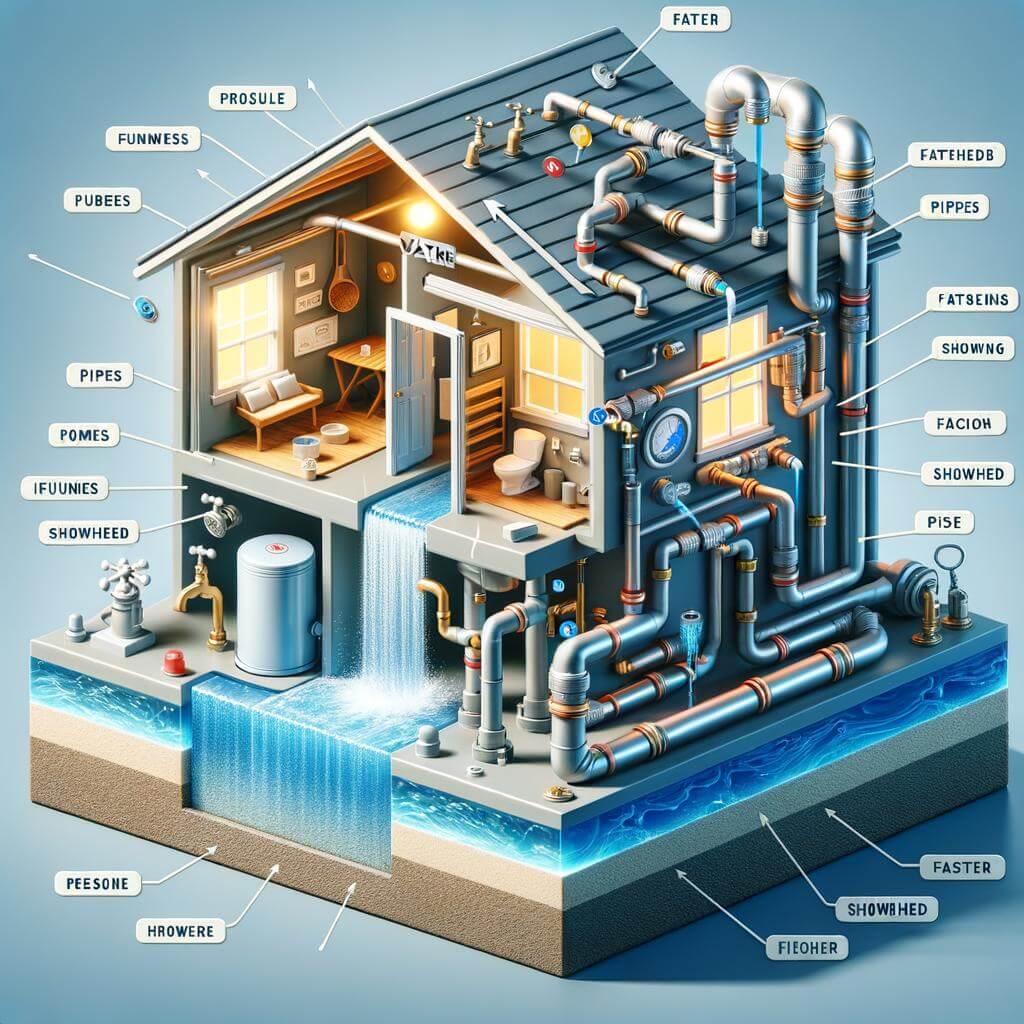
In every home, water pressure is crucial for the smooth functioning of various systems – from your shower and toilet flush to your dishwasher and washing machine. Water pressure is a measure of the force that pushes water through our mains and into your pipe. It’s the rate at which water flows from taps and showers. For an optimal experience, a balance must be struck – not too high that it causes pipe damage, but not too low that it’s inconvenient.
Check Your Pipes: Pipes can become clogged over time with mineral deposits or even break due to wear and tear. This can significantly reduce your water pressure. Regular maintenance and ensuring your pipes are adequately insulated to prevent freezing in winter can help prevent low pressure.
Pressure Regulators: These devices control the pressure of water coming into your home. If it breaks or fails, it could lead to low water pressure. The regulator is usually found on the outside of your home where the main water line enters or in the basement.
Main Shutoff Valve: This is the main valve controlling water flow into your house. If it’s not fully open, it can cause a drop in water pressure. Check that it’s completely open to ensure optimal water pressure.
Issues with your plumbing system can often be the root cause behind low water pressure in your home. However, the problem occasionally may be with the municipal water supply, especially if you live in an area with low water pressure. Seek help from a professional plumber if the problem persists, to diagnose and efficiently solve the issue for better water pressure.
Situation
Possible Causes
Suggested Solutions
Low water pressure in the entire home
Blocked pipes, failed pressure regulator, partially closed main shutoff valve
Professional plumbing inspection and repair
Low water pressure in a particular area
Mineral accumulation in that part of plumbing, localized pipe damage
Cleaning or replacement of the problematic part
Detecting the Signs of Low Water Pressure
One of the key indicators of low water pressure in your home can be a significant reduction in flow rate. This means that the water coming out of your faucets or showerhead is much less than what it used to be. If you notice that your water is taking a longer time to fill a pot or other container, it’s a clear symptom of low pressure. Slow filling of toilets or washing machines is another telling sign. Additionally, a diminished spray in the shower indicates a dip in water pressure.
Besides the obvious reduction in water flow, other signs of low water pressure can involve unusual noises or vibrations in your plumbing system. When your water pressure is lower, your pipes may start to vibrate and hum, producing a noticeable noise. If you observe this along with a reduction in water flow, it’s time to take action. Also, the occurrence of sporadic bursts of water whenever you turn your taps on, known as water hammer, can be a sign of pressure problems.
Noises and Vibrations: If your pipes make odd humming or vibrating noises, it’s likely due to low water pressure.
Water Hammer: This refers to the loud, thudding noise that your pipes make when you turn the water on. It’s a sign that water pressure is too low in one spot and too high in another.
Reduced Flow Rate: If your water takes too long to fill a pan or the shower pressure is too low, it’s a clear indication of low water pressure.
Sign
Explanation
Noises and Vibrations
Pipes make odd humming or vibrating noise
Water Hammer
Loud, thudding noise when water is turned on.
Reduced Flow Rate
Water takes too long to fill a pan or the shower pressure is too low
Examining Pipes as the Culprit Behind Low Water Pressure
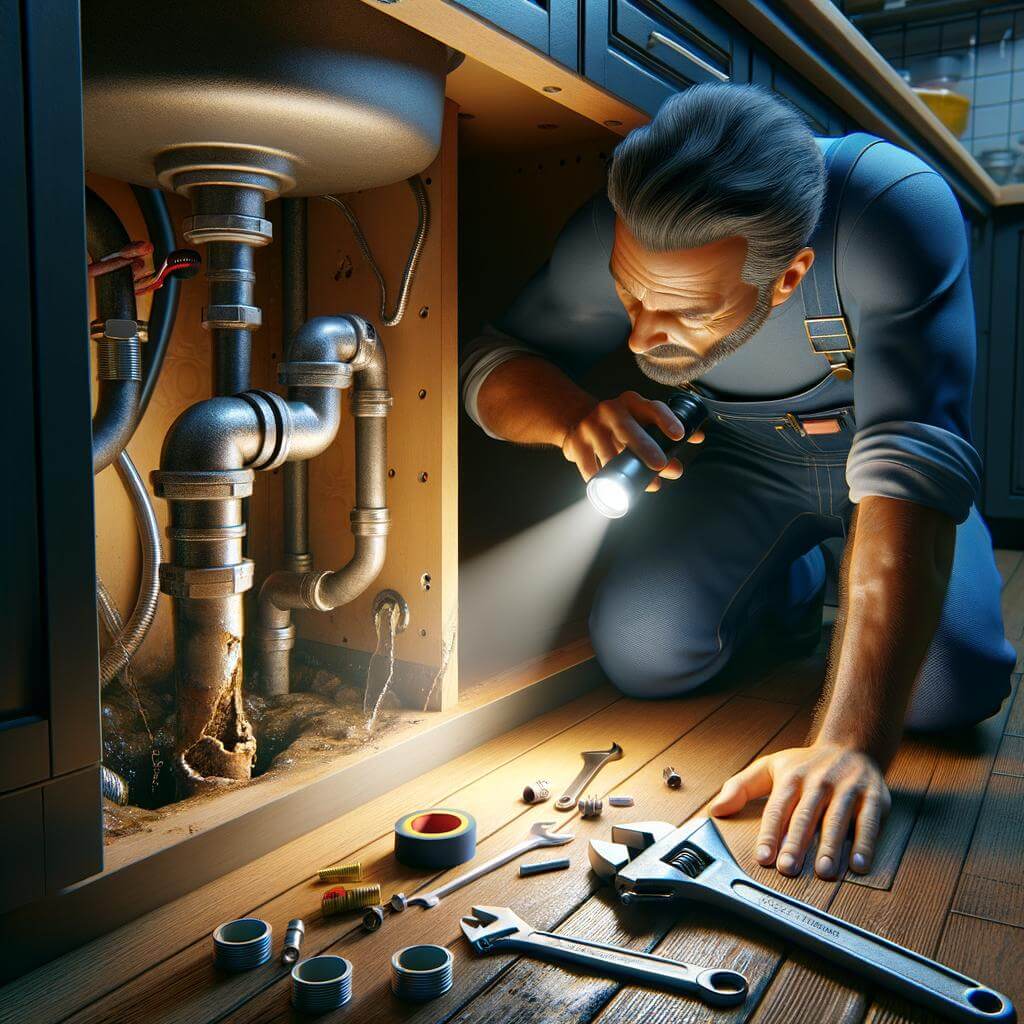
When water pressure is less than optimal in your home, one of the main suspects commonly pointed at is your home’s pipes. As plumbing materials age, corrosion accumulates inside them, leading to a smaller passageway for water to travel. This causes a reduction in the amount of water flowing out of your faucets, showerheads, and appliances, thereby reducing the water pressure. If your home is older, with pipes that have not been replaced for decades, this could indeed be the reason for low water pressure.
Moreover, the water pressure can be affected by the design of your plumbing system. If the pipes are not laid out and connected correctly, they can create bottlenecks in the water flow. Other than these common issues, below are a few more pipe-related reasons for low water pressure:
Leaks in the Pipes: Even a small leak can significantly affect your water pressure.
Mineral Deposit Buildup: These deposits can reduce the internal diameter of the pipe, decreasing water flow.
Incorrect Pipe Size: If the pipes’ diameter is too small, it doesn’t allow a high volume of water to pass through.
Each of these instances can be addressed to improve your home’s water pressure. However, it is best to seek professional help to identify and fix these issues to avoid further complications down the line.
Common Pipe Problems that Lead to Reduced Water Pressure
When you have low water pressure in your home, it might be due to certain problems occurring in your pipes. These problems can range from pipe corrosion to leakages, thereby affecting the flow of water in your home. Corroded pipes can reduce the diameter of the pipe, leading to less water being able to flow through. Leakages, on the other, can cause water to spill over and not reach its intended destination, which could be your sink or shower.
Pipe Corrosion: This is the result of the chemical reaction between the pipe material and the water, which can eventually lead to rust and corrosion. As the pipe wears away over time, it can restrict water flow and lead to lower water pressure.
Leaks: If your pipes are leaking, not only are you wasting water, but this could also be the reason for your low pressure. When water continuously seeps out, it reduces the amount of water that reaches your taps.
Sediment Build-up: Over time, minerals and other particles in the water can accumulate inside pipes. This build-up can obstruct the flow of water, causing reduced water pressure.
Pipe clogs: Clogs represent another common problem with pipes. This can be caused by a lot of things from a build-up of hair, grease, food waste and even small objects, causing blockages.
Pipe Problem
Effect
Corrosion
Reduces the diameter of the pipe, affecting water flow
Leaks
Water loss leads to decreased pressure
Sediment Build-up
Obstructs water flow, causing reduced pressure
Clogged Pipes
Blockages disrupt water flow
Ensuring that your pipes are routinely checked and repaired when necessary can greatly help in enhancing your water pressure. A licensed plumber will be able to diagnose and rectify these issues, providing you with the optimum water pressure that your home needs.
Expert Techniques and Tools for Diagnosing Pipe Issues
When it comes to diagnosing pipe issues, there’s a wealth of cutting-edge tools and expertise. Video pipe inspection is an incredibly useful technique. A camera is guided along your home’s plumbing system, allowing plumbers to identify blockages, damage, and other common issues. They provide detailed feedback and can help pinpoint minor problems before they evolve into costly repairs. Hydrostatic pressure tests, on the other hand, can be a great way to identify leaks. Through this process, the system is pressurized with water to check for drops in pressure that can indicate leak presence.
Furthermore, there is a wide selection of high-tech professional tools that plumbers utilize in their pipe diagnostic arsenal. Pipe locators are extremely efficient for finding concealed pipes without necessitating excavation or drilling. They use radio frequencies to detect pipes even behind walls and buried underground. Next in line are the pipe and cable locators, these devices are able to locate non-metal pipes and cable lines, allowing plumbers to find and diagnose issues without any unnecessary destruction.
Technique/ToolUseVideo Pipe InspectionVisual analysis of interior pipe problemsHydrostatic Pressure TestIdentification of leak presence through pressure variationPipe LocatorsTracing underground and concealed pipesPipe and Cable LocatorsFinding non-metal pipes and cable lines along with issues
Note: It is best to call in specialists to use these tools and techniques as improper use might cause further damage to your plumbing system. A blend of technological advancements and expert knowledge can help diagnose and address your low water pressure issues rapidly and efficiently.
Providing Effective Solutions to Restore Optimal Water Pressure
Identifying the Underlying Cause
If your home is experiencing low water pressure, the first step is to identify the underlying cause. It could be due to build-up of minerals and sediment in your pipes, corrosion over time, or even an issue with the water main line. In some cases, erroneous water pressure reductions are a result of faulty plumbing design or simple wear and tear. It’s essential to pinpoint the root cause before deciding on the most effective solution.
Mineral/Sediment build-up: Over time, your pipes may accumulate deposits of minerals or sediments, which can obstruct the water flow.
Corrosion: Older pipes tend to corrode over time, which narrows down the inner surface area, causing reduced water pressure.
Water main issues: If the water main supplying water to your house is having issues or is under repair, it can affect your water pressure.
Flawed plumbing design or wear and tear: Sometimes, the placement of pipes or the gradual deterioration of hardware can lead to water pressure issues.
Finding the Correct Solution
Upon identifying the cause of the problem, the appropriate solution can then be determined. If there’s a mineral build-up, the pipes may need to be cleaned or replaced. Corrosion could also require pipe replacement, specifically with corrosion-resistant materials. If the issue is related to the water main or a flaw in the plumbing design, it would be best to consult with a professional plumber.
The following table presents some common solutions to restore optimal water pressure.
<table class=“wordpress_table_class”>
ProblemSolutionMineral/Sediment build-upPipe cleaning or replacementCorrosionReplacement with corrosion-resistant pipesWater main issuesProfessional consultationFlawed plumbing designProfessional consultation and possibly re-design
Remember, solving water pressure issues isn’t just a matter of functionality, it’s about ensuring the longevity of your water supply system and promoting healthier living conditions.
To Wrap It Up
In conclusion, while various factors may contribute to low home water pressure, it’s crucial not to overlook the potential role of faulty pipes. They may be aging, corroded, clogged, leaking, or improperly sized, all of which can significantly hamper water flow. Identifying and addressing these issues requires a certain level of expertise. So, don’t hesitate to consult with a professional plumber if you’re dealing with persistent water pressure problems. They can accurately diagnose the problem, recommend suitable options, and carry out necessary repairs or replacements promptly and efficiently. Remember, keeping your plumbing system in prime condition is essential to ensure a steady water supply in your home. It might seem like a daunting task initially, but with a little bit of learning and professional help, you can efficiently overcome the low water pressure dilemma. Armed with this new knowledge, you can now take proactive steps towards improving water pressure, thereby elevating your overall household convenience. Knowledge is, indeed, power!
Welcome to our new post, “Why Your Shower Takes Long to Heat Up & How to Fix It.” Do you ever find yourself shivering in the early morning, waiting impatiently for your shower to warm up? Are you tired of wasting time while you could be doing something productive? This post is about to turn your world around. Bring an end to the challenging moments of enduring chilly shower water. Our expert advice, combined with verified facts, will guide you through the reasons your shower takes time to heat up. And it doesn’t stop there! We also have practical, user-friendly solutions that you can utilize to fix the problem. This educationally-focused guide aims to provide significant insights not only to identify the root cause but also to address it effectively. Read on, and seize the opportunity to make your everyday routine more pleasant and efficient.
Understanding Why Your Shower Takes Longer to Heat Up
We’ve all been there: you step into the shower expecting immediate warmth, only to be met with an icy blast of water. There are several reasons why your shower may take longer to heat up than it did before, and they’re often easily remedied once identified. If left unattended, however, these issues can potentially lead to more serious problems such as unnecessary energy consumption or even damage to your water heater.
One common problem lies in the distance between your water heater and your shower. Simply put, the farther the water has to travel, the longer it will take to heat up at the spigot. In homes with a distant water heater or large properties, this can noticeably delay the arrival of hot water. Another culprit could be cold pipes. Particularly in the colder months, it takes time for the hot water to warm the cold pipes as it travels to your shower.
Sediment buildup in your water heater can also cause a delay. This happens when minerals in the water settle at the bottom of the tank, creating an insulation layer and making your water heater work harder to heat the water. Lastly, if your shower still takes a long time to heat up despite being close to the water heater and having clean pipes, it might be time to check your water heater’s thermostatic mixing valve, which can fail over time and disrupt the flow of hot water.
Problem
Potential Solution
Distance from water heater
Consider installing a recirculating pump
Cold pipes
Insulate pipes to keep them warm
Sediment in water heater
Flush and clean your water heater
Failing thermostatic mixing valve
Replace the valve
By assessing and addressing these potential problems, you can significantly decrease the time it takes for your shower to heat up, saving you time and making your morning routine more pleasant. If you’re not comfortable doing these checks and fixes yourself, getting help from a professional plumber might be a good idea.
The Science Behind Water Heating Systems
Physical Factors Influencing Your Shower’s Heat-Up Time
The time it takes for your shower to heat up depends on multiple factors. Some are related to your dwelling’s specific layout, while others are directly tied to your particular water heating system’s design and condition. If you find yourself waiting an unusually long time for gushes of warm water to arrive, one or more of these factors may be in play:
Location of the Water Heater: Distance plays a significant role. If your water heater is situated far from your bathroom, your shower will take longer to heat up as the water must traverse a longer path.
Water Heater Size: Smaller heaters can’t produce as much hot water as larger ones, meaning you may run out of hot water more quickly or notice a slower heating time.
Condition of the Water Heater: Over time, sediment buildup occurs in water heaters, reducing their heating efficiency and slowing the process.
Design Mechanism of Water Heaters and Solutions
Water heaters operate on simple scientific principles. Essentially, the heater warms the water and then stores it until you’re ready for a warm bath or shower. The time it takes to heat the water is determined primarily by the type and condition of the water heater you have installed. Here are some ways to address the issue:
Upgrade Your Water Heater:
This might be costly, but it guarantees you a speedier heating process and more hot water. Opt for a ‘Tankless Water Heater’ that heats water on demand, reducing wait time.
Maintenance and Care:
Regular maintenance like flushing out the water heater annually helps to remove sediment build-up, enhancing efficiency and reducing wait times.
Rerouting Plumbing Lines:
If distant plumbing routes cause your delay, you can have a plumber reroute these lines to shorten the distance water travels from the heater to your shower.
By understanding these factors and solutions, you can implement effective measures to ensure your shower heats up faster, giving you a warm escape from the morning chill faster.
Common Issues Leading to Delayed Hot Water in Showers
Many homeowners encounter the frustrating experience of preparing for a warm shower only to be met with frigid water temperatures. There could be numerous reasons as to why your shower isn’t producing hot water immediately. One crucial factor to consider is the distance between your shower and the water heater. The further your shower is from the heater, the longer the hot water will take to reach it. Long pipe runs can cool the water as it travels through. This issue gets amplified if those pipes run through unheated spaces like basements or garages.
Another typical problem leading to this delay is the water heater’s capacity. An undersized water heater can struggle to keep up with high demands, causing you to wait for it to heat up enough water. It’s also crucial to consider the type of water heater you have. Tankless heaters can take longer to produce hot water as they heat water directly without the use of a storage tank.
Mineral buildup in your pipes can also lead to delayed hot water in showers. As water travels, it leaves behind minerals that build up over time. This buildup can restrict the flow of water, causing it to take longer to heat your shower.
Lastly, your shower mixing valve could be faulty. This valve mixes the hot and cold water together to create the perfect shower temperature. If it’s broken or isn’t working correctly, it can delay the hot water.
Potential Issue
Solution
Distance between shower & water heater
Relocate water heater or install a circulation system
Water heater’s capacity
Upgrade water heater or manage hot water usage
Type of water heater
Consider switching to a tank water heater
Mineral buildup in pipers
Use a water softener or regularly clean pipes
Faulty shower mixing valve
Replace or repair the mixing valve
Effective Solutions to Speed Up Your Shower’s Heating Time
Understanding why your shower takes longer to heat up requires understanding how your home’s water heating system works. Your water heater has a tank where it stores hot water for whenever you need it. The time it takes your shower to get warm is directly related to how quickly your water heater can heat up the water. So if your shower is taking too long to heat up, that could indicate something is wrong with your water heater or the plumbing leading to your shower.
Troubleshoot and Resolve the Issue
Insulation: Exposed pipes can lose heat during winter. Insulating these pipes can reduce heat loss and speed up your shower’s heating time.
Scale Buildup: Scale buildup can decrease the efficiency of the water heater. Flushing the tank would remove the sediment and improve its performance.
Temperature: The thermostat for your water heater could be set too low. Increasing the temperature can speed up the heating time but remember to consider safety and energy efficiency.
Upgrade: If your water heater is more than a decade old, it might be time for a new one. Tankless water heaters heat water on demand and alleviate the waiting time for hot water.
Your best strategy in solving hot water problems may depend greatly on the cause of the issue.
Solution
Cost
Effectiveness
Insulation
Low cost
Medium-High
Descale Heater
Medium cost
Medium-Low
Adjust Temperature
No cost
Medium
Heater Upgrade
High cost
High
Don’t let a sluggish water heater slow down your day. By identifying the cause and taking the appropriate action, you can significantly reduce your shower’s heating time.
Expert Tips to Maintain Your Water Heater for Quick Heating
If you’ve ever groaned in frustration because your shower is taking forever to heat up, there could be a number of reasons. Primarily, it might involve the distance the hot water must travel from your water heater to your shower or the sediment build-up in the water heater tank. Perhaps, its a sickly water heater simply struggling to produce enough hot water. For these issues, you can follow these expert tips to maintain your water heater for quick heating:
Regularly Flush the Water Heater: Over time, mineral deposits from the water settle at the bottom of your heater. This sediment forms a barrier between the burner and the water, making your heater work harder and longer. Regularly flushing your water heater helps to wipe out these sediments, thereby improving its efficiency and lifespan.
Insulate Your Heater: Consider wrapping your water heater tank in an insulating blanket. This slows heat loss, keeping the water hotter for longer periods.
Lower Your Heater’s Thermostat: Maintaining your water heater’s thermostat at 120 degrees instead of 140, not only saves energy but also slows down mineral build-up and corrosion in your water heater and pipes.
It’s also important to recognize the signs your water heater might be failing. Here’s a handy table to guide you:
Symptoms
Possible Problem
Water is not hot enough
Thermostat issue
Low water pressure
Sediment build-up
Rusty colored water
Tank corrosion
Unusual noises
Sediment in tank
Water leaks
Possibly a damaged or loose part
When some or all of these signs occur, you should consult with a professional to inspect your water heater. If it’s aged more than 15-20 years, it might be time to replace it.
Wrapping Up: Ensuring Your Shower Heats Up Fast All the Time
Ensuring that your shower consistently and quickly heats up can be made possible with all the above discussed tips, as well as regular checks and maintenance of your plumbing system. The key ingredients to a perpetually warm shower include: double-checking the capacity and efficiency of your water heater, making certain that your pipes are well insulated, and perhaps considering a tankless water heater if your current one isn’t performing as you’d like. A suitable maintenance schedule and being cognizant of any inconsistent heating patterns can also provide an early indication of potential issues.
However, if you find that after implementing these measures, you still face a constant struggle with your shower temperature, it may be time to call in a professional. A certified plumber can provide a full diagnostic on your system, work on complex repairs, and even provide recommendations on appropriate appliances or upgrades suited for your household’s needs. Sometimes, the issue may be as simple as needing a cleaning to remove mineral deposits. On the other hand, it could be something more serious that requires comprehensive repairs or replacements. Remember, taking prompt action on any potential problems can significantly enhance your shower’s heating efficiency.
Closing Remarks
In conclusion, facing a shower that takes too long to heat up may not only be uncomfortable but also lead to cost inefficiencies. As we’ve highlighted above, the reasons could range from outdated water heating systems to more complicated structural issues. But, fear not, the tips and tricks we’ve provided should help you diagnose and rectify the issues faster. Remember, it’s always recommended to involve a professional for more complex solutions, to ensure everything is properly installed and functioning efficiently. Your morning routine deserves an immediate, warm, and consistent shower experience, and with the right solution, you’ll get exactly that. We hope this information helps make every shower you take as comfortable and instant as possible!
Hi my name is Angel Muro I established Comfort Time Heating & Cooling driven by my deep passion for HVAC and a sincere commitment to improving our customers' comfort. My initial fascination with plumbing, heating, and air conditioning systems has evolved into a dedicated profession, emphasizing the significance of both technical expertise and a warm, customer-centric approach. This blog aims to provide valuable insights and information. While some pages provide details about our services, my primary goal is to share real-life experiences that can assist you in various HVAC matters.
Have A Plumbing, Heating Or Air Conditioning Project & You Can Us Our Help?
Comfort Time Plumbing Heating & Cooling Servicing Southern California
At Comfort Time Plumbing Heating and Cooling, we are your trusted HVAC & Plumbing experts serving Southern California. With years of experience in the industry, we take pride in delivering top-notch heating and cooling solutions tailored to the unique climate and needs of the region. Whether you're in the coastal areas, inland valleys, or urban centers, our team of dedicated professionals is here to ensure your year-round comfort. We stay up-to-date with the latest technologies to offer energy-efficient solutions, and our commitment to customer satisfaction means you can rely on us for prompt and reliable service. When it comes to your HVAC needs in Southern California, Comfort Time is the name you can trust.