Welcome to our expert guide on understanding and fixing water leaks in garbage disposals. This comprehensive guide provides an in-depth understanding of why your garbage disposal might be leaking, how to detect the leak, and most importantly, how to fix it by yourself. We’ve blended expert advice with solid facts to give you the most reliable and trustworthy content. Remember, fixing a water leak in your garbage disposal on your own not only allows you to gain a deeper comprehension of your appliance, but it can also save you both time and money on unnecessary repairs from professionals. Ultimately, it’s about empowering you to resolve common household issues efficiently and effectively. Let’s dive right in and get those leaks fixed.
Understanding the Role of Garbage Disposals
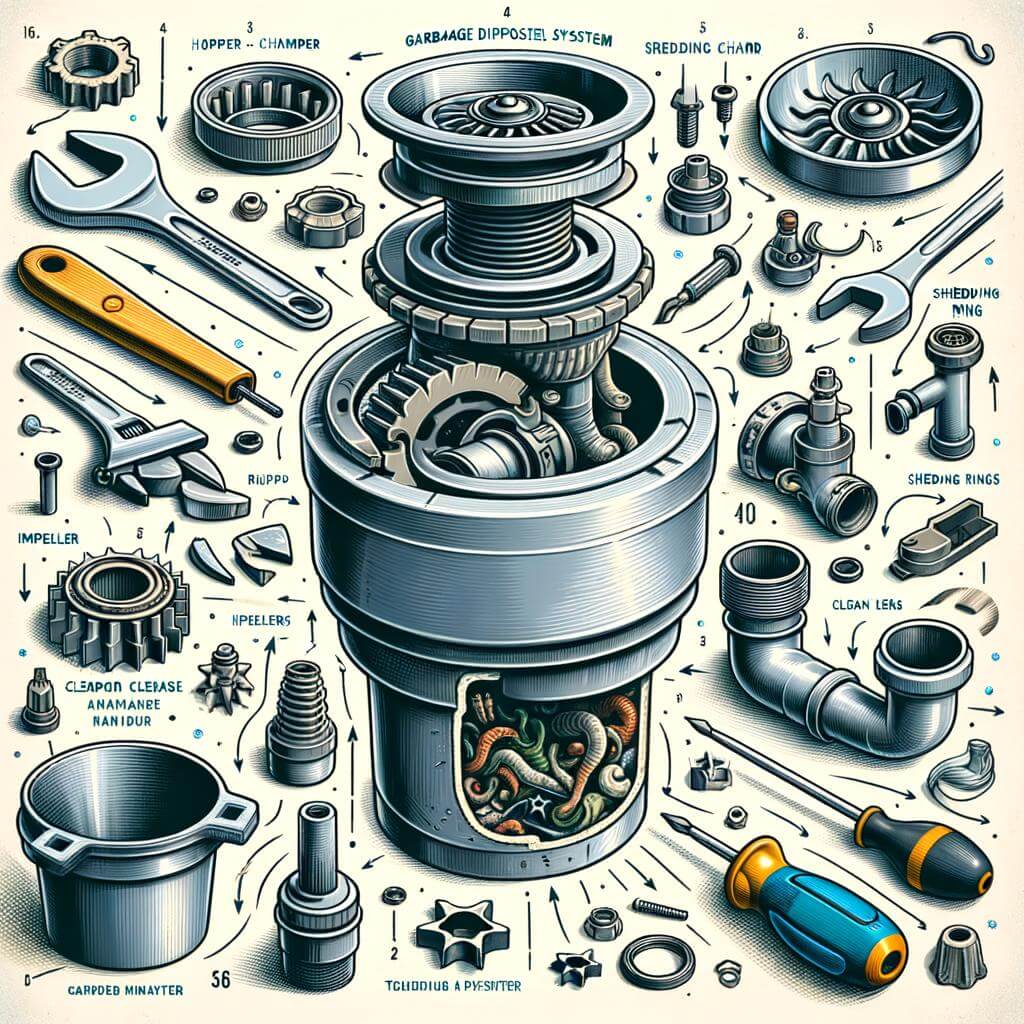
Garbage disposals are a convenient feature in many households, playing a major role in your kitchen plumbing. They are designed to do away with food leftovers by grinding them up and sending them down your drain system, hence avoiding clogs. But for such a valuable appliance, it requires proper use and regular maintenance. If not, it can easily be the source of water leaks, causing discomfort and extra cost.
Identifying the Cause of Leaks
The first step in fixing any issue with your garbage disposal is identifying the root cause. Leaks can result from various situations such as: a faulty seal at the sink flange, poor connection at the dishwasher inlet or the drain pipe, and internal leaks which occurs when the unit itself is defective or worn out.
Sink Flange: This is the top part of the garbage disposal unit that attaches it to the sink drain. If this seal is faulty or wasn’t installed properly, water could leak from the top of the unit.
Dishwasher Inlet: Some garbage disposals are connected to the dishwasher and therefore have a dishwasher inlet. A leak here could result from a faulty hose connection.
Drain Pipe: The drain pipe points out from the side of the disposal unit and channels the ground-up waste into your drain system. Looseness or damage here could result in leaks.
Unit Itself: Over time, garbage disposals can develop internal leaks due to worn-out seals or cracks in the unit itself.
The good news is, fixing these leaks can be a simple handyman project if you have the right guidance and tools, saving you the cost of professional services. In our next section, we’ll go over the ways to fix these common issues.
Identifying Common Causes of Water Leaks in Garbage Disposals
When it comes to maintaining your garbage disposal, spotting a water leak can signal a range of possible issues. Several common causes can be at the root of the problem, understanding these can expedite the repair process, while also preventing potential damage to your appliance and home.
One primary reason behind water leaks in garbage disposals is poor installation. This comes down to seals that have not been properly tightened during setup. It’s crucial to ensure all connections and seals are secured correctly. Another common cause is a damaged drain line. This happens when the line that removes the waste from the disposal cracks or breaks, eventually leading to a leak. Regular wear and tear can also result in leaking. Parts like seals and gaskets deteriorate over time and gradually fail to contain the water within the unit. Lastly, if your garbage disposal vibrates excessively during operation, this could cause a loose drain line, linking back to the installation issue mentioned earlier.
Possible Causes
Signs & Symptoms
Suggested Fixes
Poor Installation
Loose fittings, improper seal
Re-install or tighten fittings
Damaged Drain Line
Cracks or breaks in the line
Replace the drain line
Regular Wear and Tear
Deterioration of seals or gaskets
Replace seals/gaskets
Excessive Vibration
Loose drain line, unusual noise
Check and secure installation
Proactive Inspection: How to Detect Leaks Early
For a proactive approach to leak detection in garbage disposals, two essential steps must be observed. First, it’s always important to know your equipment. Familiarising yourself with the disposal’s design, components and their functions can facilitate early detection of leaks. Another step is habitual routine checks. These checks should be conducted regularly, even when there are no visible signs of leakage. Pay close attention to the disposal’s common leak points such as the sink flange, dishwasher hose, and drain pipe.
Leak Location
Symptom
Action
Sink Flange
Pooling water around sink area
Re-seal or replace Flange
Dishwasher hose
Water leaking underneath disposal unit
Check hose and replace if required
Drain Pipe
Water leaks when disposal is in use
Check connections and replace pipe if damaged
You should also listen carefully for any unusual noises when the equipment is running, as these can indicate that something’s not right. Moreover, odd smells can be indicative of lingering water thus an indication of possible leakage. Be sure to check for deterioration, especially on pipes and seals. Don’t hesitate to get expert assistance when necessary. The expertise of a professional could save you from tremendous water damage further down the line.
Remember, a vigilant homeowner is the first line of defense against water leaks in garbage disposals. Being proactive doesn’t necessarily mean that you have to fix every issue that arises. Sometimes, it can mean guiding a professional to the problem quickly, thus preventing more severe damage. Above all, it means preserving your home by nipping problems in the bud before they can escalate.
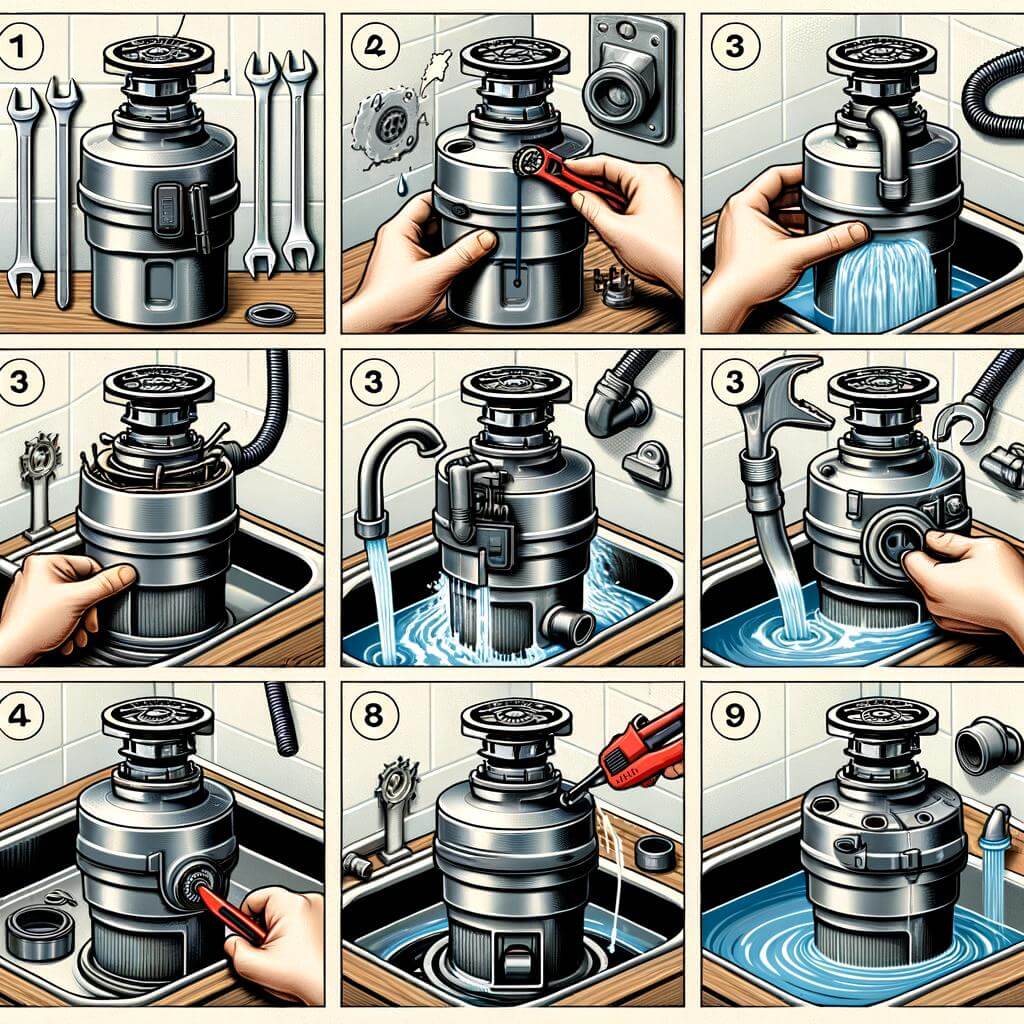
Comprehensive Guide to Fixing Water Leaks in Garbage Disposals
Water leaks in your garbage disposal can cause havoc in your kitchen. These perplexing issues are often caused by failure of the sink flange, dishwasher connection or drain pipe. Understanding what’s causing the issue is the first step in resolving it. To make your task easier, let’s break down these three common areas where leaks typically occur:
Sink Flange: This is the uppermost part of your garbage disposal which connects the appliance to the sink. Leaks here are often due to insufficient plumber’s putty, worn out gaskets, or loose mounting bolts.
Dishwasher Connection: Some disposals are connected to the dishwasher which aids in the removal of excess food. If the hose that connects the two has a leak, you’ll notice water dripping when the dishwasher runs.
Drain Pipe: This is the tube that carries waste away from the disposal. Leaks are often due to worn out gaskets or loose connections.
Now that we’ve identified the potential problems areas, let’s move on to their solutions. If the sink flange is the issue, you’ll need to loosen the bolts, apply a fresh layer of plumber’s putty and then retighten the bolts. Replace worn out gaskets as necessary. If the leak is at the dishwasher connection, tighten the clamp on the hose or replace the hose if it’s damaged. Finally, to fix leaks in the drain pipe, check the bolts that secure the disposal to the drain pipe. Tighten them up if they’re loose. If the gaskets are worn out, you’ll need to replace them. As always, ensure that all power sources are switched off before you start working on the disposal to prevent accidental injury.
Common Leak Areas
Possible Causes
Solutions
Sink Flange
Inadequate plumber’s putty, worn out gaskets, loose mounting bolts
Reapply putty, replace gasket, tighten bolts
Dishwasher Connection
Leaky or damaged hose
Tighten clamp or replace hose
Drain Pipe
Worn out gaskets, loose connections
Replace gaskets, tighten connections
Preventive Measures: Reducing the Chance of Future Leaks
In maximizing the lifespan of your garbage disposal unit, protective steps carry as much weight as knowing how to fix leaks. A well-maintained garbage disposal unit tends to be less prone to leakages. Stay ahead of potential problems with the following easy-to-implement preventive measures.
First, ensure you’re using your unit correctly. Nothing speeds up the breakdown of a disposal unit like the wrong items going inside it. Avoid putting non-food items, fibrous materials or starchy foods in your garbage disposal. These substances can clog the unit and trigger leaks. Grease and oil should also be kept away as they can solidify and cause blockages leading to discomforting leaks.
By regular cleaning of your unit, you can deter the build-up of materials that potentially cause leaking. Try running a little dish soap and cold water through the garbage disposal after you’ve finished washing dishes. The soap’s degreasing action and the water’s flushing ability can help maintain the device’s optimal functionality.
Fixing minor issues on time is crucial. Listen for any strange noises and look out for any sluggish operation as these could be signs pointing to a leakage problem. It’s a good plan to call a professional plumber when these issues arise. They have the expertise to proactively diagnose and fix problems before they escalate.
Action
Frequency
Regular cleaning with soap
Daily
Check for strange noises/sluggish operation
Weekly
Professional inspection
Annually
We hope these tips will help you maintain a leak-free garbage disposal for many years to come. But remember, if you do spot an issue, it is always safer to call an expert.
Post-Fix Care: Maintaining Your Garbage Disposal to prevent Leaks
The longevity of your garbage disposal and its ability to work effectively largely depend on regular maintenance and proper use. Garbage disposals are quite sturdy, but anything that deals with water and food waste will eventually face clogs and leaks if not properly cared for. Post-fix care for your garbage disposal can help to prevent leaks that might create damaging situations and malfunctions.
It is crucial to know what things should and should not go into your garbage disposal. Proper usage is a fundamental step to avoiding water leaks. For starters, avoid throwing hard materials like bones or shellfish shells in there. They might break the shredder and cause the device to leak. Be sure to also keep away fibrous foods like celery or corn husks as they can wrap around the blades and lead to clogs.
Do’s
Don’ts
Grind small food particles
Dispose large, hard materials
Run cold water while operating
Grind fibrous foods
Clean disposal regularly
Leave food waste inside
Lastly, it’s vital to clean your garbage disposal regularly. You can do this by grinding ice cubes, which will work as a scouring agent to clear away residue and grime in the garbage disposal. Additionally, use baking soda and vinegar for natural, non-corrosive cleaning that won’t wear down the blades or the inner wall of the disposal. The prevention of leaks in your garbage disposal begins with mindful usage and regular cleaning.Be proactive to prevent a leak before it happens.
In Summary
As we wrap up this comprehensive guide on understanding and repairing water leaks in garbage disposals, remember that consistent maintenance is key to preventing leaks from happening in the first place. We have shared with you the critical knowledge about causes of leaks, identifying the leak source, and some practical steps you can take to fix leaks yourself. But never hesitate to seek professional help if the problem persists or is beyond a simple fix. It’s important to take care of your kitchen appliances, especially something like the garbage disposal which plays a significant role in keeping your home clean and hygienic. By having an understanding of garbage disposal leaks and how to handle them, you are now more equipped to keep your disposal system in optimal condition. Good luck, and remember, every home deserves a well-functioning garbage disposal!
IWelcome to our latest post, “Expert Insight: Key Reasons Why Your Toilet Leaks from Its Base.” This educational article is packed with expert opinions and facts aimed at helping you understand the common reasons behind an issue that can cause significant inconvenience: a leaking toilet. A leaking toilet is not only troublesome but can lead to significant water waste and potentially higher bills. By educating yourself about the potential causes, you put yourself in a better position to troubleshoot and resolve the problem when it arises. So, sit back, read on, and equip yourself with the knowledge to tackle this common household problem with confidence and ease.
Understanding the Common Causes of Toilet Leaks
Toilets are a prime spot for water leaks in most homes. However, most homeowners overlook them because they are silent and inconspicuous. A common leakage point occurs around the base, where the toilet meets the floor. Two primary reasons account for this: faulty wax seals and broken flanges.
The Wax Seal
Traditionally, a wax ring seals the base of the toilet. This seal prevents water from leaking as it passes from the toilet to the sewer pipe through the floor. Over time, the wax seal can deteriorate, become misaligned, or suffer damage from frequent use. When this happens, water can slip past and you have a leak on your hands. Essentially, whenever you observe water pooling around the base after flushing, a faulty wax seal is the likely culprit. You might also perceive a lingering odor due to the leakage of sewer gases.
The Flange
The flange’s role is similarly significant. It’s a pipe fitting that both mounts the toilet to the floor and connects it to the drain pipe. A flange needs to be in prime condition for the toilet to work properly. If it cracks or breaks, water will leak at the base. Factors often leading to flange damage include age, wear and tear, and improper installation.
Common Cause
Impact
Faulty Wax Seal
Leads to water pooling around the base, causing water wastage and potential damage to flooring.
Broken Flange
Results in water leakage at the base, which can lead to structural damage over time.
In conclusion, both a faulty wax seal and a broken flange are common reasons why your toilet might be leaking from its base. Regular inspection and maintenance can prevent these issues, saving you unwanted repair costs and conserving water in the process.
Deciphering Signs that Indicate a Leaking Toilet Base
Spotting the Early Warnings The first step towards solving any problem is identifying it on time, and a leaking toilet base is no exception. If your toilet is leaking from its base, you may notice wetness around the toilet area even when it hasn’t been used recently. In more severe cases, water may be visibly leaking from the base. Additionally, if the wax seal under the toilet is damaged, you may notice a strong, unpleasant odor. This is due to sewer gases escaping into your bathroom, so it’s a sign you should definitely not ignore. While some signs are more obvious, some subtle indications might be overlooked. Let us review these signs:
Visible water pooling around the toilet base: This is the most obvious sign and usually the first to be noticed.
Unusual odors: Sewer gas leakage could result in bad smells, appreciable near the toilet base.
Distorted Flooring: If your bathroom floor near the toilet seems to warp or discolor, water leakage could be the culprit.
Constant running water noise: A continuously running toilet could be due to leakage, resulting in repeated activation of the fill valve.
Understanding the Causes Once you’ve detected a leaking toilet base, it’s imperative to understand what might be causing it. The most common reason is a damaged or worn out wax ring seal, which prevents water from leaking out of the base. Another common reason is a loose toilet base. This can occur when the bolts securing the toilet to the floor have come loose. Lastly, you may be dealing with a cracked toilet bowl or tank. Even minor cracks can lead to significant leakage. Here is a brief table illustrating these causes:
Leak Origin
Probable Cause
Wax Ring
Damage or wear and tear over time
Base Bolts
Loosening over time due to constant usage or initial improper installation
Toilet Bowl or Tank
Cracks which might develop from using harsh cleaners or mechanical impact
While remediation for these conditions is not usually complex, it is always advisable to engage professional services to ensure effective and permanent fixes. After all, saving a few dollars now might lead to costly repairs in the future.
Crucial Role of Wax Ring in Toilet Leaks
A common cause of water leaking from the base of your toilet is a faulty wax ring. This doughnut-shaped seal is positioned between the floor and the bottom of the toilet to prevent leakage from the sewers up to the top of the bowl and onto the floor. It forms a waterproof seal that forestalls water and unpleasant odors from escaping and protects the floor from damage caused by constant exposure to water.
Over time, the wax ring may lose its ability to seal properly due to strain from use and temperature fluctuations. When this occurs, water starts leaking every time you flush. The signs are visible - you’ll notice a pool of water accumulated around the base of your toilet, and potentially, a foul smell. To fix this issue, you must replace the wax ring. Here are the steps:
Remove the toilet: You need to lift the whole toilet to access the wax ring. Do this by disconnecting the water supply and removing the nuts holding the toilet in place.
Take out the old wax ring: Use a putty knife or similar tool to scrape off the old ring. Make sure you remove it entirely to allow the new ring to seal effectively.
Install the new wax ring: Position the new wax ring in the exact spot where the old one was. Carefully lower the toilet back into place, ensuring the screws match the holes in the toilet base.
Reconnect the toilet: Replace the nuts and reconnect the water supply. Give it a test flush to confirm everything is in order and the leakage has stopped.
Problem
Solution
Water leaking around toilet base
Replace wax ring
Always remember, regular maintenance is crucial to prevent such leaks. Promptly replace the wax ring at the onset of a leak to save your floor from water damage and keep your bathroom clean and hygienic.
How a Loose Toilet Tank can Cause Base Leaks
Having a loose toilet tank is not just an annoyance, it can lead to more significant issues, such as leaking from the base of the toilet. As the tank shifts, it can strain the gasket seals between the tank and the bowl, as well as the wax ring seal between the toilet base and the floor. When these seals are strained or damaged, water can begin to leak from the base of the toilet. Depending on the severity of the leak, this could cause water damage to your floors and potentially even lead to structural issues if left unattended.
So how do you know if a loose toilet tank is causing your toilet to leak from its base? There are a few signs you can look out for. Excessive movement when you are using the toilet is a clear indication that the tank is loose. Another sign is water pooling around the base of the toilet. Finally, if the water level in the tank is consistently lower than the fill line, even when the toilet hasn’t been used, this could mean that water is leaking out through a damaged seal.
Sign
What it Indicates
Excessive movement
Has a loose tank
Water pooling around the base
Possible leak from the bottom
Consistently low water level in tank
Leak through a damaged seal
If you observe any of these signs, it’s crucial to address the issue promptly to prevent further damage. You may be able to tighten a loose tank yourself, but if water is already leaking, it’s usually a sign that the seals are damaged and need to be replaced. This is a task best left to professionals to ensure that it’s done correctly and to prevent further leaks in the future.
Reparing a toilet can be a messy job but just remember in the long run, prompt action can save your floors and your wallet from further damage yielded by a loose toilet tank.
Expert Tips to Fix a Leaky Toilet Base
In diagnosing the root cause of a leaky toilet base, there are several key factors to consider. A common culprit is the wax ring that seals the base of the toilet to the floor. Over time, this ring can degrade or become unseated, causing water to ooze out every time you flush. Replacing the wax ring is most times tested and proven to fix toilet leaks at the base. Another possible cause is cracks in the toilet base itself. While this is rarer, a crack – even a small one – could allow water to escape. In such cases, the solution usually involves replacing the entire toilet.
Below are practical steps to fix a leaky toilet base using professional tips:
Shut off the water supply: Before you get to work, it’s essential to close the water valve to prevent any more water from entering the toilet.
Empty the toilet: Flush the toilet to drain off the remaining water in the bowl and tank.
Loosen the bolts: Carefully unbolt the toilet from the floor. Always be gentle to avoid breaking anything.
Replace or reseat the wax ring: Lift the toilet and check the wax ring. If it’s damaged, replace it. If it’s off-centre, simply reposition it.
Reassemble the toilet: Return the toilet to its original place, ensuring it aligns perfectly with the ring and the flange. Tighten the bolts, reconnect the water supply, and give it a test flush.
When assessing the condition of your toilet base, remember that even hairline cracks can be a problem. Look closely and run your hand over the outer surface to detect any pits or ridges. Replace the toilet if a crack is present. It may seem like a daunting task, but with the right tools and a bit of determination, you can successfully fix a leaky toilet base, saving money on expensive plumber call-outs in the process.
Preventive Measures to Avoid Toilet Base Leaks
Toilet leaks from the base often occur due to three significant issues: improper installation, worn-out wax seal, and cracked bowl. Fortunately, there are several easy preventive measures that every homeowner can take to avoid this problem.
Regular Maintenance is the key to preventing these types of leaks. Always inspect your toilet to ensure that it’s properly installed. If the toilet is wobbly, it can break the wax seal and lead to leaks. Therefore, always make sure to tighten the bolts that connect your toilet to the floor. However, be careful not to over-tighten, as it can crack the toilet base. Furthermore, if you spot any cracks in the toilet bowl during your regular inspections, it’s crucial to take immediate action. A minor crack can lead to a major leak if left untreated.
Activity
Action
Regular Inspections
Check if the toilet is properly installed and look for any cracks in the bowl.
Proper Installation
Ensure the bolts that connect the toilet to the floor are tightened.
Immediate Repair
Fix any minor cracks instantly to prevent major leaks.
Unarguably, the Wax Seal plays a crucial role in maintaining the integrity of a toilet’s base, it serves as a water barrier between the toilet base and the drain pipe. Overtime, and as a result of constant use, the wax ring can wear out and cause leaks. Therefore, regular replacement of the wax seal is advisable. Changing the wax ring is a straightforward job that any DIY enthusiast can handle; all you need is the right tools and a new wax ring.
Also, Re-Tiling a bathroom floor or installing a new toilet provides a prime opportunity to replace the wax seal and inspect the flange for damage. Remember, an intact flange is essential for the wax ring to make a good seal. If it’s cracked or broken, it’s worth having it replaced by a professional plumber. Don’t skimp on these two essential components; they are the backbone of a leak-free toilet.
Activity
Benefit
Changing Wax Seal
Avoids leakage caused due to worn-out wax rings.
Re-Tiling or New Toilet Installation
Perfect time to replace the wax seal and inspect the flange for any damage.
In-depth Analysis: The Long-term Consequences of Ignoring Toilet Leaks
Many homeowners overlook the occasional puddle of water around the toilet base, attributing it to frequent showers or humid weather. However, this seemingly inconspicuous issue harbors potentially significant long-term consequences. Structural damage, health problems caused by mold growth, and increased utility bills are among the adverse effects of ignoring even a minor toilet leak.
The water escaping from the toilet finds its way into the subfloor, weakening the structural integrity of the bathroom. Over time, these leaks can lead to substantial damage and hefty repair costs. Mold and mildew thrive in such damp conditions, leading to a musty smell and posing serious health risks.
Structural damage: Over time, the water leaks weaken your home’s wooden structures, eventually leading to decay. This can compromise the strength and stability of the structure, demanding costly repairs and replacements.
Health implications: The wet and warm conditions created by water leaks offer a perfect breeding ground for molds. Mold spores can cause allergies, skin irritations, and respiratory issues, especially in individuals with asthma or other respiratory complaints.
Increased utility bills: A seemingly insignificant leak can waste up to 6,300 gallons of water per month, dramatically increasing your utility bills.
Potential Consequences
Impact
Structural Damage
Increased repair and renovation costs
Health Implications
Allergies, skin irritations, respiratory issues
Increased Utility Bills
Hiked monthly water bills
Hence, it is advisable to address any plumbing issues at the earliest. Surprisingly, some simple DIY solutions can effectively mitigate these problems. If the problem persists, do not hesitate to reach out to a professional plumber for an expert solution.
Smart Replacement Alternatives for Your Leaking Toilet
It’s alarming to walk into your bathroom and see a puddle around the base of your toilet. No, it’s not a spilled glass of water, or a missed shower spray, but a small, persistent leak. Don’t panic just yet, this issue is more common than you might think. Although you may be unnervingly close to a mild case of bathroom flooding, there are viable solutions for you. Here’s everything you need to know about why your toilet leaks, and how to smartly replace it when necessary.
When your toilet leaks from its base, the number one culprit is usually a broken wax ring seal. This unassuming component plays an essential role in making sure your toilet is watertight. A faulty seal can result from its age, improper installment, or even the settling of your house. Also, cracks in the base of the toilet itself can cause this problem, though this is less common. Revamping these parts of your toilet will make sure that the water stays where it’s supposed to be: inside the pipes. If the issue persists, it might be time for a new toilet.
Smart Replacement Alternatives
Dual-Flush Toilets: They provide two different flush power levels. This feature not only prevents leakage but also saves on your water bill.
Pressure-Assisted Toilets: These are powered by pressurized air instead of gravity. While they are a bit louder, they effectively prevent leaks.
One-Piece Toilets: Built as a single unit, these toilets are less prone to leaks as they don’t have the junctions where two-piece toilets often fail.
Type of Toilet
Main Features
Pros
Dual-Flush Toilets
Two flush power levels.
Prevents leakage, conserves water.
Pressure-Assisted Toilets
Powered by pressurized air.
Effectively prevents leaks, powerful flush.
One-Piece Toilets
Built as a single unit.
Less prone to leaks, easy to clean.
Ultimately, the best toilet for your home will depend on your budget and cleanliness priorities. The most important thing is to ensure its proper installation and maintenance to prevent leaks in the future. Remember, an ounce of prevention is worth a gallon of mop water.
Professional Advice: When to Call a Plumber for Toilet Leaks
While discovering a trail of water leading away from your commode can be a startling experience, it’s important to remain calm and quickly determine the source of the leak. Toilet leaks at the base can be caused by several reasons; one common cause includes broken wax seals. The wax ring that seals the base of your toilet to the sewer pipe can harden and break over time, making it unable to perform its job efficiently. Another possibility is that your toilet flange may be broken. The flange is a circular pipe fitting that connects your toilet to the floor and when it breaks, you may find water seeping from under the toilet.
In certain cases, you can resolve simple leakage issues with DIY methods. However, there are situations when it’s best to call a professional to preserve the integrity of your plumbing system. For instance, when the leakage problem stems from complex issues such as a broken flange or wax ring, experts advise enlisting the help of a professional plumber. Moreover, if your toilet continually leaks even after replacing components like the flange or wax seal, it’s a clear sign you might need professional assistance. Ascertaining the root of the problem can be challenging for amateurs, and faulty DIY repairs can possibly worsen the problem.
Issue
DIY Fix or Professional Help
Worn out Wax Seal
Potential DIY, but ideally Professional Help
Broken Toilet Flange
Professional Help
Consistent Leakage Post-Repair
Professional Help
Keep in mind that the plumbing system of your home is a complex network of pipes and fittings. A leak can quickly escalate into more severe problems affecting your entire home’s plumbing. Remember, when in doubt, it’s safe to call a professional.
To Conclude
In conclusion, understanding the key reasons why your toilet leaks from its base can make issues less daunting and allow you to find a solution more promptly. As experts in the field, we can assure you that whether it’s a fault in the wax seal, a loose tank, defective bolts, or a cracked porcelain base, appropriate measures can be taken to resolve the problem. Keep in mind that regular maintenance and timely repairs are essential to preventing water damage and costlier fixes down the line. Don’t hesitate to reach out to a professional if you’re unsure about handling these issues yourself. Remember, you play an integral part in ensuring your home’s plumbing system works without causing any unwelcome surprises. With this essential knowledge, you can navigate those disconcerting toilet leaks and restore harmony to your home.
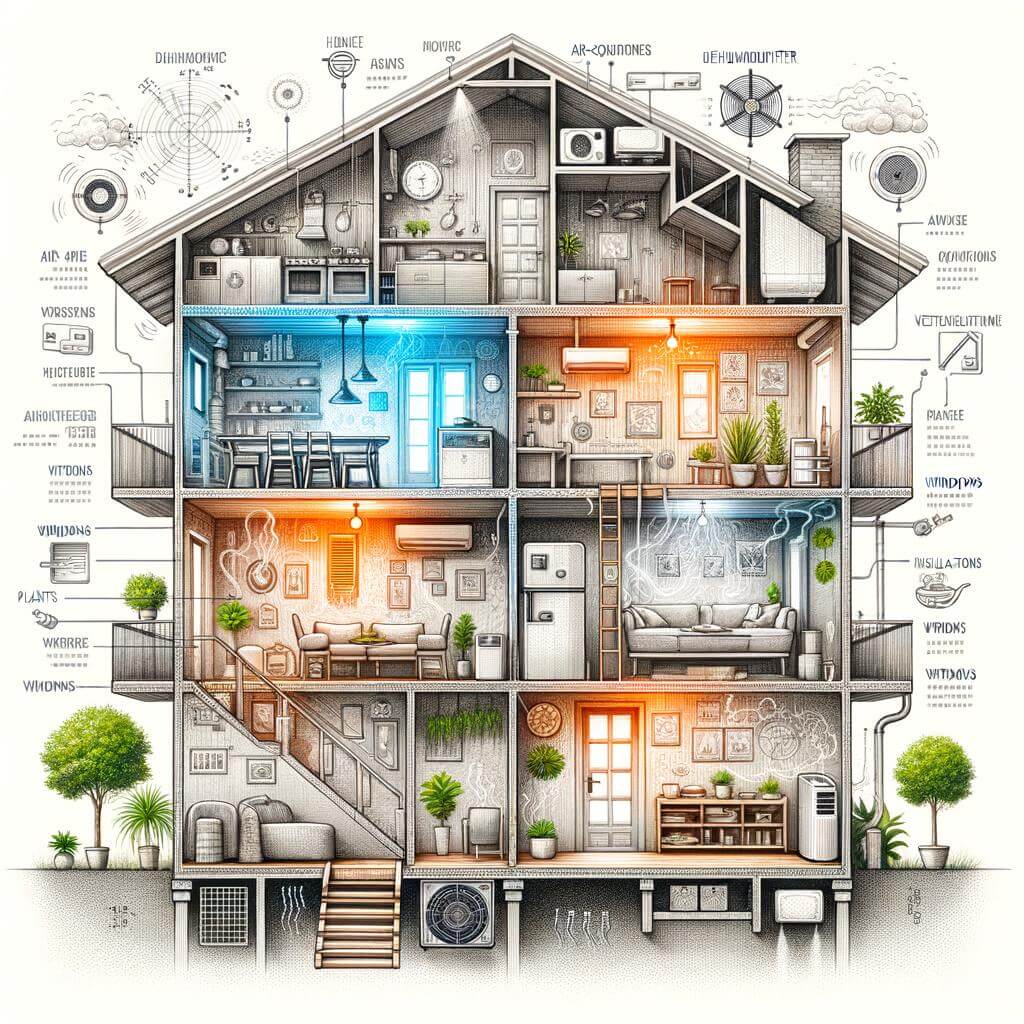
Welcome everyone! Is your air conditioning unit making your home feel more like a steamy jungle than a cool retreat? You’re not alone. In today’s post, named ”Understanding Why Your AC Makes Your Home Feel Humid”, we unravel why this issue happens and guide you through the process to fix it. Our fact-based, insightful report will empower you with expert knowledge on how your AC works and the intrinsics of indoor humidity. Whether you’re a homeowner aiming for a more comfortable living environment or you’re simply curious about the mechanics of your cooling system, this post will provide invaluable insights. So, let’s dive into the world of ACs and get to the root of the ‘humid home’ problem. Trust us, it’s not as complicated as it sounds, and the information could help you create a more comfortable home.
Understanding the Phenomenon: Why Does Your AC Make Your Home Feel Humid?
There are a few reasons why your air conditioner might be causing your home to feel more humid rather than comfortable and dry. One of the primary reasons can be a mismatch in size of the unit for your home, or the unit itself not being properly maintained. If an AC unit is too large, it might cool the home too quickly, leaving little time to effectively remove moisture from the air. Likewise, an AC unit that isn’t well maintained might not perform optimally, contributing to a damp feeling within your home.
Another possible cause might be found in excessive ventilation. Allowing too much fresh outdoor air into the house can drive up your indoor humidity levels. This is especially true in regions where the air is naturally more humid. It’s also worth noting that if your home’s humidity levels are consistently high, there may be other underlying issues. These problems could range from improper insulation, leaks in your ductwork, or problems with your home’s overall ventilation.
Potential Causes
Solution
AC Unit Too Large
Consult with a professional to determine the proper size for your home
Improperly Maintained AC Unit
Regular service and maintenance to ensure optimal performance
Excessive Outdoor Air Ventilation
Reduce the amount of fresh air circulated into your home, especially during humid weather
Consult with a professional to inspect these areas
Understanding the specific reasons behind why your AC is making your home feel humid is the first step in resolving the issue. This will help ensure that your AC not only cools your home, but also effectively manages the humidity levels, aiding in creating a comfortable and healthy living environment.
Diving Deep: Exploring the Working Mechanism of your Air Conditioning System
One of the most common complaints homeowners have about their AC systems is that instead of making their homes cooler and more comfortable, sometimes they seem to make the atmosphere uncomfortably humid. To comprehend why this happens, it’s essential to grasp how an AC unit functions and interacts with the humidity in your house.
Essentially, your AC works in two critical phases: the cooling phase and the dehumidifying phase. In the cooling phase, the air conditioner absorbs the hot air from your room and passes it over a cold refrigerant, thereby releasing cooler air back into your room. In the dehumidifying phase, the AC sucks in moisture-laiden air from the room, moves it over a series of cold pipes causing the moisture to condensate, and releases the now moisture-free air back into the room.
Issues with the cooling phase: If your AC isn’t optimized to handle the intensity of the heat in your home, it may not cool the air sufficiently and you still feel humid. You might need to consider getting a higher-capacity AC unit.
Issues with the dehumidifying phase: If your AC cools the air too quickly without removing sufficient moisture, this too can result in a humid feeling. This is common in oversized AC units that cool the room quickly, but don’t run long enough to properly dehumidify.
Issue
Solution
Inefficient cooling phase
Get a higher-capacity AC unit
Excessive dehumidifying phase
Opt for a correct-sized AC unit
Bridging the knowledge gap about your AC system can help you make more informed decisions about maintenance and purchases. Always remember that a faulty or wrongly-sized AC unit not only has an impact on the comfort of your home but also your energy bills and the longevity of the equipment itself.
The Unintended Impact: Examining the Role of AC in Increasing Home Humidity
In many cases, your air conditioning system can actually contribute to a higher level of humidity in your home. This is primarily due to an inefficient operation, where the AC system is not properly sized or maintained. Often, your AC works by drawing in warm air, cooling it, and then releasing it back into your home. However, if the AC unit is not dehumidifying the air efficiently, or if it’s cooling your home too quickly and shutting off before it has had a chance to dehumidify, this can result in a more humid indoor environment.
There are a few symptoms to watch out for that signal your AC may be contributing to an increase in home humidity. Pay attention if your windows are frequently fogging up, if certain rooms in your home feel clammy, or if there’s a musty smell. Such signs can indicate that the humidity levels are too high.
Consider the tips below for reducing humidity at home:
Proper AC Maintenance: Regularly replacing and cleaning your AC filters can greatly enhance the unit’s dehumidifying efficiency.
Proper Size: Oversized AC units cool homes too quickly, preventing the system from effectively dehumidifying the air. A properly sized unit for your space goes a long way.
Use Dehumidifiers: For space where AC is not typically used, consider a dehumidifier to help control moisture levels.
Tips
Action
Proper AC Maintenance
Regular AC filter replacement and cleaning
Proper Size
Use a properly sized unit for your space
Use Dehumidifiers
Use in spaces where AC is not typically used
Ensuring your home maintains a balanced humidity level is not just about comfort, it’s about promoting a healthier living space. Understanding the role your AC plays in controlling home humidity can help you tackle any related challenges effectively.
Resolving the Issue: Expert Solutions for Dealing with Humid Interiors
Understanding the Root Causes
Firstly, it is essential to identify what causes the humid feeling inside your house even when your AC is running. A significant percentage of homes experience this due to three primary reasons: over-sized AC units, incorrect fan settings, and poor insulation.
Over-sized AC Units: An air conditioner that is too large for your space cools down the room so quickly that it doesn’t have adequate time to remove the humidity, which leaves you with a cool but damp feeling.
<li><em><strong>Incorrect Fan Settings: </strong></em>If the fan is set to 'On' instead of 'Auto', it is running continuously, even when the AC is not cooling. This causes the humidity pulled from the air to be blown back into your home.</li>

<li><em><strong>Poor Insulation: </strong></em>If your home is poorly insulated, hot, humid outdoor air can easily seep into your home, leading to a humid interior despite the AC running.</li>
Resolving the Issue
Once you have recognized the underlying cause, choosing the right solution becomes easier. Here are some expert-provided solutions:
Problem
Solution
Over-sized AC units
Consider replacing the unit with one that is correctly sized for your space. Seek professional advice if you’re unsure of the right size.
Incorrect fan settings
Set your fan setting to ‘Auto’. This way, the fan will only run when the AC is cooling, ensuring that humidity is correctly removed.
Poor insulation
Invest in better insulation for your home. This could involve insulating your walls, roof, or windows to reduce the amount of humidity entering your house.
Adopting these changes will not only help in reducing the humidity in your home, but also improve the overall efficiency of your air conditioning system.
In seeking to create the ideal indoor climate, you may have wondered why your air conditioner might make your home feel more humid. The answer often lies in your AC’s operation combined with your home’s specific conditions. Running the air conditioner continuously on an excessively hot day can cause an environment that feels damp and humid, contradicting the predominant belief that air conditioning dehumidifies the air. Similarly, installing an oversized AC unit can cool your home quickly but leaves little time for the necessary dehumidifying process. Over time, these conditions can lead to an uncomfortable home environment.
Implementing a few essential changes can drastically improve the quality of your indoor climate. Below are a few recommended strategies:
Utilizing a dehumidifier: An excellent first step towards a less humid environment. Dehumidifiers work by removing excess moisture in the air. Using one in conjunction with your air conditioning can create a more comfortable indoor climate.
Installing a smaller or more appropriate AC unit: If your unit is too large for your space, it won’t run long enough to dehumidify the air. A properly sized unit operates in a cycle, providing more time to manage humidity levels adequately.
Ventilating your home: Basic as it may seem, opening windows and doors regularly can balance indoor and outdoor humidity levels, especially during cooler times of the day.
Consider these changes as part of a comprehensive approach to creating a comfortable indoor climate. Each home is unique – the strategy that works best for you may require a blend of these techniques.
Your Next Steps: Making Necessary Adjustments in AC Settings for Optimal Humidity Control
Switching to the Right Settings To achieve the ideal indoor humidity levels, adjustments to your AC settings might be necessary. The optimal range for indoor humidity is typically around 30-50%. Thus, if your home feels too humid, establish whether your AC is set to ‘on’ or ‘auto.’ Although it may seem counter-intuitive, setting your AC to ‘on’ means it constantly recirculates air, even when not cooling, leading to excess moisture. On the other hand, the ‘auto’ mode allows your AC unit to only blow air when it’s actually cooling, helping to control excess humidity.
Investing in Modern Solutions Upgrading your air conditioning system can also tackle humidity issues. A dehumidifier can be a great addition or alternative. It lowers humidity levels, making your living space more comfortable, and allows your AC to work more efficiently, potentially leading to lower energy costs. Alternatively, you might also consider a whole-house dehumidifier which can be integrated within your home’s heating and cooling system.
Home Equipment
Usage
Dehumidifier
Reduces excess moisture in the air, making homes more comfortable
Whole-house dehumidifier
Works with your existing HVAC system to remove moisture from the entire home
Humidistat
Measures and maintains optimal humidity levels
Furthermore, a humidistat can be an effective tool to measure and maintain optimal levels of humidity in your home. By automatically adjusting your AC’s operation according to humidity levels, a humidistat can help you achieve better air quality and prevent mold, mildew and other issues related to excess humidity.
Future Outlook
In conclusion, understanding why your air conditioning might make your home feel humid is crucial to maintaining a comfortable living environment. It’s not just about discomfort, but also about your health and the state of your home. Issues such as inadequate size, improper settings, or the need for maintenance can vastly affect your AC’s performance. Knowledge is power; so, staying informed about your air conditioning system and its proper care can save you from discomfort, high energy bills, and potential health issues. If your AC continues to give a damp feeling despite your efforts, it’s advisable to consult a professional to diagnose and rectify the issue. Your indoor comfort matters. With the insights provided in this article, we hope you will now be more adept at identifying and addressing humidity concerns in your home.
Hi my name is Angel Muro I established Comfort Time Heating & Cooling driven by my deep passion for HVAC and a sincere commitment to improving our customers' comfort. My initial fascination with plumbing, heating, and air conditioning systems has evolved into a dedicated profession, emphasizing the significance of both technical expertise and a warm, customer-centric approach. This blog aims to provide valuable insights and information. While some pages provide details about our services, my primary goal is to share real-life experiences that can assist you in various HVAC matters.
Have A Plumbing, Heating Or Air Conditioning Project & You Can Us Our Help?
Comfort Time Plumbing Heating & Cooling Servicing Southern California
At Comfort Time Plumbing Heating and Cooling, we are your trusted HVAC & Plumbing experts serving Southern California. With years of experience in the industry, we take pride in delivering top-notch heating and cooling solutions tailored to the unique climate and needs of the region. Whether you're in the coastal areas, inland valleys, or urban centers, our team of dedicated professionals is here to ensure your year-round comfort. We stay up-to-date with the latest technologies to offer energy-efficient solutions, and our commitment to customer satisfaction means you can rely on us for prompt and reliable service. When it comes to your HVAC needs in Southern California, Comfort Time is the name you can trust.