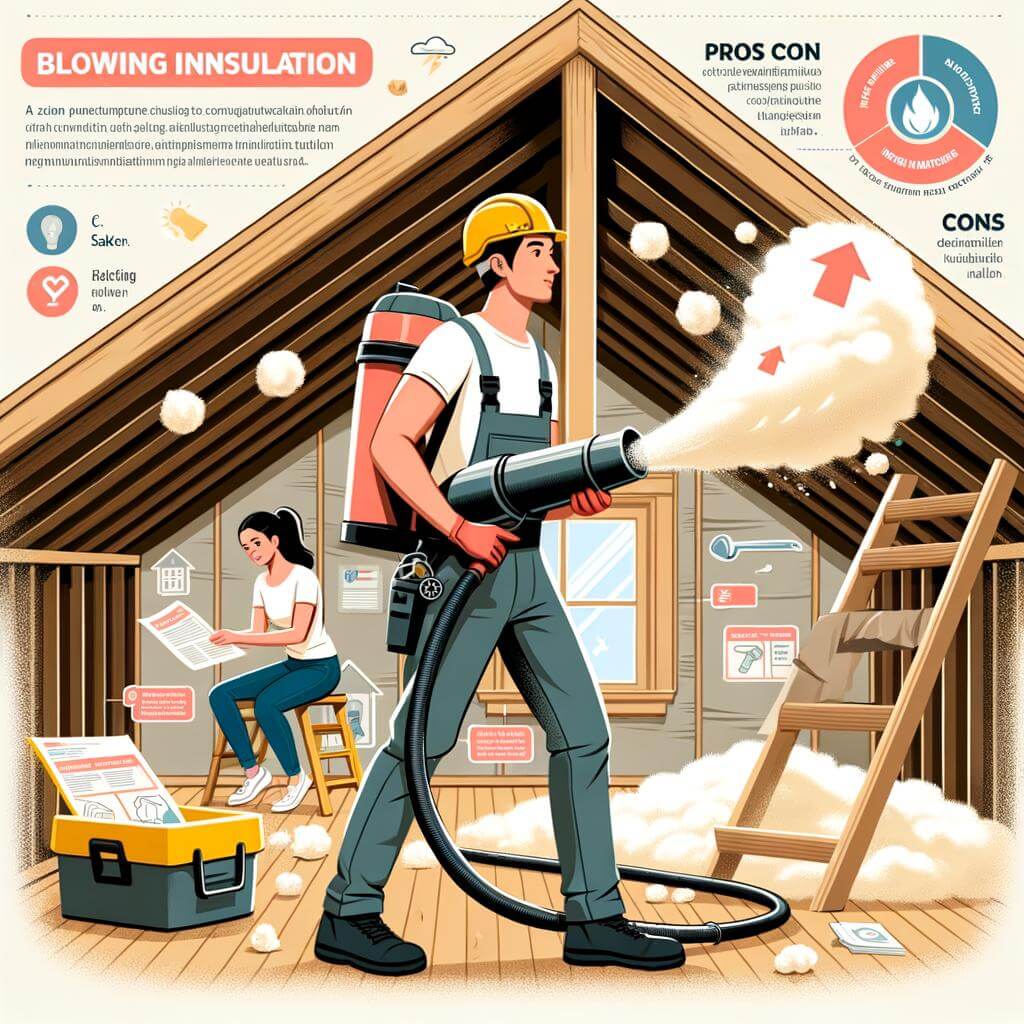
Welcome! In this post, we will delve into the concept of ‘blowing in insulation’, a method of insulating homes that offers numerous advantages. As homeowners, it’s crucial to understand how we can make our homes more energy-efficient and comfortable, while possibly saving on utility costs. This post aims to break down what ‘blowing in insulation’ is, its benefits and how it can be a game-changer for your household. Derived from expert opinion and fact-based data, this information promises invaluable insight. Whether you’re looking to improve your current home’s insulation or need guidance for a new project, this post will surely serve as a comprehensive guide. So, let’s dive in to enhance our understanding and make the best decisions for our homes!
Understanding the Basics of Blowing In Insulation
If you’re looking to make your home more energy-efficient, it’s time to consider blowing in insulation. This is a type of insulation that is literally blown into the cavities of your home’s walls, floors, and ceilings, helping to trap warm air inside during the cooler months and keep the hot air out during the summer. As a homeowner, understanding the basics of this process is crucial – not only can it help you reduce your energy costs, but it can also make your home more comfortable and eco-friendly.
So, where do you start? Let’s begin with the types of blowing in insulation.
Firstly, we have loose-fill fiberglass, which consists of small particles of spun glass that are blown into space. This is one of the most common types of insulation as it’s fire-resistant and non-absorbent.
Next, there’s cellulose, a plant-based material ideal for eco-conscious homeowners. It’s fire and insect resistant and has one of the highest R-values, which measures an insulation material’s resistance to heat flow.
Then we have mineral wool or rock wool, which is made up of fibers created from molten stone or industrial waste. These fibers trap pockets of air, slowing the flow of heat between your home’s interior and exterior.
Lastly, there’s loose-fill spray foam, an expanding material that fills nooks and crannies better than any other type. It’s particularly useful for insulating irregularly shaped areas and around obstacles.
Blowing in Insulation Type
R-value
Common Use
Loose-fill Fiberglass
Moderate
Walls, Attics
Cellulose
High
Attics, Walls, Floors
Rock Wool
Moderate to High
Walls, Floors, Roof
Loose-fill Spray Foam
High
Tight Spaces, Irregularly Shaped Areas
It’s important to note that each type of blowing in insulation has its pros and cons that can greatly affect its efficiency based on where it’s being used, your local climate, and your home’s specific needs. Considering these factors carefully will ensure that you truly optimize your home’s energy efficiency.
Choosing the Right Type of Blown In Insulation for Your Home
Understanding the different types of blow-in insulation Blown in insulation, also known as loose-fill insulation, is a cost-effective and efficient way to insulate your home. The insulation material, which can be cellulose, fiberglass, or mineral wool, is blown into the cavities of the house like attics, wall cavities, and crawl spaces. It provides an excellent thermal barrier and it is eco-friendly since most of these materials are made from recycled waste materials. However, not all types are created equal. When it comes to selecting the right type of blown-in insulation for your home, careful consideration must be made.
Cellulose insulation is one of the most popular types. It is made of recycled newsprint and is treated with fire-retardant chemicals. It has a high R-Value (the measure of insulation’s thermal resistance), making it excellent for colder climates.
On the other hand, Fiberglass insulation is made from tiny glass fibers and is less dense. Hence, it generally has a lower R-Value. However, it is highly resistant to fire and moisture.
Finally, Mineral wool insulation is made from rock or blast furnace slag. This type of insulation is denser and more resistant to fire than the other two.
Type
R-Value
Fire Resistant
Moisture Resistant
Cellulose
High
Yes
No
Fiberglass
Low/Medium
Yes
Yes
Mineral Wool
High
Yes
No
Your home’s specific needs and climate should dictate your choice of blown-in insulation. For example, if you reside in a region with a hot and humid climate, fiberglass insulation might be the best choice due to its resistance to moisture.
Remember to consult with an insulation expert to select the most suitable type for your home. It is also advisable to check with local building codes as some types of insulation may not be permitted in certain areas.
Addressing the Common Questions About Blowing In Insulation
Perhaps one of the most frequently asked questions is about the procedure of blowing in insulation. This method involves the usage of a machine to pump insulating material into your house’s walls, attic, or floors. Interestingly, this material is typically cellulose, fiberglass, or mineral wool that have been broken down into loose fill for easy installation. The insulation works wonders for cutting down on energy costs and increasing comfort in your living space. Here are some common queries:
Is blown-in insulation better than the traditional type? Blown-in insulation tends to be more efficient since it’s able to insulate hard-to-reach areas where traditional batts or rolls may not go.
Can you do it yourself? Yes, for those who are handy, installing the insulation yourself could save money. However, to ensure effective coverage, professional help is recommended.
How long does it last? Blown-in insulation can last for up to 20-30 years with proper care, making it a good long-term investment for your home.
The second set of popular inquiries focuses on the cost aspect of implementing this type of insulation. The cost of blowing in insulation varies based on several factors including your location, the size of your house and the specific type of insulation you choose. Also, the cost can change if you choose to hire professionals for installation. In the table below, we illustrate an estimate of the material and labor costs for a typical house:
Insulation Type
Material Cost
Labor Cost
Cellulose
$0.60 – $0.80/sq.ft.
$1.50 – $2.50/sq.ft.
Fiberglass
$0.40 – $0.60/sq.ft.
$1.50 – $2.50/sq.ft.
Mineral Wool
$0.60 – $1.00/sq.ft.
$1.50 – $2.50/sq.ft.
While these cost may look high initially, remember that blown-in insulation can contribute significantly to reducing your future energy bills. This investment will pay off in the long run through generous saving on heat and cooling expenses.
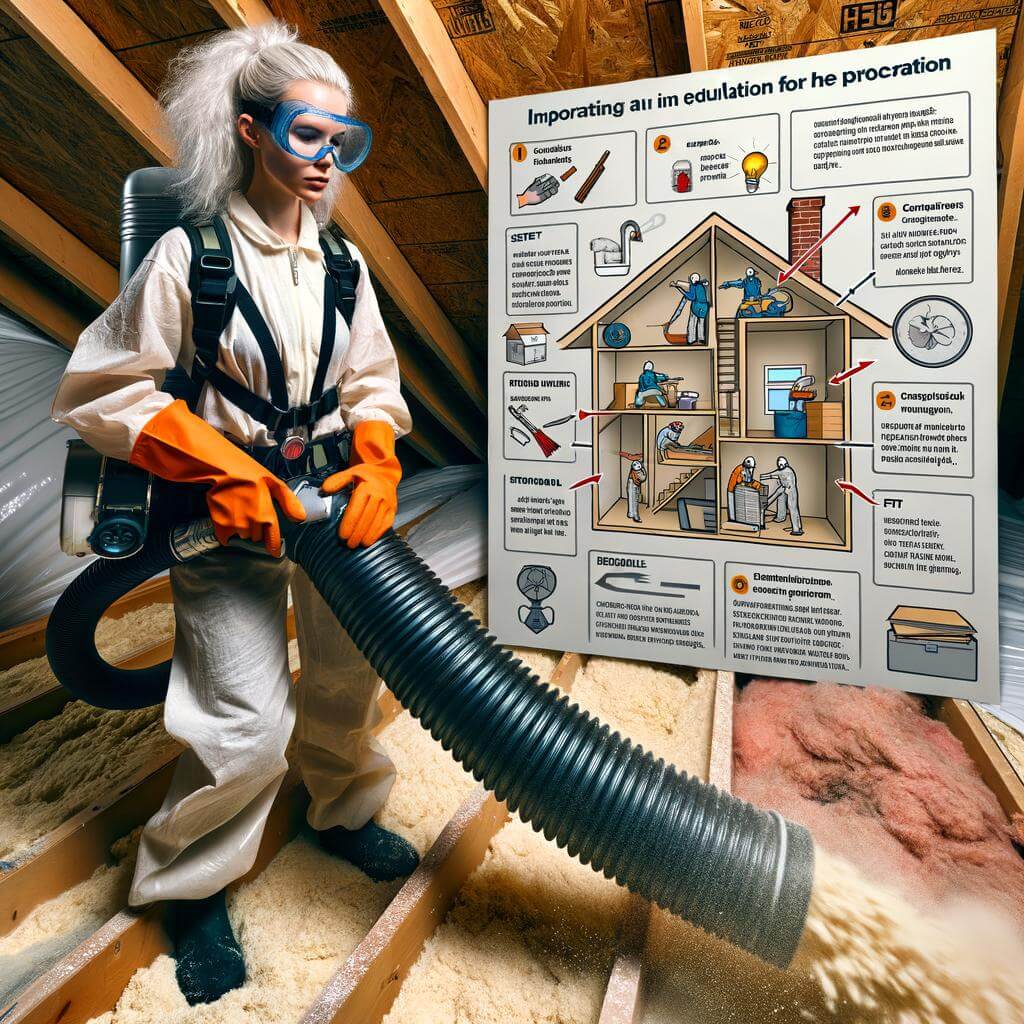
Detailed Steps in the Process of Installing Blowing In Insulation
In embarking on the task of installing blown-in insulation, it’s crucial to follow a careful procedure for a successful outcome. The first step involves a comprehensive home inspection. You’ll want to pinpoint the precise areas that require insulation. Take specific note of things such as electrical wires, recessed lights, and the types of existing insulation, if any. To avoid potential hazards or inefficiencies, you might need to add clearances or barriers.
And now – we’re onto the process of installing the insulation. The actual insulation blowing process isn’t too complex. You’ll need to have a machine available, which can often be rented from local home improvement stores. Always remember to follow safety instructions: wear a mask, goggles, gloves, and cover as much skin as possible.
Step 1: Prepare the area. Make sure everything is clean and free of debris. Place plastic sheeting over any areas you want to protect from potential insulation overspray.
Step 2: Set up the machine. This typically involves loading the insulation material into a hopper which then gets fed into a blower unit. The blower is what blows the insulation into your home.
Step 3: Insulate! Move methodically starting from the farthest point and working your way towards the exit. This way you won’t have to step on any freshly insulated areas.
Let’s look at a simple table to understand the steps and required equipments:
Remember, while it’s entirely possible to conduct this process as a DIY project, there’s no harm in seeking professional assistance to ensure a safe and effective insulation installation.
Maximizing Energy Efficiency with Blowing In Insulation
If you seek an easy, cost-effective means to bolster your home’s energy efficiency, you might want to consider blowing in insulation. Unlike its traditional counterparts—fiberglass batts or blankets—the blown-in variant is designed to fill irregular spaces and tightly-sealed areas to offer superior energy savings. This type of insulation is loose-fill, typically made of cellulose, fiberglass, or mineral wool, and is installed with special blowing devices.
There are three primary types of blown-in insulation: fiberglass, cellulose, and mineral wool. Choosing the right one depends on your particular needs and budget. To aid you in making the best choice, we have provided a concise comparison below:
Insulation Type
Advantages
Disadvantages
Fiberglass
Fire resistant, non-organic (won’t promote mold growth), lower cost.
Can irritate skin and lungs when disturbed.
Cellulose
Higher R-value (measures insulating power), made from recycled materials.
Can settle over time, possibly organic (may encourage mold growth if exposed to moisture).
Mineral Wool
Doesn’t require additional fireproofing, doesn’t promote mold or pest growth.
More expensive, may be difficult to install in tight spaces.
Note that insulating your home also requires considering where exactly the insulation will be installed. Spaces such as attics, walls, and floors can hugely benefit from this type of insulation. A professional installer can offer advice tailored to your specific home layout and efficiency goals. Relying on a professional can also ensure the work is done correctly and safely, given that improperly installed insulation can lead to decreased performance and potential health hazards.
Safety and Maintenance Tips for Homes with Blown In Insulation
Understanding how to properly maintain your blown-in insulation is crucial for the safety and longevity of your home. To begin, let’s explore what blown in insulation actually is, before diving into best maintenance practices. Essentially, blown in insulation is an environmentally-friendly method of insulation that involves blowing or pouring insulation product into walls, attics, and floors. This type of insulation typically consists of cellulose, fiberglass, or mineral wool.
Let’s consider safety tips first. Minimize disturbance to the insulated areas, limiting access to only necessary activities. If you suspect the presence of vermin or pests, seek professional assistance, as they can compromise the effectiveness of your insulation. For optimal fire safety precaution, avoid placing any heat conductors near your insulation, as some materials used in blown-in insulation could potentially ignite.
Maintenance Tips
Explanation
Regular Inspections
Inspect your blown-in insulation at least twice a year. Check for settling, wet spots, and damage from pests.
Proper Ventilation
Ensure your home has a proper ventilation system in place to prevent moisture buildup that could lead to mold and mildew.
Professional Services
While homeowners can carry out some maintenance tasks, it’s advisable to hire professionals for complex tasks like repairing or adding insulation.
In terms of maintenance, keeping the insulation dry is paramount. Wet insulation can lead to growth of mold and mildew, which is detrimental to both your home and health. Ensure your home has good ventilation and any leaks or moisture issues are promptly addressed. Also, ensure that the insulation has not settled or degraded over time, compromising its effectiveness. A professional insulation service company can conduct these checkups for you and guide you on how best to maintain it.
Lastly, every few years, consider adding more insulation material to maintain the desired insulation level, but only if the existing insulation is in good condition. This will result in better conservation of energy and improved temperature regulation inside your home. Remember, proper maintenance and safety measures can help you maximize the benefits of blown-in insulation and prolong its lifespan.
Expert Tips and Recommendations on Blowing In Insulation
Nobody loves a chilly home during winter or a sweltering house during summer. The real solution to creating a comfortable house season in, season out is by providing an effective thermal barrier, and a popular option is blowing in insulation. With this technique, small particles of insulation are propelled into the wall cavities, attic spaces, and other hard-reach areas. The great thing about this method is it offers complete coverage with little or no material waste. However, it’s essential to consider several expert tips and recommendations before you embark on this task.
Creating a successful insulation barrier is about more than just the product; you need to consider the entire process. The first step is to ensure to seal all air leaks beforehand. It’s literally like throwing money out the window if you don’t. You should fill any openings around electricity cables, windows, doors, and pipes with caulk or expanding foam. Additionally, you will need to consider the Type of Insulation particularly in regards to material used. Material type can significantly impact the R-Value, which is a measure of thermal resistance.
Type of Insulation Material
R-Value per Inch
Cellulose
3.2-3.8
Fiberglass
2.2-2.7
Rockwool
3.0-3.3
The higher the R-Value, the better the insulation power. Lastly, keep in mind that safety should always be your utmost priority. Always remember to use proper safety equipment, including a mask, goggles, and gloves, and only entrust this job to a trusted, professional insulation installer to ensure a job well done.
To Conclude
In conclusion, ‘Blowing In Insulation’ is a proven, effective way to bolster your home’s energy efficiency, save money on utility bills, and enhance comfort indoors. By understanding how it works, the types of materials used, and the areas it best suits, you’re taking a proactive step towards boosting not just your home’s value but also its environmental credentials. Remember, though it might look simple, the process demands expertise. It’s always best to work with professional installers who have extensive experience in this field. As homeowners, our properties are our most significant investments, and every improvement counts. Stay informed, stay cozy, and let’s make our homes better, one insulation project at a time!
Welcome! In this post, we are delving into the world of home insulation by focusing primarily on two types: cellulose and fiberglass. We aim to give you an in-depth comparison of these materials to provide beneficial insights that can guide you in making the best choice for your home. Insulation is crucial to ensure the energy efficiency of your home, maintain a comfortable indoor climate, and reduce outside noise. Our expert analysis, coupled with fact-based information, will equip you with valuable knowledge applicable in real-life scenarios. By understanding the advantages and disadvantages of both types, you will be empowered to make informed decisions that can impact the long-term comfort and value of your home. Stay tuned to uncover the secrets of cellulose and fiberglass insulation!
Understanding the Basics of Home Insulation
Before diving headfirst into comparing these two types of insulation, it is essential to have a basic understanding of what they are and what they do. Home insulation works as a barrier, preventing heat from escaping your home in winter and keeping it out in summer. This significantly reduces the amount of energy required for heating and cooling, saving you money. There are many types of insulation, but the focus here is on cellulose and fiberglass, two standard materials often used in residential applications.
Cellulose insulation is made of plant fibers and is often touted as an environmentally friendly option. It has a high R-value, which indicates its effectiveness in blocking heat. Often, cellulose is blown in, allowing it to fill cavities and crevices more completely than traditional rolls of insulation. Conversely, fiberglass insulation is made of tiny strands of glass woven together. It also has a good R-value and is commonly available as rolls or blown-in. While it’s not as green as cellulose, it’s typically less expensive and resistant to fire. Both types have distinct advantages, which can make choosing between them challenging.
Aspect
Cellulose
Fiberglass
Material
Plant fibers
Strands of glass
Form
Blown-In
Rolls or Blown-In
R-value
High
Good
Cost
More expensive
Less expensive
Fire resistance
Less
More
When deciding on the type of insulation that best fits your needs, consider factors such as cost, installation complexity, desired energy efficiency, and environmental impact. While both cellulose and fiberglass insulation are viable options, understanding their differences can guide you in making a more informed choice for your home insulation project.
Diving Deep into the Properties of Cellulose Insulation
When it comes to home insulation, many homeowners face the dilemma of choosing between cellulose and fiberglass. As the most commonly used materials, both options come with unique properties, benefits, and drawbacks, but today we’ll be zeroing in on cellulose insulation.
Cellulose insulation is an eco-friendly choice, made from recycled paper products, chemically treated to resist fire, mold, and pests. It can be installed using two methods: loose-fill or dense pack. Loose-fill cellulose is suitable for open attic applications and can be blown in with a special machine, while dense pack cellulose is ideal for enclosed areas like walls and floors.
Eco-Friendliness: As mentioned earlier, cellulose insulation is composed of approximately 85% recycled material, significantly reducing your carbon footprint.
Thermal Performance: At approximately R-3.7 per inch, cellulose insulation has a higher R-value than fiberglass, providing more effective thermal resistance.
Fire Resistance: Unlike its fiberglass counterpart, cellulose insulation is treated with borates, giving it excellent fire resistance properties.
Pros of Cellulose Insulation
Cons of Cellulose Insulation
Eco-friendly
Can settle over time, reducing effectiveness
High R-value
Can be more expensive to install than fiberglass
Excellent fire resistance
May retain moisture, potentially leading to mold
However, cellulose insulation also has a few drawbacks. It’s more expensive than fiberglass insulation and may settle over time, reducing its insulating capabilities. Additionally, while it’s treated to be moisture-resistant, cellulose can still hold onto some water, potentially leading to issues like mold growth.
Choosing the right insulation for your home will ultimately depend on your specific needs, budget, and the area you live in. But, comparing cellulose vs. fiberglass insulation in detail will certainly help you make an informed decision.
Exploring the Advantages and Disadvantages of Fiberglass Insulation
Fiberglass insulation has long been a homeowner’s first choice due to its various advantages. Its primary benefit is its excellent thermal performance, which effectively curtails heat transfer. This means that your home remains warm during winters and cool in summers, ultimately leading to significant energy savings. Additionally, fiberglass insulation is non-flammable and does not absorb water, enhancing its durability. Furthermore, fiberglass is environmentally friendly since it is made from recycled materials.
Thermal performance
Non-flammable nature
Water resistant
Eco-friendly
Although fiberglass has multiple benefits, there still exist a few drawbacks to consider. First, insulation works by trapping air, but fiberglass is less dense and, therefore, traps less air than cellulose. Second, fiberglass may also have health hazards. Long term exposure to fiberglass dust can lead to respiratory problems. Third, fiberglass lacks in soundproofing abilities compared to cellulose insulation.
Aspects
Fiberglass Insulation
Cellulose Insulation
Thermal Performance
High
High
Non-flammable
Yes
No
Water Resistance
Yes
Somewhat
Environmentally Friendly
Yes
Yes
Soundproofing Abilities
Poor
Excellent
Despite these disadvantages, homeowners often prefer fiberglass over cellulose due to its high-performance and cost-friendly nature. However, when deciding which insulation to install in your home, a thorough evaluation of both types’ advantages and disadvantages is essential to make an informed decision.
Comparative Analysis: Cellulose versus Fiberglass Insulation
When it comes to insulating your home, you may be caught up between choosing cellulose and fiberglass insulation. Both come with their unique benefits and downsides, and understanding these can assist you in making an informed decision.
First up, let’s consider the insulation efficiency of both. Cellulose insulation is known for having a higher R-value, implying it offers superior thermal resistance compared to fiberglass. This means your home can stay warmer in the chilly winter months and cooler during the sweltering summer heat when you choose cellulose. However, cellulose tends to settle over time, which can diminish its efficiency. The R-value of fiberglass remains constant, providing reliable insulation you can count on.
On the other hand, their environmental impact is a weighty factor too. Cellulose is often lauded for being eco-friendly, thanks to its primary constituent- recycled newspaper. On the contrary, fiberglass uses significantly more energy for its manufacture and isn’t as splendidly green.
Cellulose: Higher insulation efficiency but settles over time.
Let’s compare their fire-resistance. While cellulose insulation is treated with fire-resistant chemicals making it safer in case of a fire, fiberglass is naturally non-combustible which makes it a safer pick as well.
Insulation Type
Insulation Efficiency
Environmental Impact
Fire Resistance
Cellulose
High (Consistency diminishes)
Eco-friendly
Treated with fire-resistant chemicals
Fiberglass
Constant
Uses more energy for manufacture
Non-combustible
In the end, the choice between cellulose and fiberglass insulation hinges on your specific needs and priorities when it comes to insulation efficiency, environmental impact, and fire-resistance.
Safety Concerns and Environmental Impact of Both Insulation Types
Focusing on safety concerns, the initial thought about cellulose insulation is likely to be more reassured since it is made from recycled newspaper. However, it’s essential to note that it is treated with fire retardant chemicals, making the material significantly safer. Some concerns include a higher moisture absorption than fiberglass which can in turn lead to deteriorated effectiveness and mold growth. On the other hand, fiberglass insulation is non-combustible by nature, but installing or disturbing it can lead to microscopic particles being released into the air which can be harmful if inhaled.
The environmental impact of both insulation types is split into categories: production, installation, and longevity. Starting with cellulose insulation, its production process is less energy-intensive and uses up to 85% recycled content, making it more eco-friendly. However, it often requires more material by volume to achieve the same level of insulation as fiberglass. Fiberglass insulation uses considerably more energy in its production, consequently releasing more greenhouse gases. Its higher R-value per inch means that less material is needed for effective insulation, potentially offsetting the initial energy costs over time. Both materials may entail potential health risks during installation, it’s therefore crucial to follow safety guidelines.
Insulation Type
Environmental Impact
Cellulose
Less energy-intensive production, Recycled content
Fiberglass
High energy production, Less material required
Concluding Remarks: Choosing the Best Insulation Material for Your Home Needs
In the end, the insulation material you choose depends largely on your home’s requirements, climate, desired energy efficiency, and budget. Comparing cellulose and fiberglass insulation, we find that both have distinct strengths and weaknesses. Fiberglass insulation is long-lasting, non-flammable, and more affordable. However, it is less effective at insulating compared to cellulose and can be difficult to install in hard-to-reach areas. On the other hand, cellulose insulation provides superior thermal resistance and has better sound-dampening qualities, but it is comparatively costly and requires professional installation.
Fiberglass: Long-lasting, non-flammable, affordable, less effective insulation, and difficult to install.
Cellulose: Superior thermal resistance, better sound-dampening, costly, and needs professional installation.
Insulation Material
Advantages
Disadvantages
Fiberglass
Long-lasting, non-flammable, affordable
Less effective, hard to install
Cellulose
Superior thermal resistance, sound-dampening
Costly, requires professional installation
In conclusion, your choice between cellulose and fiberglass insulation should be influenced by your unique requirements and constraints. If you rate thermal efficiency and sound-proofing higher, you might lean towards cellulose. However, if your budget is tight and you require an easy to handle product, fiberglass might be the solution. Always seek professional advice before making your final decision, as nuances in your project may lead to one material being more suitable than the other.
Concluding Remarks
In conclusion, both cellulose and fiberglass insulation bring valuable aspects to the table when it comes to protecting your home. Your choice ultimately depends on your specific needs and circumstances like climate, noise control, durability, environmental concerns, and budget, to name a few. The goal is to obtain the maximum R-Value possible, with a product that complements your home’s specific requirements and your individual preferences. It’s important to remember, proper installation is crucial for both methods, so hiring a professional can save you in energy costs in the long run. Now that you’re equipped with this information, making an informed decision should be relatively simple. We wish you the best in your home insulation endeavors and hope this comparison of cellulose and fiberglass insulation has provided you with helpful insights.
Welcome to our informative post on “Understanding Why Your Air Vents Sweat During AC Use.” This post is designed to help homeowners and property managers understand an often overlooked issue – condensation on air vents during the operation of air conditioning systems. Not only will this post provide a clear understanding of why this happens, but it will also suggest effective solutions to counter this issue. Packed with expert opinion, backed by facts, this educational material aims to assist you in maintaining a more efficient, comfortable, and healthier living or working environment. Dive in to equip yourself with useful knowledge that is easy to apply!
Understanding the Phenomenon: Why do Air Vents Sweat During AC Use
When you notice water droplets or a damp feel around your air vents during the use of your air conditioning (AC) system, you are experiencing what is commonly referred to as ‘sweaty vents.’ This phenomenon is largely due to two factors: the difference in temperature between the cooled air and the warmer parts of your home and the level of humidity in the air. Think of it this way: when the chilled air from your AC system collides with the warm, moist air around vents, condensation is expected to form. This process mirrors the situation when your cold glasses start to ‘sweat’ on a hot summer day.
Factors Causing Sweaty Vents
Impact on your AC system
Large difference in temperature
More condensation on vents
High humidity levels
Increased likelihood of ‘sweaty vents’
While the condensation on your vents may seem like a small issue initially, it may lead to more concerning problems down the line. For instance, constant condensation can result in water damaging your walls or ceilings. In worst-case scenarios, it may even foster mold growth, jeopardizing your home’s air quality and your family’s health. As condensation occurs, it’s important to address it early on. In some cases, a dehumidifier might be needed to lower your home’s overall humidity. Meanwhile, hiring professionals for regular AC maintenance is also an effective way to limit the condensation around your vents.
Deep Dive: The Science Behind Sweating Air Vents
It’s an easy thing to brush off - the unusual sight of your air conditioning vents producing what appears to be sweat. Yet, understanding the science behind sweating air vents is pivotal for maintaining your home’s comfort levels and preventing potential issues. When your AC unit is at work, extracting warmth from the interior air, it leads to the phenomenon we call sweating air vents.
First off, let’s delve into the actual reason. During hot summer months, your AC unit cools the interior air, which is then funneled through the air vents. When this cool air comes into contact with the warm air in your home, condensation occurs, leading to visible water droplets, or ‘sweat,’ on your air vents. It’s very much like how a cold beverage ‘sweats’ in hot weather.
Heat Extraction Process:
AC unit removes heat from the room
Vent Temperature:
Cool air passes through the vents
Condensation:
Sweat results when cool vent surface meets warm interior air
Leaving this issue untouched, while it does not immediately pose a threat, could be the catalyst for more prominent problems down the line. Excess moisture accumulation can lead to mold growth, which adversely impacts the air quality in your home. Additionally, it can cause damage to your home structure by promoting rot in wood and corrosion in metal structures.
Impacts indoor air quality due to potential mold growth.
Can gradually degrade building materials and structures.
Understanding the science behind sweating air vents can aid in mitigating these problems. Firstly, it’s wise to ensure that your home’s humidity levels are adequately controlled. Investing in a dehumidifier could prove beneficial if you live in a high-humidity environment. Regular maintenance of your AC unit is another essential preventative measure. Regular AC servicing and education around humidity control can go a long way in preventing unnecessary deterioration in your air vents and maintaining optimal comfort levels in your home.
Key Factors Contributing to Air Vents Sweating
A variety of factors can lead to the apparent “sweating” of air vents during the use of air conditioning units in your home. Understanding these elements is crucial to maintaining your cooling system and preventing undesired water damage.
One of the leading contributors to vent condensation is high levels of humidity within your home. If the air contains a large amount of moisture, it may lead to a cold surface – such as an air vent – to sweat. Also, inappropriate ventilation can contribute to this issue. Proper airflow helps to distribute temperature evenly, reducing the likelihood of condensation. However, if the system is obstructed or poorly designed, the potential for sweating increases significantly.
Table:
Factor
Description
High Humidity
A high moisture content in the air may condense on cooler surfaces such as air vents, causing ‘sweating’.
Inappropriate Ventilation
Deficient or obstructed airflow may cause uneven temperature distribution, leading to condensation.
Temperature imbalance is another key factor. Should the temperature within your ductwork be considerably cooler than your home environment, condensation can occur. Furthermore, if your AC unit doesn’t run enough, it can’t dehumidify your home properly, increasing the moisture level and setting the stage for sweating vents.
High Humidity
Inappropriate Ventilation
Temperature Imbalance
Inadequate use of AC Units
Lastly, the quality and type of your duct insulation are also important. A poorly insulated or wrong type of insulation will not protect the ducts from the warm air. When cool AC air passes through uninsulated ducts, sweating becomes a big problem.
Exploring Damages: The Impact of Sweating Air Vents on Your Home
Everyone loves a cool breeze indoors when the summer sun is sweltering outside. But, have you ever noticed droplets of water or ‘sweat’ on your air vents when the air conditioning gets running? While it might not seem like a big deal, sweating air vents can actually inflict serious damage to your home.
Sweating, or condensation, occurs when the cool air from your AC comes into contact with the humid, warm air in the room. This leads to moisture build-up on the vent surface – essentially causing your air vents to ‘sweat’. Over time, constant moisture contact can pose severe problems such as damaging wall coverings, ceiling tiles, and insulation. Similarly, it brings about excellent conditions for mold growth, which can lead to significant health issues for the property’s inhabitants.
The Impact of Sweating Air Vents
Structural Damage: Persistent dampness from condensation can deteriorate the material of your ceiling and walls. Over time, this could demand expensive repairs.
Mold Development: Mold thrives in moist, dark spaces like those you would find behind a sweating vent. Mold infestations not only affect property value but also pose a public health risk.
Increased Energy Consumption: When your vents sweat, it’s indicative of humidity levels in your home. Your AC unit works harder to cool down a humid house, leading to excessive energy consumption.
Issue
Effect
Structural Damage
Leads to expensive repairs
Mold Development
Decreases property value and poses health risks
Increased Energy Consumption
High utility bills
In sum, sweating air vents not only damage your home but your pocketbook too. By understanding why your vents are sweating, you can take preventive measures. In our next sections, we’ll cover the practical steps to reduce air vent sweat, ensuring you maintain a healthy and energy-efficient home.
Expert Recommendations: How to Prevent Air Vents from Sweating
It’s perplexing, isn’t it, to find that your air vents are perspiring like a chilled glass of lemonade on a hot summer day? Well, calm your worries because this strange occurrence is a common issue that has practical solutions. The condition is primarily triggered by the interaction between a cold surface (your air ducts) and the warm, humid air circulating in your home. When there’s a difference in temperature between two surfaces, condensation can occur.
Firstly, it’s worth investing in dehumidifiers. By maintaining a balance in the atmospheric humidity within your home, these helpful devices can counteract the tendency for condensation to form on your vents. Secondly, consider insulating your air ducts. This creates a barrier that keeps the air outside the ducts warmer, thus reducing the chance of condensation.
Below is a simple guide on how to insulate your air vents:
Measure the length and diameter of your vents.
Purchase a suitable insulating material like foil or fiberglass duct wrap.
Wrap the insulation around your vents, ensuring all surfaces are covered.
Secure the insulation with foil tape.
Finally, remember that the health and functionality of your HVAC system as a whole is key to preventing vent sweat.
Quick Maintenance Tips
Regular cleaning
Remove dust and obstructions from your vents periodically.
AC Servicing
Get your AC system serviced by a professional at least once a year.
Adequate Ventilation
Ensure that your home is encompassing enough natural or mechanical ventilation.
Ensuring these steps will help you significantly improve the condition of your air vents and prevent them from sweating, regardless of the weather outside.
Effective Solutions: Tips and Tricks to Deal with Sweaty Air Vents
Eliminate Excess Humidity Excess humidity in your home can lead to the condensation that manifests as sweat on your air vents. The moisture in the air precipitates on the colder surfaces of the vents, creating an environment ripe for mold. A solution could be to regulate the humidity in your home. Consider checking and adjusting your thermostat settings to ensure it’s operating as it should. Ensure the humidity level is set between 40-50% to minimize the risks associated with high moisture. Investing in a dehumidifier could also help manage high humidity levels.
Improve Ventilation Another effective solution is to enhance the airflow in your home. Poor ventilation can trap moisture, leading to sweaty air vents. Improving ventilation could involve investing in quality exhaust fans for your kitchen and bathrooms, or leaving the windows open to allow fresh air to circulate. Remember to maintain your air ducts by getting them regularly cleaned, as dust and debris can block the flow of air.
Invest in exhaust fans for improved ventilation
Regularly clean your air ducts to ensure uninterrupted air flow
Leave windows open when possible to infuse fresh air
Check and adjust thermostat settings
Consider a dehumidifier to reduce moisture level
Solution
Action
Exhaust Fans
Bathroom & Kitchen
Air Duct Cleaning
Regular maintenance
Window Ventilation
During suitable weather
Thermostat Settings
Adjust to 40-50% humidity
Dehumidifier
For high humidity areas
In summary, dealing with sweaty air vents involves understanding the cause and implementing necessary solutions. Regulating humidity and improving ventilation are effective methods to reduce the condensation on your vents and extend their lifespan. Remember to keep regular maintenance in mind for a healthier, cleaner, and fresher home.
In Conclusion
In conclusion, understanding the reasons behind your air vents sweating during AC use is the first significant step to resolving the issue and ensuring your system’s longevity. It’s often a result of high humidity levels and temperature differences between the air inside the ducts and in your home. Periodic maintenance, dehumidification, and proper insulation are all proven strategies for combating this concern. Remember, as with many things, prevention is better than cure. Address the root causes quickly to avoid further damage and costly repairs. Though it might feel overwhelming at first, experts are always available to guide you. Utilize the suggestions provided in this article, and don’t hesitate to seek a professional’s opinion to create a healthier, more efficient home environment. You now have the foundation to prevent your air vents from sweating, enhancing your comfort and ensuring your AC performs to its optimum potential throughout the year.
Hi my name is Angel Muro I established Comfort Time Heating & Cooling driven by my deep passion for HVAC and a sincere commitment to improving our customers' comfort. My initial fascination with plumbing, heating, and air conditioning systems has evolved into a dedicated profession, emphasizing the significance of both technical expertise and a warm, customer-centric approach. This blog aims to provide valuable insights and information. While some pages provide details about our services, my primary goal is to share real-life experiences that can assist you in various HVAC matters.
Have A Plumbing, Heating Or Air Conditioning Project & You Can Us Our Help?
Comfort Time Plumbing Heating & Cooling Servicing Southern California
At Comfort Time Plumbing Heating and Cooling, we are your trusted HVAC & Plumbing experts serving Southern California. With years of experience in the industry, we take pride in delivering top-notch heating and cooling solutions tailored to the unique climate and needs of the region. Whether you're in the coastal areas, inland valleys, or urban centers, our team of dedicated professionals is here to ensure your year-round comfort. We stay up-to-date with the latest technologies to offer energy-efficient solutions, and our commitment to customer satisfaction means you can rely on us for prompt and reliable service. When it comes to your HVAC needs in Southern California, Comfort Time is the name you can trust.